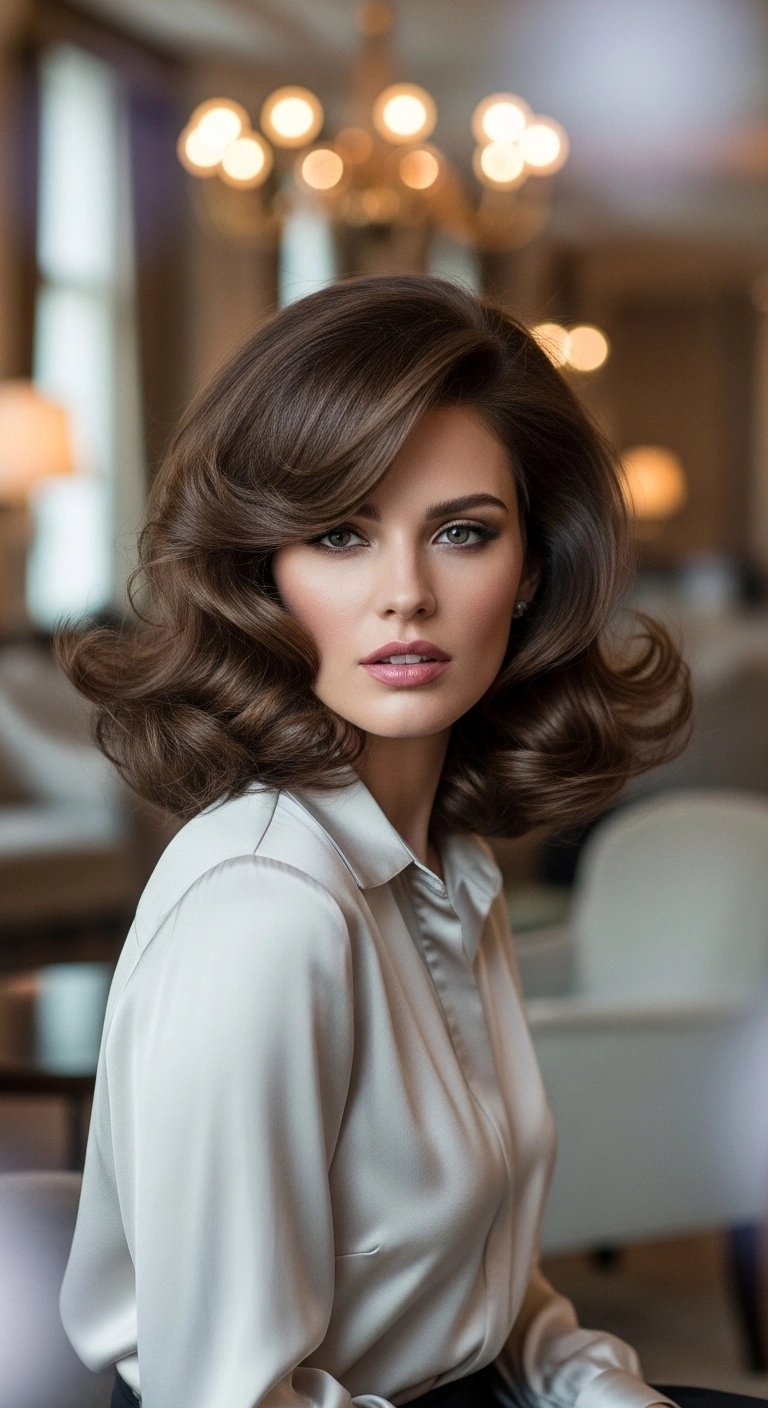
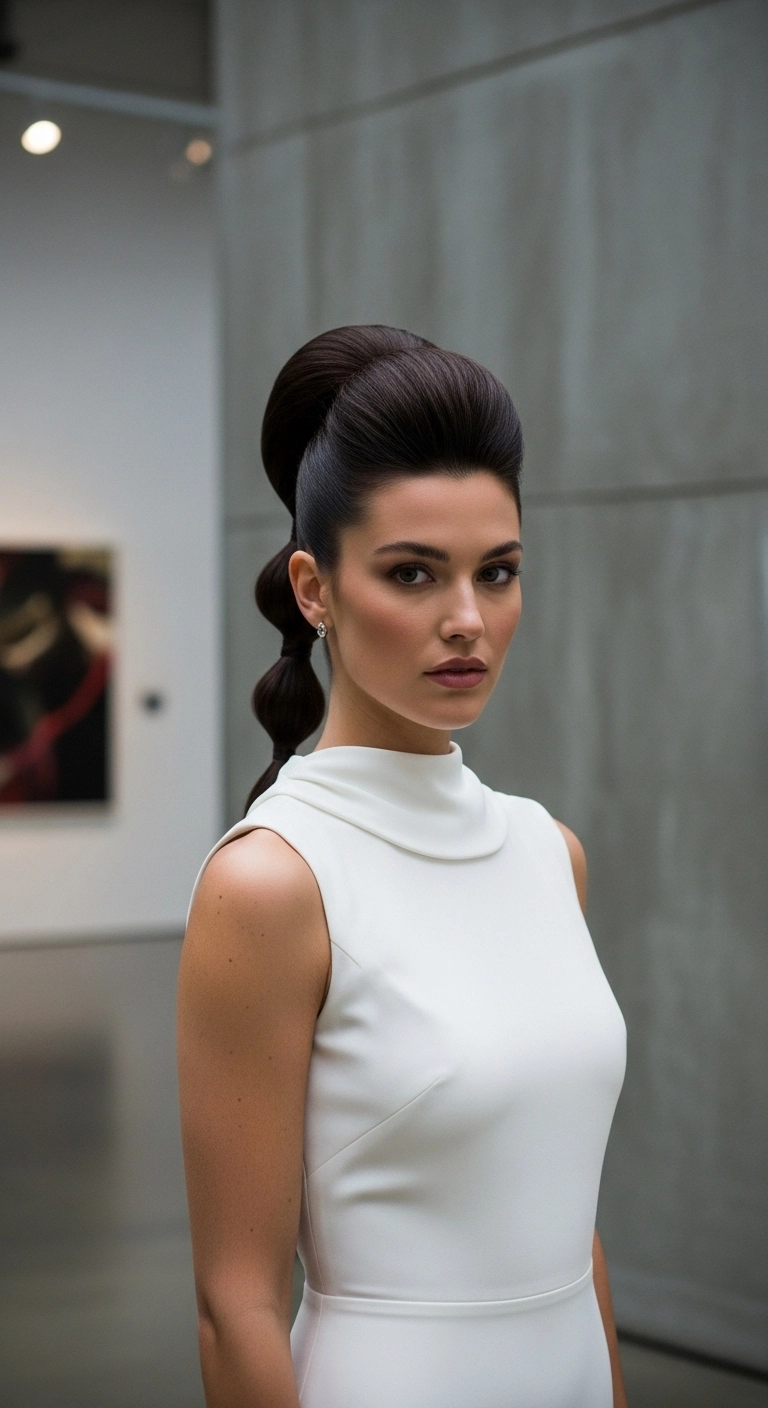
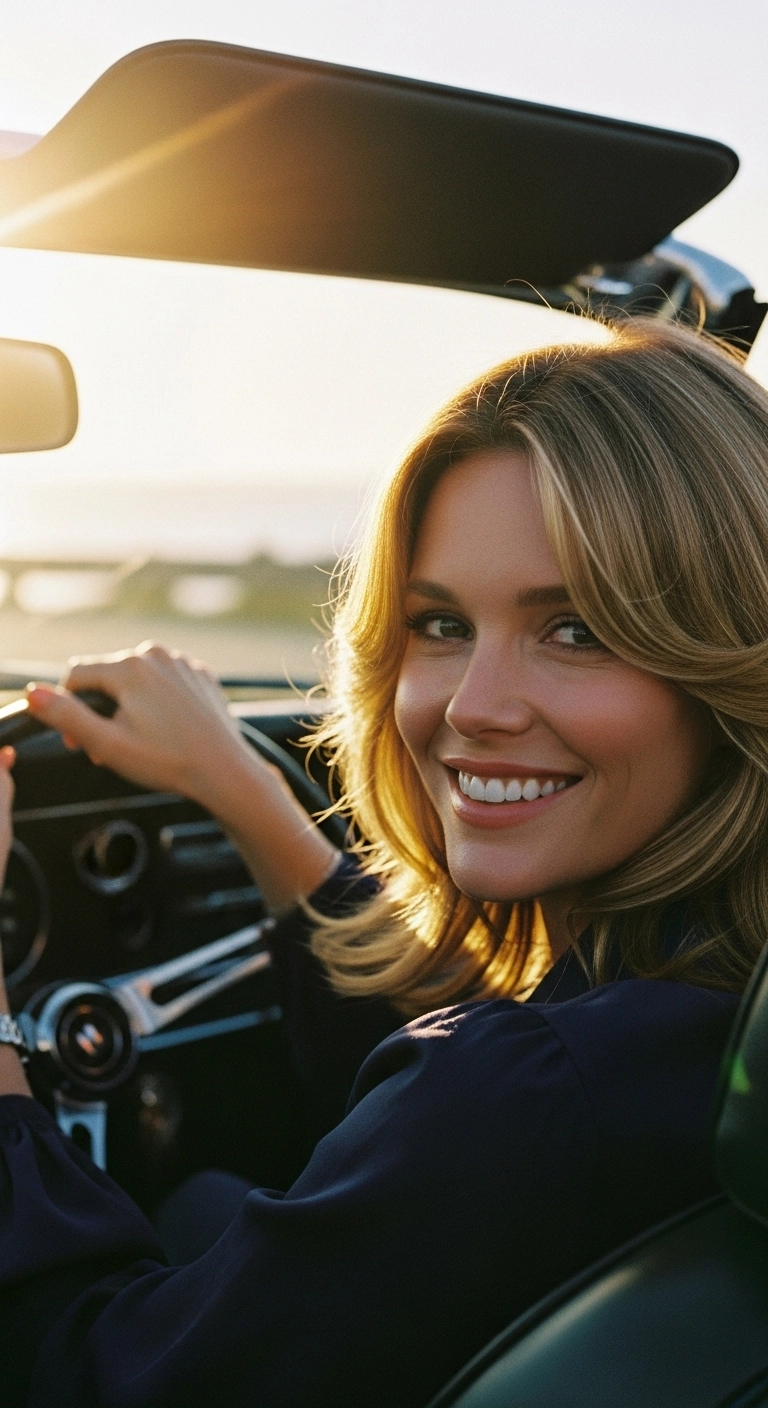
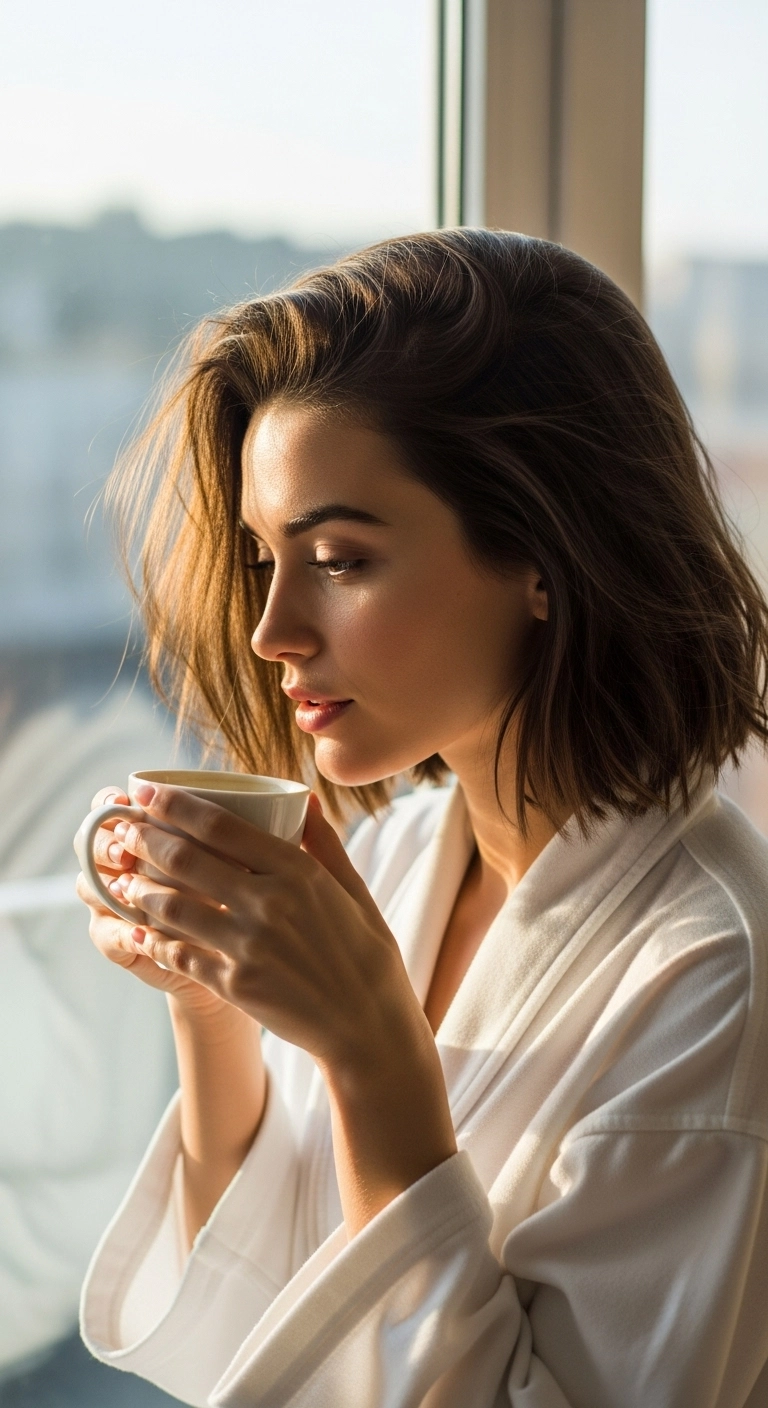
Can we talk about the ultimate Old Hollywood elegance? This vintage-inspired voluminous lob blowout gives me all the retro starlet vibes, and honestly, who wouldn’t feel incredibly chic wearing this?! The deep side part with that sweeping sculpted fringe combined with flipped-up curled ends adds so much glamorous movement and bounce. It’s perfect for a black-tie gala or an unforgettable date night where you want to make a lasting impression!
How to do this
1. Start on freshly washed, damp hair and prep with a lightweight volumizing mousse from roots to ends using the volumizing root lift mousse listed below.
2. Mist hair evenly with a thermal protectant spray before sectioning.
3. Using a medium-to-large ceramic round brush and a blow dryer with a concentrator nozzle, blow out the hair in sections, focusing on lifting the roots straight up to maximize body.
4. As you reach the ends of each section, curl them upward and outward using the round brush to create dramatic, flippy curved ends.
5. While sections are still warm from the dryer, roll them into jumbo self-grip velcro rollers using the jumbo velcro hair rollers listed below, securing them at the crown and sides to set the bounce.
6. Allow the rollers to cool completely for at least 20 minutes before carefully unwinding them.
7. Gently sculpt the sweeping side fringe and voluminous ends into place using a natural boar bristle styling brush.
8. Finish with a spritz of shine spray and lock the dramatic retro shape in place using the strong hold flexible hairspray listed below.
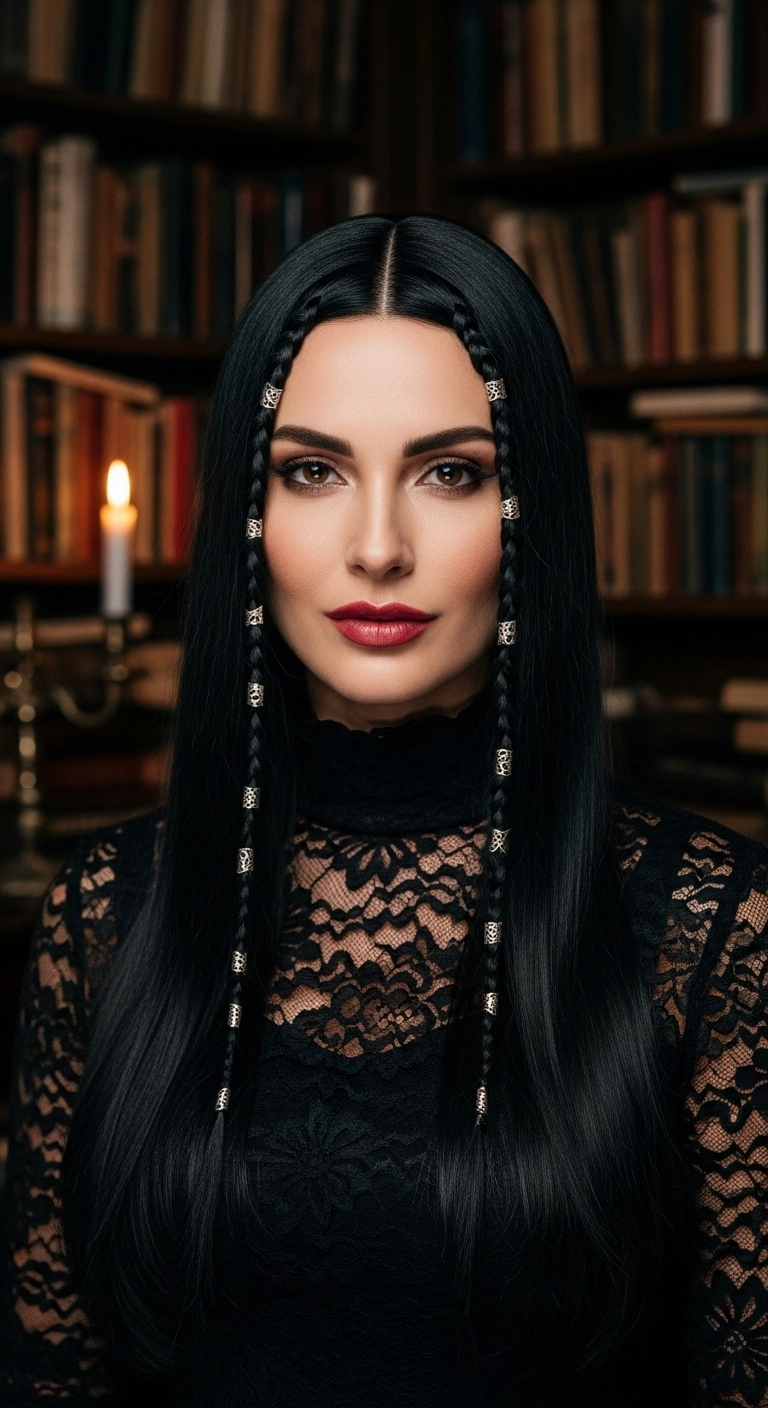
I’m totally obsessed with this look. It takes a sleek, glass-hair blowout and gives it an instantly cool gothic edge just by adding two simple face-framing baby braids decorated with intricate silver cuffs. It has this mysterious dark academia vibe that makes a statement without being over the top, making it amazing for a night out, a themed event, or just bringing some daily drama to your everyday look.
How to do this
1. Start by prepping clean, damp hair with a smoothing heat protectant spray to ensure a sleek, frizz-free finish.
2. Blow dry the hair straight down with a paddle brush using the ionic hair dryer listed below to achieve high shine and a smooth canvas.
3. Divide the hair into clean sections and pass a flat iron over each piece from roots to ends using the ceramic flat iron listed below.
4. Create a sharp, precise middle part down the center using the fine-tooth rat tail comb listed below.
5. Section out two small, symmetrical half-inch strands of hair directly along your front hairline on either side of the part.
6. Tightly braid each of these two frontal sections straight down all the way to the tips into neat micro-plaits and secure the ends with clear mini elastics.
7. Gently slide patterned silver hair cuffs onto each braid at evenly spaced intervals using the filigree hair cuffs listed below.
8. Finish the entire style with a light mist of glossing mist to lock down flyaways and impart an ultra-reflective gothic sheen.
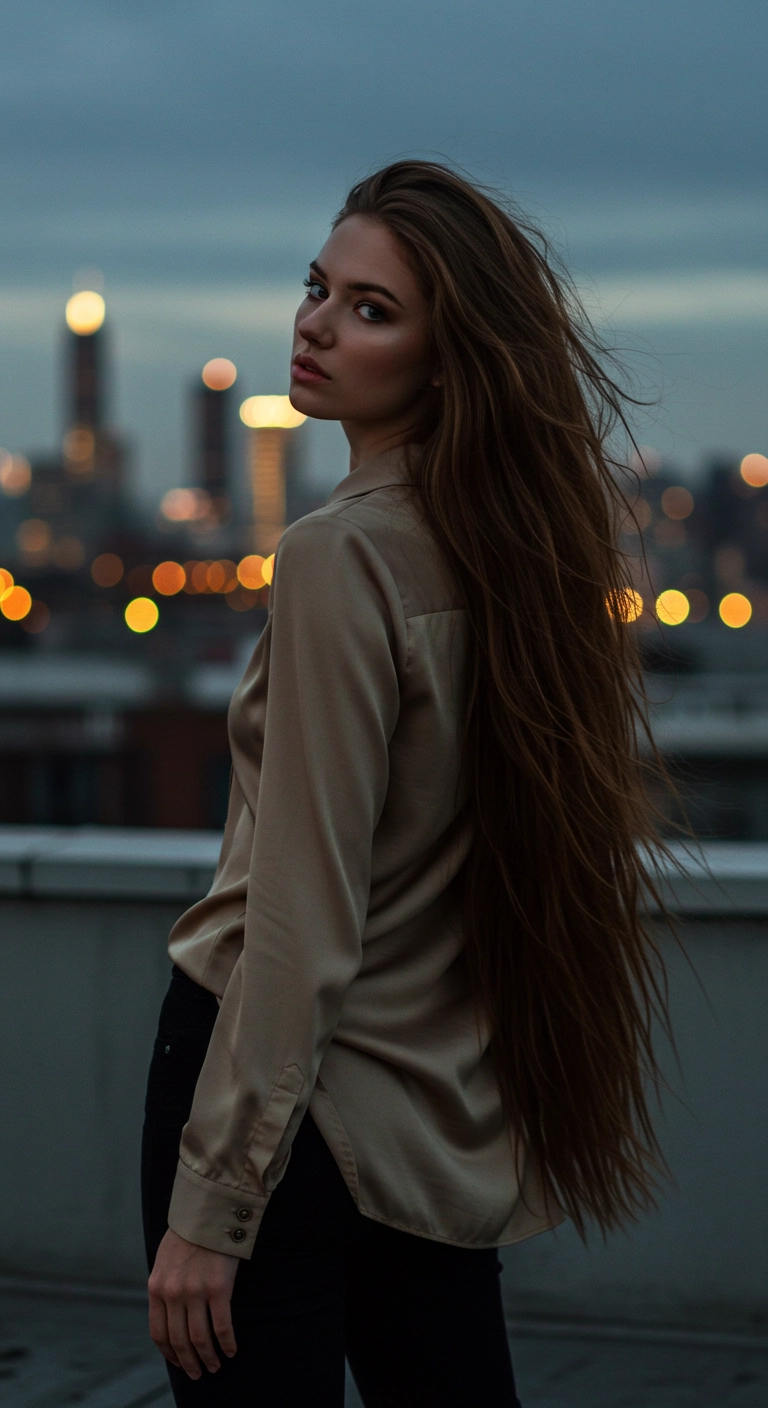
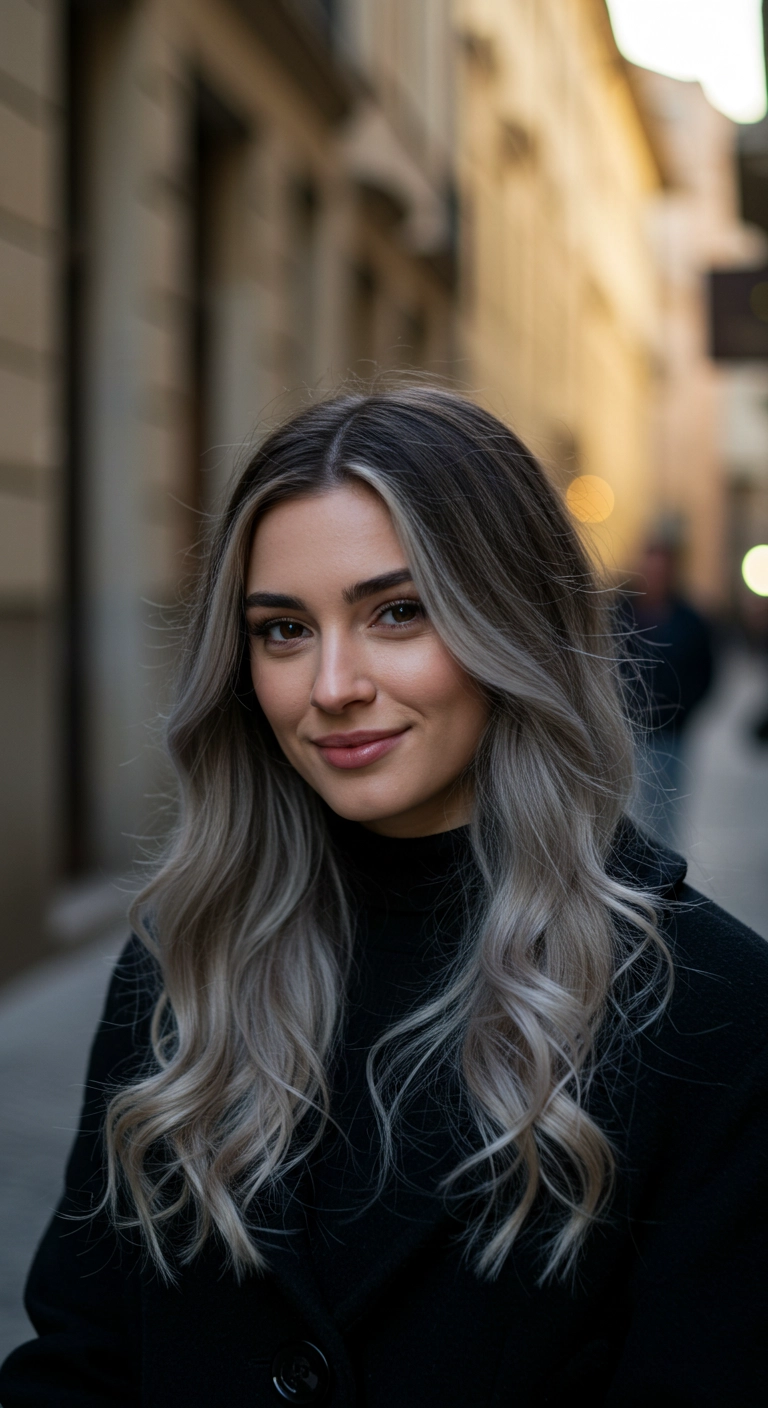
I’m seriously obsessed with this look. It’s that dreamy, Rapunzel-level extra long chestnut hair that flows effortlessly down past the waist. It has just enough soft texture and movement to feel super modern, chic, and completely lived-in rather than stiff. Whether you're dressing it up with a satin blouse for an evening date or letting it blow in the wind for everyday street style, this length makes an absolute statement.
How to do this
1. Prep freshly washed, damp hair with a lightweight leave-in conditioner and a thermal spray using the heat protectant spray with argan oil listed below to safeguard those ultra-long lengths from heat damage.
2. Gently detangle starting from the ends and moving upward towards the roots using the wide-tooth detangling comb listed below to prevent breakage.
3. Blow-dry using a high-velocity blow dryer with a concentrator nozzle and a large ceramic round brush, smoothing the cuticle downwards to create natural sleekness without losing volume.
4. For ultra-long lengths that may need extra fullness or length, seamlessly blend in clip-in or tape-in pieces using the seamless clip-in remy human hair extensions listed below.
5. Use a large 1.5-inch curling iron or flat iron to add just the slightest, barely-there bend through mid-lengths for a wind-blown, natural aesthetic.
6. Finish by warming a few drops of the lightweight hair smoothing serum listed below between your palms and running it down through the ends to tame flyaways and enhance glossy shine.
7. Give the hair a light mist of the flexible hold hairspray listed below for touchable, all-night hold that still moves beautifully in the breeze.
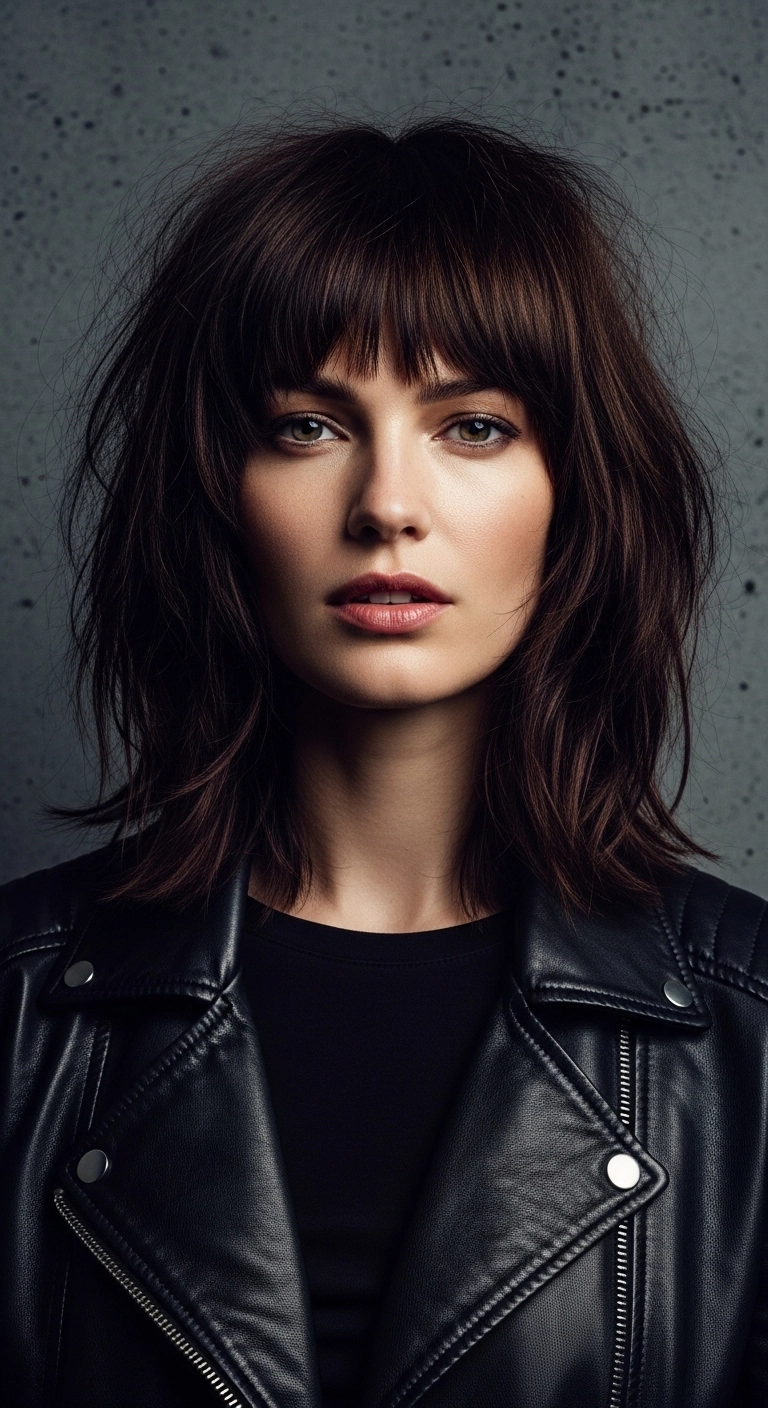
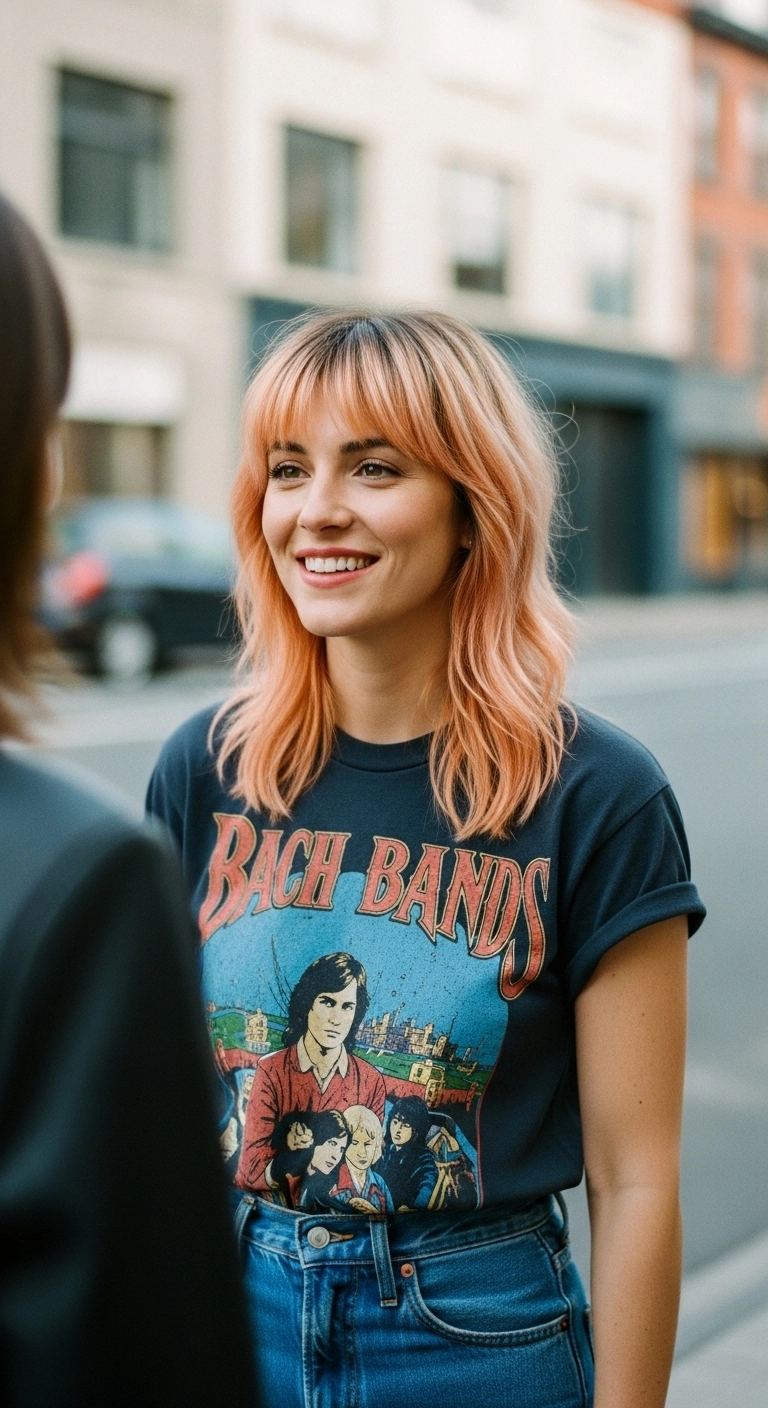
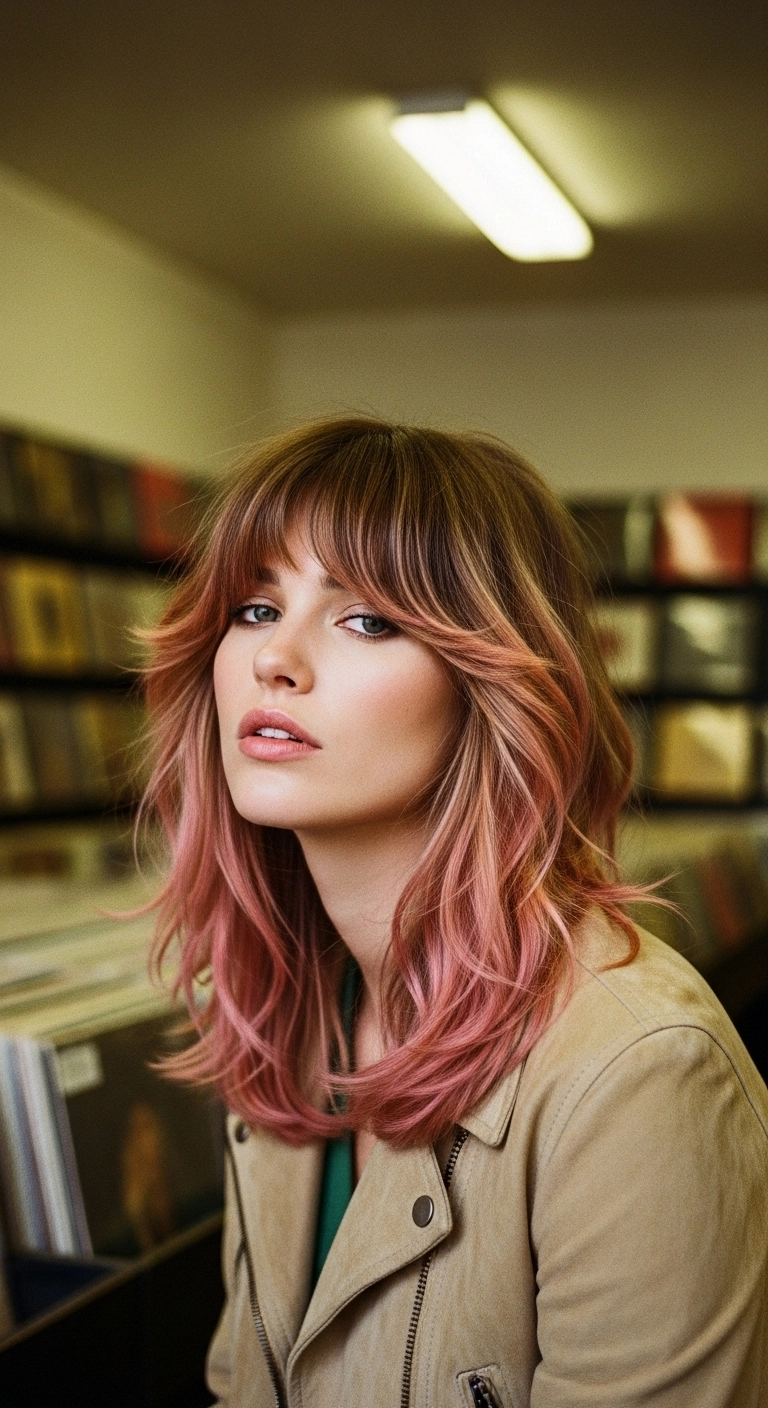
Oh, the lived-in shaggy lob, how I adore you! Pair it with a leather moto jacket and some piecey bangs and I am completely obsessed. This rock-chic look is effortless perfection! Would you ever cut your hair into this shaggy lob?
How to do this
1. Start on damp, towel-dried hair and apply a lightweight styling mousse or texturizing lotion from roots to ends using the volumizing foam listed below.
2. Blow-dry the bangs first with a small round brush or paddle brush, using the professional ceramic hair dryer listed below to push them side to side for that effortless, piecey drape.
3. Rough-dry the rest of the hair using your fingers or a diffuser to encourage natural body, root lift, and jagged movement around the collarbone.
4. Take a few random vertical sections through the crown and mid-lengths and quickly tap them with a flat iron to create subtle bends and undone texture.
5. Finish by misting the roots and mid-lengths generously using the dry texturizing spray listed below, gently shaking everything out with your fingers to break up the layers.
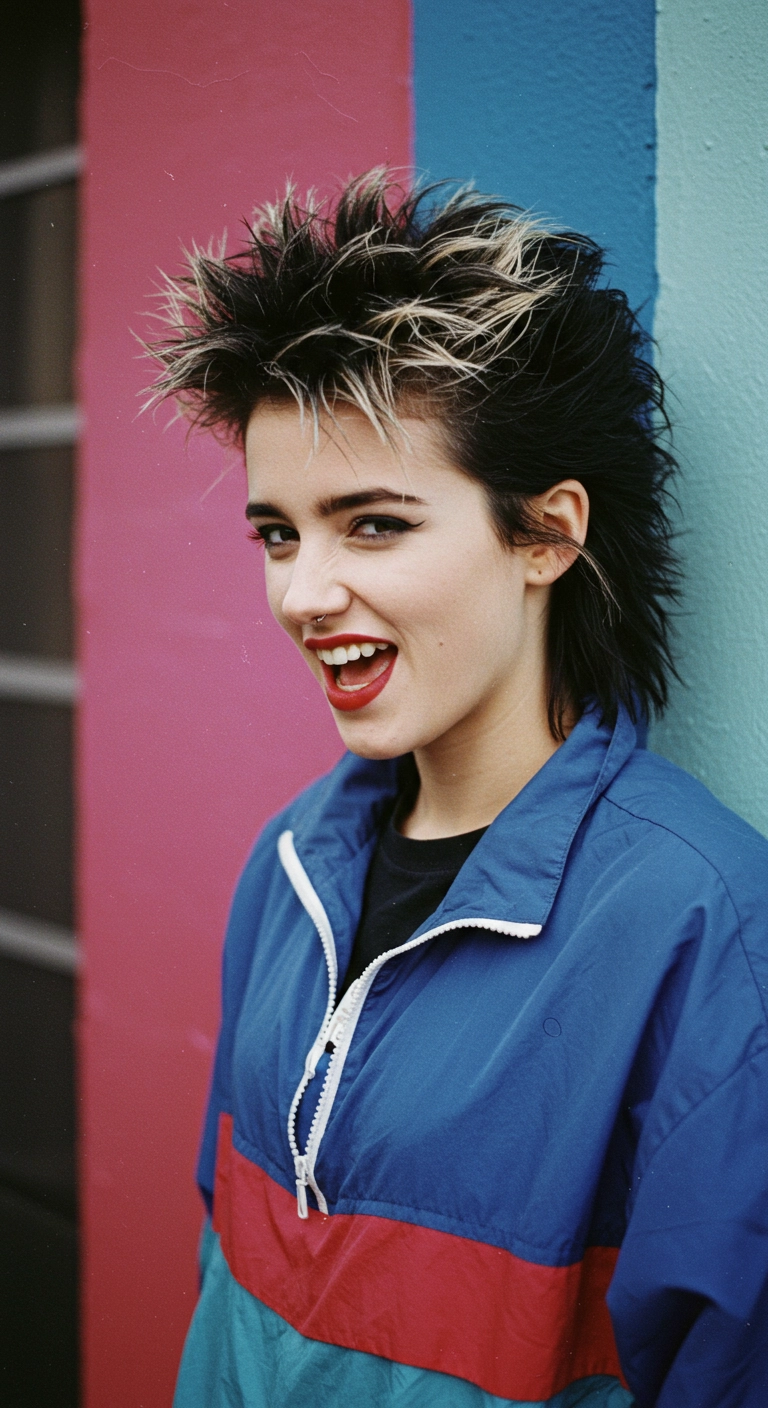
Talk about an absolute throwback with pure rock-and-roll attitude! This look takes the iconic retro mullet and levels it up with electric, frosted blonde spikes that contrast against a dark, moody base. It’s bold, completely fearless, and guaranteed to turn heads the second you step out.
How to do this
1. Start by getting a tailored short mullet cut with razor-chopped layers through the top crown and front fringe, keeping the nape area elongated and tapered.
2. Lighten the very tips of the top spiky sections to a pale blonde level using the hair bleach highlighting kit listed below, leaving the base dark off-black.
3. On damp, clean hair, apply a generous amount of the lightweight volumizing mousse listed below from roots to ends to build explosive grip.
4. Blow dry using a directional nozzle while using your fingers to pull the top crown sections straight upward and back, encouraging gravity-defying height.
5. Warm a nickel-sized amount of the matte styling wax paste listed below between your palms and aggressively pinch and twist the blonde crown tips into separated, sharp spikes.
6. Slick the sides gently behind the ears and lock the entire high-impact punk silhouette into place with the extreme hold freezing hairspray listed below.
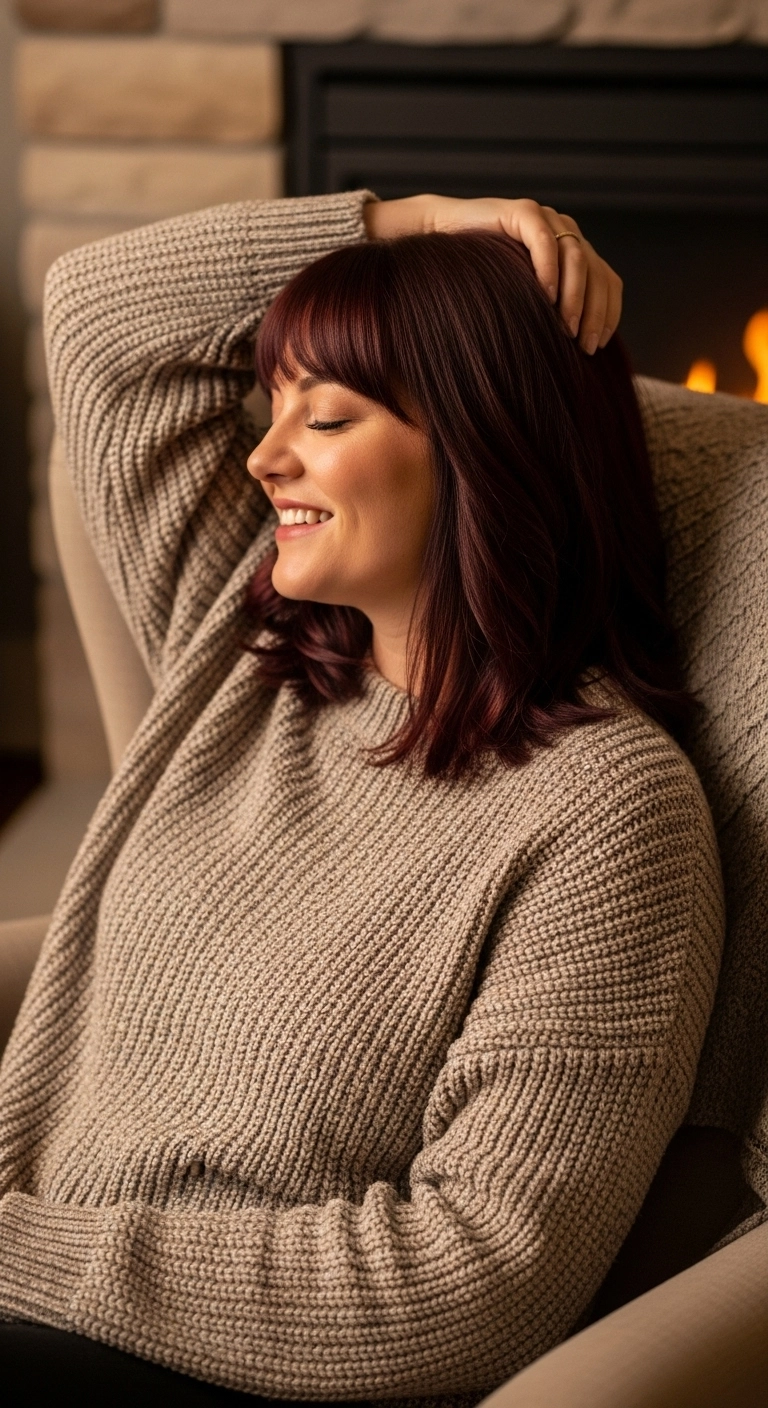
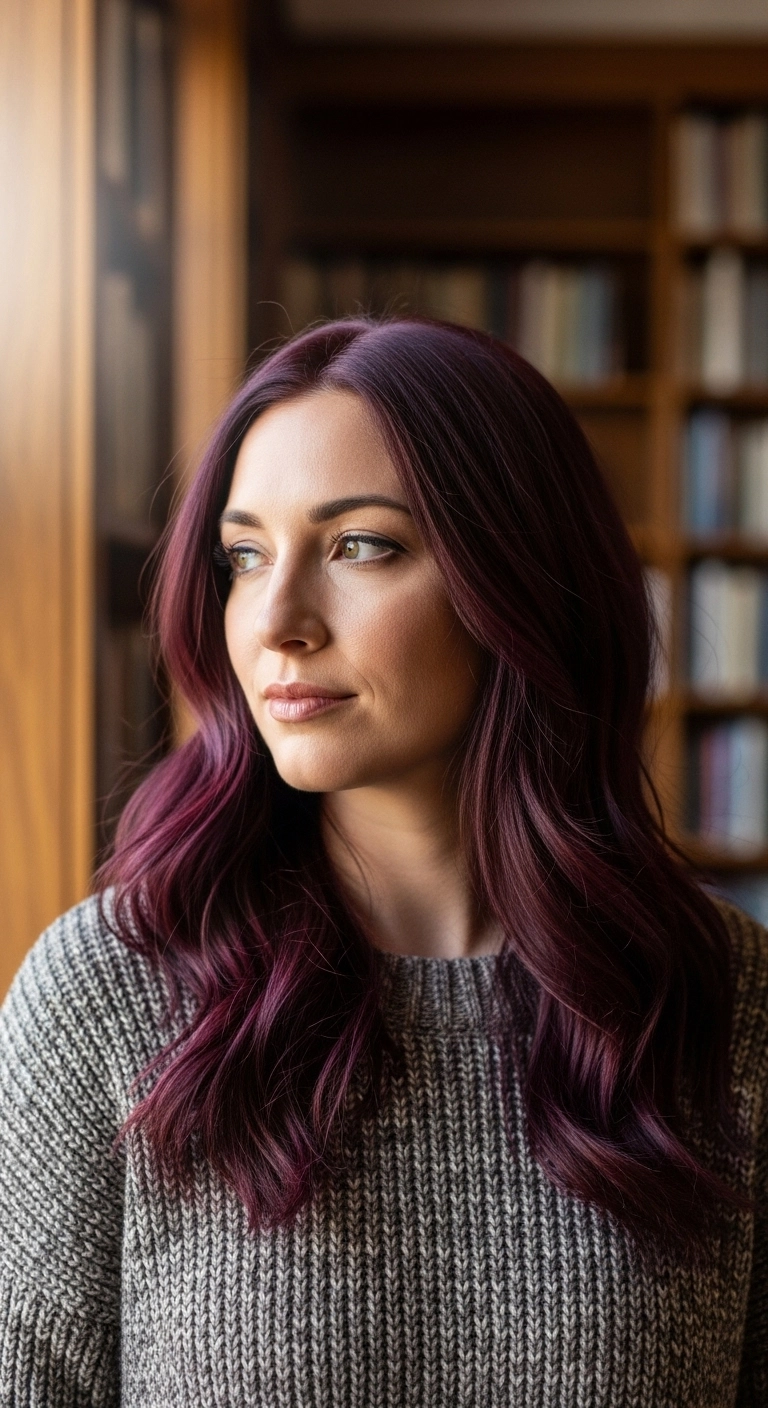
The rich burgundy lob with bangs. Such a vibe! I love how warm and cozy this deep wine shade feels, especially paired with soft brow-skimming bangs. It’s effortless, flirty, and gives everyday hair an instant elevated look without requiring hours of styling.
How to do this
1. Start on freshly washed hair and apply a quarter-sized amount of the smoothing blowout cream listed below to damp mid-lengths and ends.
2. Mist your entire head with the thermal heat protectant spray listed below to shield your rich color from heat fade.
3. Blow-dry your fringe first using the small ceramic round brush listed below, rolling slightly under and sweeping gently to eliminate cowlicks.
4. Section off the rest of your hair into 2-inch horizontal layers and blow-dry with the medium boar bristle round brush listed below, turning the ends under softly for natural bounce.
5. Warm a couple of drops of the lightweight shine hair serum listed below between your palms and smooth over the lengths to add luminous gloss and tame flyaways.
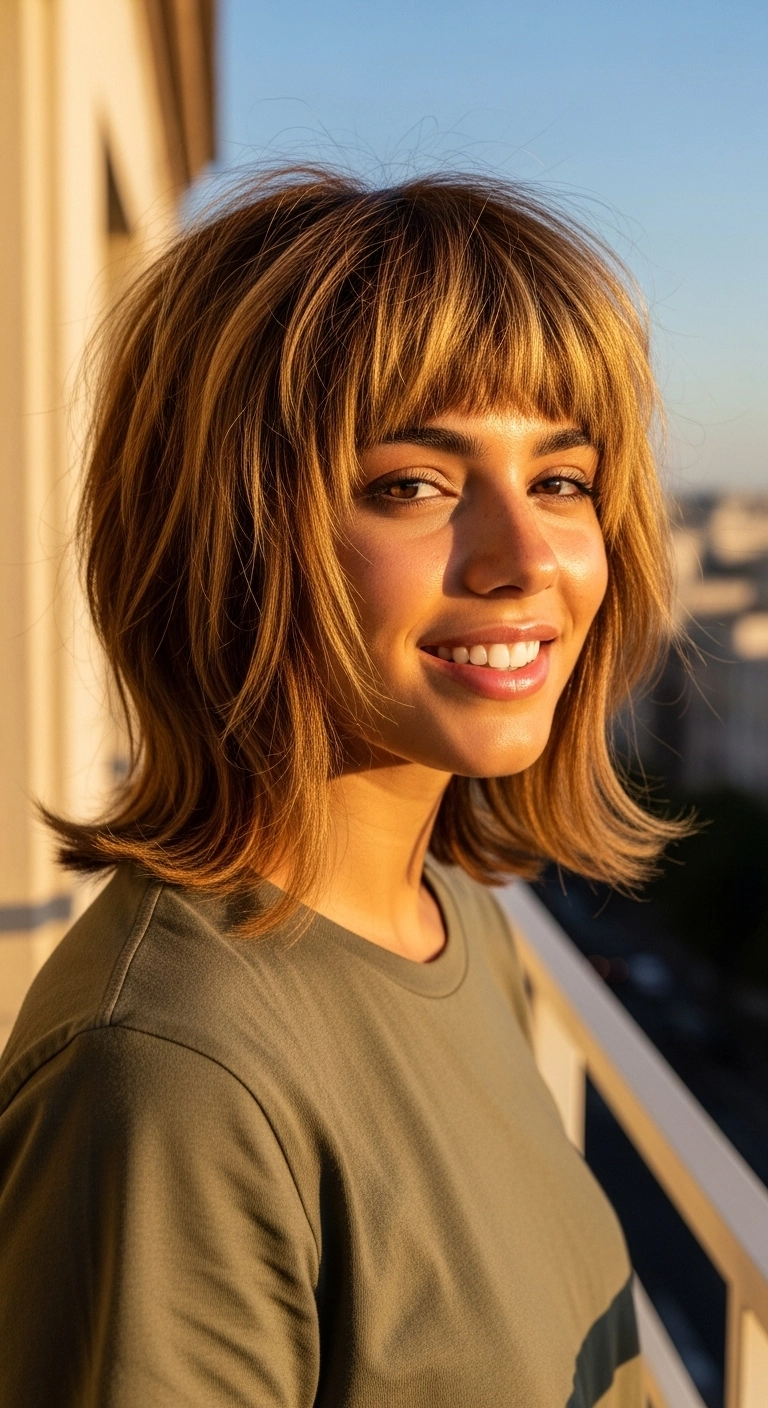
If you've been searching for that effortlessly cool, lived-in chop that practically styles itself, this retro-inspired shag lob is calling your name! The soft flipped ends paired with piecey, brow-grazing bangs give instant dimension, while warm golden honey highlights catch the golden hour light just right.
How to do this
1. Start by prepping damp, towel-dried hair with a lightweight volumizing blow-dry lotion from mid-lengths to ends.
2. Blow-dry the bangs first using the small ceramic round brush listed below, rolling them downward with slight tension and then giving them a quick blast of cool air to lock in shape.
3. Section the rest of your hair into manageable tiers and blow dry using the medium round blowout brush listed below, pulling sections outward and flipping the bottom ends slightly upwards to get that flirty kick.
4. Add extra crown volume by lifting the top sections directly upward while applying heat to the roots.
5. Once fully dry, mist the dry texturizing spray listed below evenly through your layers while shaking your hair out with your fingers for that effortless lived-in look.
6. Take a tiny dime-sized dab of the lightweight styling wax paste listed below and pinch the tips of your bangs and face-framing layers to define that piecey, textured finish.
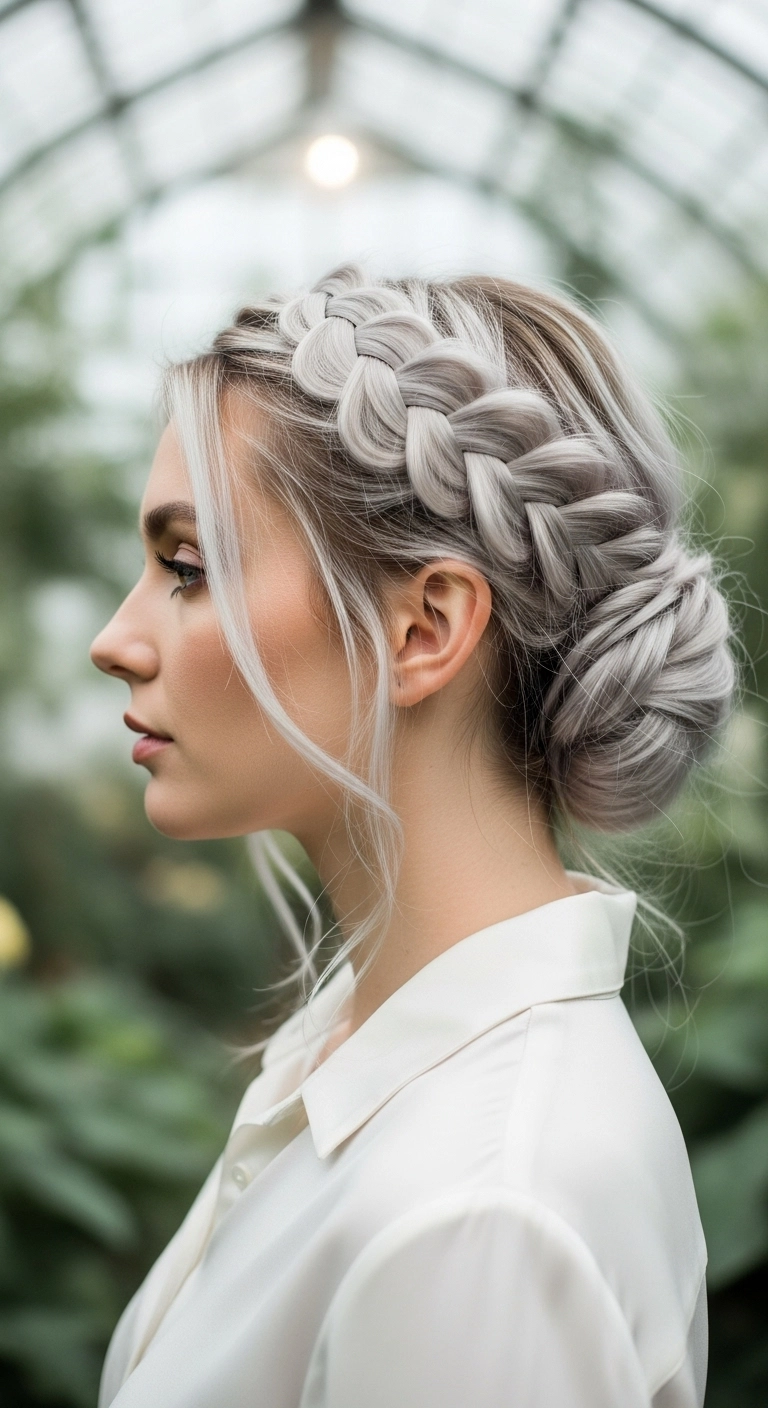
This look is the ultimate romantic Dutch braid into a low bun. You begin by carving out a thick section right along your hairline and Dutch braiding it under to create that thick, elevated crown effect. Then, wrap everything back into a soft chignon at the nape, gently pull out the edges of the braid for max volume, and let a few wispy face-framing tendrils float freely.
How to do this
1. Start by prepping your dry hair with the texturizing spray listed below to give your strands enough grip and volume for braiding.
2. Leave out a soft section of hair in front of each ear to act as your face-framing tendrils later on.
3. Create a deep side parting and begin an inverted Dutch braid along the hairline, weaving the outer strands underneath the center strand while gathering small sections from both sides as you work backward toward the nape.
4. Once the braid reaches behind your ear, transition into a standard three-strand braid to the ends and secure it temporarily using the clear mini elastic bands listed below.
5. Gather the remaining loose hair at the back into a low ponytail at the nape, then wrap and twist it into a neat, textured low bun, pinning it securely with the sturdy bobby pins listed below.
6. Wrap the tail of your Dutch braid over and around the base of the bun, tucking the tail underneath and pinning it firmly in place.
7. Gently pull and pancake the outer loops of the Dutch braid to create that wide, voluminous, plush appearance.
8. Soften your face-framing tendrils with a quick touch from a styling iron and lock the entire updo in place with the flexible hold finishing hairspray listed below.
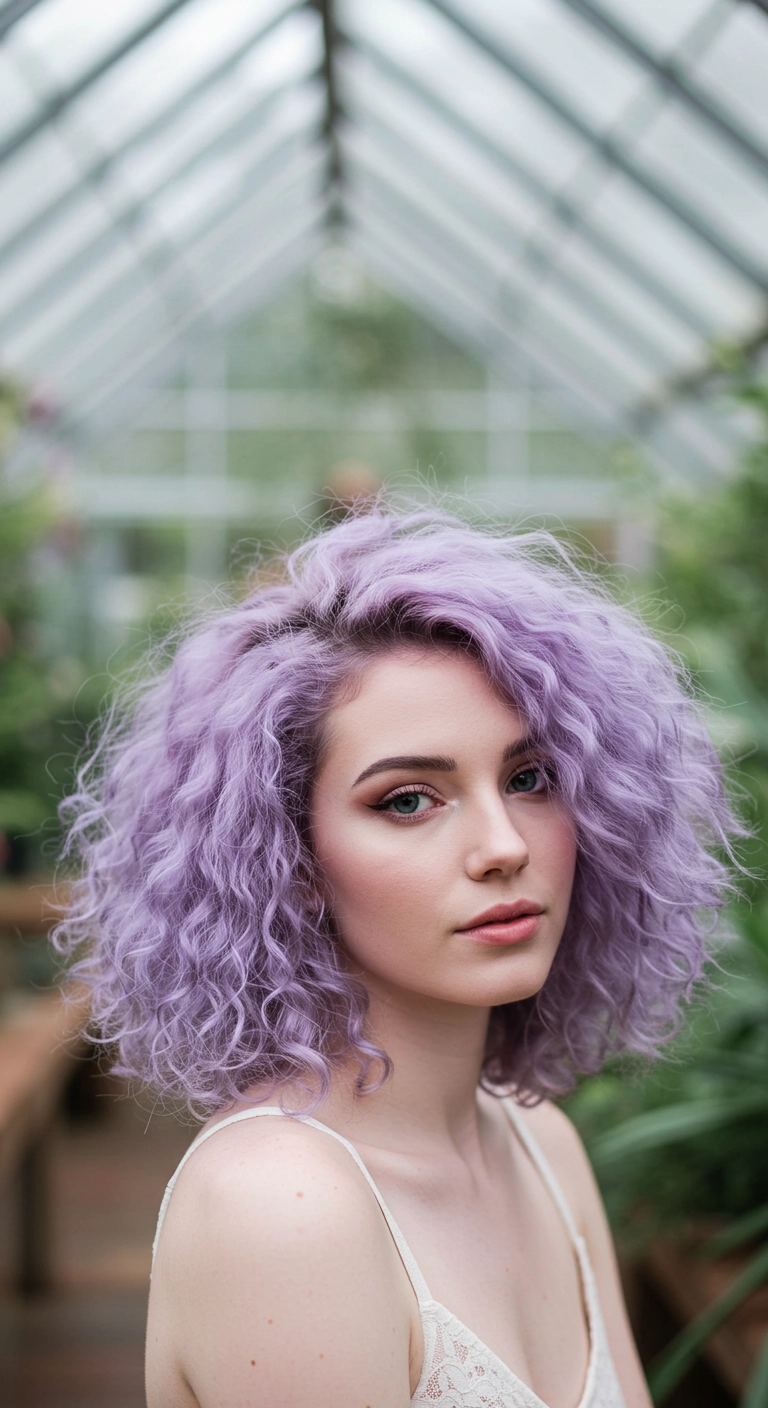
I know going pastel can feel like a total commitment, but honestly, looking at these dreamy lavender curls makes every single salon hour completely worth it! The deep side sweep gives so much natural body, and if you’ve been looking for a sign to lean into fairytale hair, this is it!
How to do this
1. Start by prepping your freshly washed, damp curls using the leave-in curl defining cream listed below to lock in hydration and fight frizz.
2. Gently rake a quarter-sized amount of the lightweight styling gel listed below from mid-lengths to ends, using prayer hands to distribute evenly.
3. Flip your head upside down and scrunch upward towards the scalp using a microfiber towel to encourage natural ringlets and curl clumping.
4. Attach the universal hair diffuser nozzle listed below to your blow dryer, setting it to low speed and medium heat, gently cupping sections until your curls are 80-90% dry.
5. Flip hair upright, create a deep dramatic side part with your fingers to build maximum crown volume, and let it fully air-dry.
6. Once totally dry, break the gel cast by scrunching a couple of drops of the lightweight shine hair oil listed below through the mid-lengths and ends for soft, touchable bounce.
7. Mist with the color-depositing purple toning spray listed below whenever your pastel lilac tone needs a fresh, vibrant boost between salon visits.
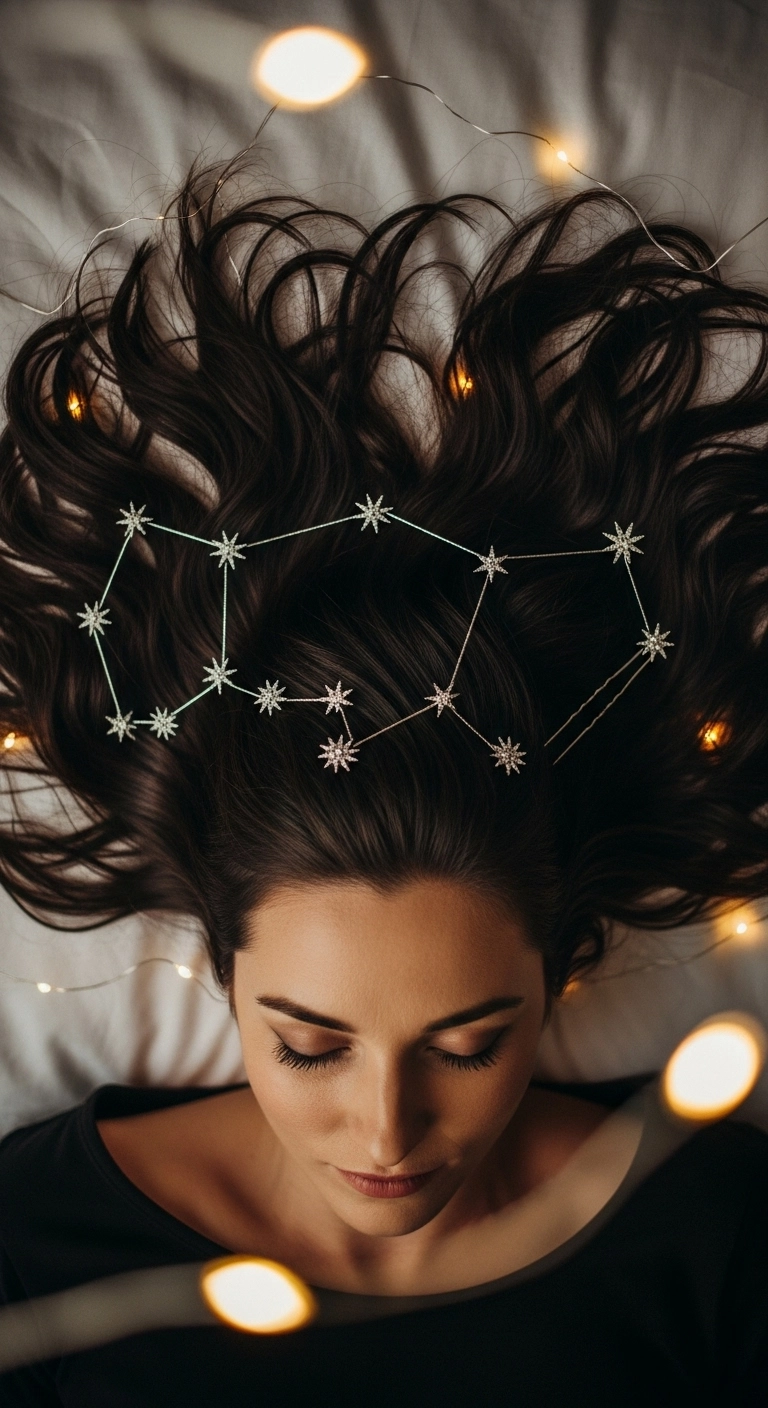
This hairstyle is what I like to call the midnight sky constellation look. You start by giving your long dark locks some soft, flowy waves using a curling wand and finger-brushing them out. Then, instead of just wearing it down, you scatter shimmering rhinestone star pins across the crown in connected constellation patterns. It creates the most magical, dreamy vibe that's totally out of this world.
How to do this
1. Start with clean, dry hair and apply a generous mist of the heat protectant spray listed below to safeguard your strands against thermal styling.
2. Using the 1.25-inch ceramic curling wand listed below, take medium sections of hair and wrap them loosely around the barrel, leaving the very ends slightly straight for a natural, undone wave.
3. Once all sections are curled and cooled, gently rake through the waves with your fingers or the wide-tooth comb listed below to soften them into loose S-bends.
4. Mist with the lightweight texturizing spray listed below at the crown and mid-lengths to add grip, separation, and subtle definition.
5. Lay hair flat or arrange your loose waves, then carefully slide in the celestial star hairpin set listed below across the crown to create your constellation design.
6. Finish the style with a light mist of the flexible hold hairspray listed below to lock the strands and delicate accessories securely in place.
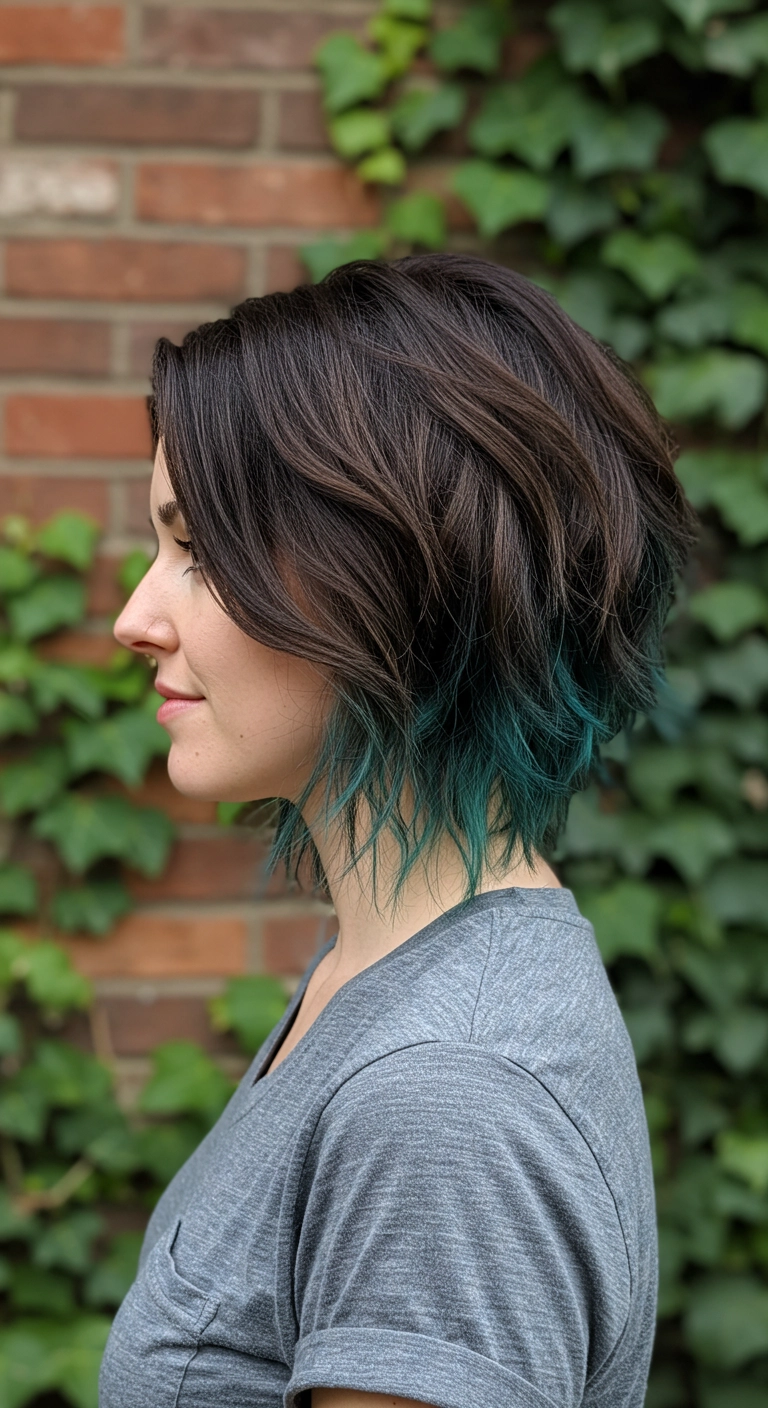
A textured dark bob with a pop of teal underneath? Sign me up immediately! It's so effortlessly edgy and fun without being too over the top. Have you ever tried peekaboo hair color like this?
How to do this
1. Start by getting a layered, graduated bob with textured ends that taper softly toward the nape.
2. Section out the underneath nape layer and pre-lighten it carefully using the hair lightening bleach kit listed below until it reaches a pale yellow blonde.
3. Apply a vibrant semi-permanent color to the lightened under-layer using the semi-permanent teal hair dye listed below and let it process completely before rinsing thoroughly.
4. Prep towel-dried hair by misting the thermal protectant spray listed below evenly from roots to tips.
5. Blow-dry using a medium round ceramic brush, lifting at the roots around the crown to build body and volume.
6. Take random 1-inch sections and add slight bends with a flat iron, alternating directions to produce an effortless, tousled texture.
7. Finish by working a dime-sized amount of the matte texturizing hair paste listed below through the mid-lengths and ends to define the piecey layers and let the teal peek through.
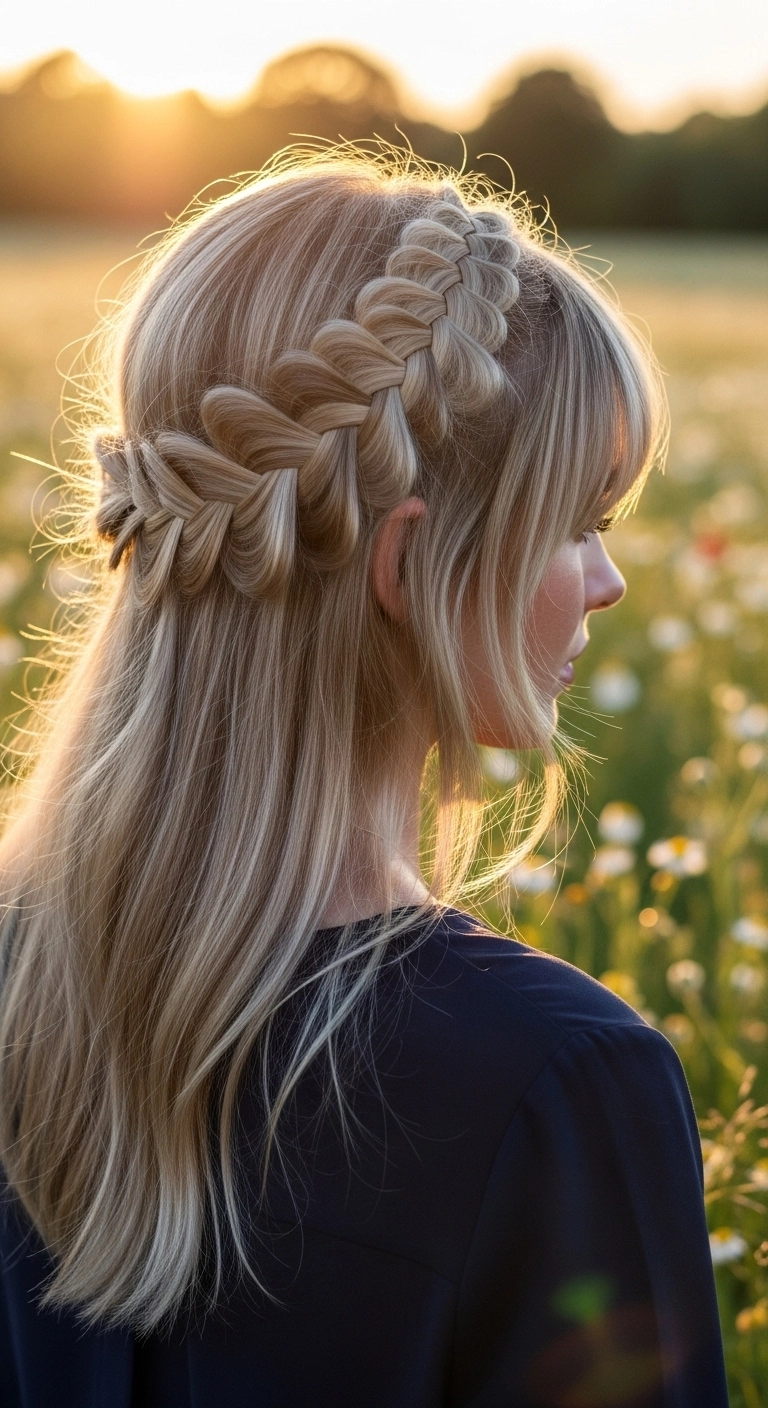
The half-up crown braid. Such a dreamy, romantic vibe! I love how the dimensional blonde highlights make each weave of the braid pop so effortlessly. It’s perfect for outdoor weddings, summer festivals, or whenever you want to feel like a woodland fairy without spending hours in a salon.
How to do this
1. Start by prepping clean, dry hair with a smoothing serum and blow dry smooth using the paddle hair brush listed below to keep the lengths sleek.
2. Separate out your front bangs and soft face-framing tendrils around the ears to leave them free.
3. Begin a deep side part or section behind the ear, gathering a generous section of hair and divide it into three equal pieces.
4. Create a Dutch lace braid across the crown, crossing outer strands under the middle while incorporating new sections only from the top crown area as you move around the back of the head.
5. Secure the braid end with one of the clear elastic hair ties listed below and pin it inconspicuously underneath the opposite side with bobby pins.
6. Gently pancake each loop of the braid by tugging lightly on the outer edges to create maximum volume and that gorgeous dimensional floral effect.
7. Finish the look by misting with the flexible hold hairspray listed below to lock the crown in place while keeping the loose lengths touchable.
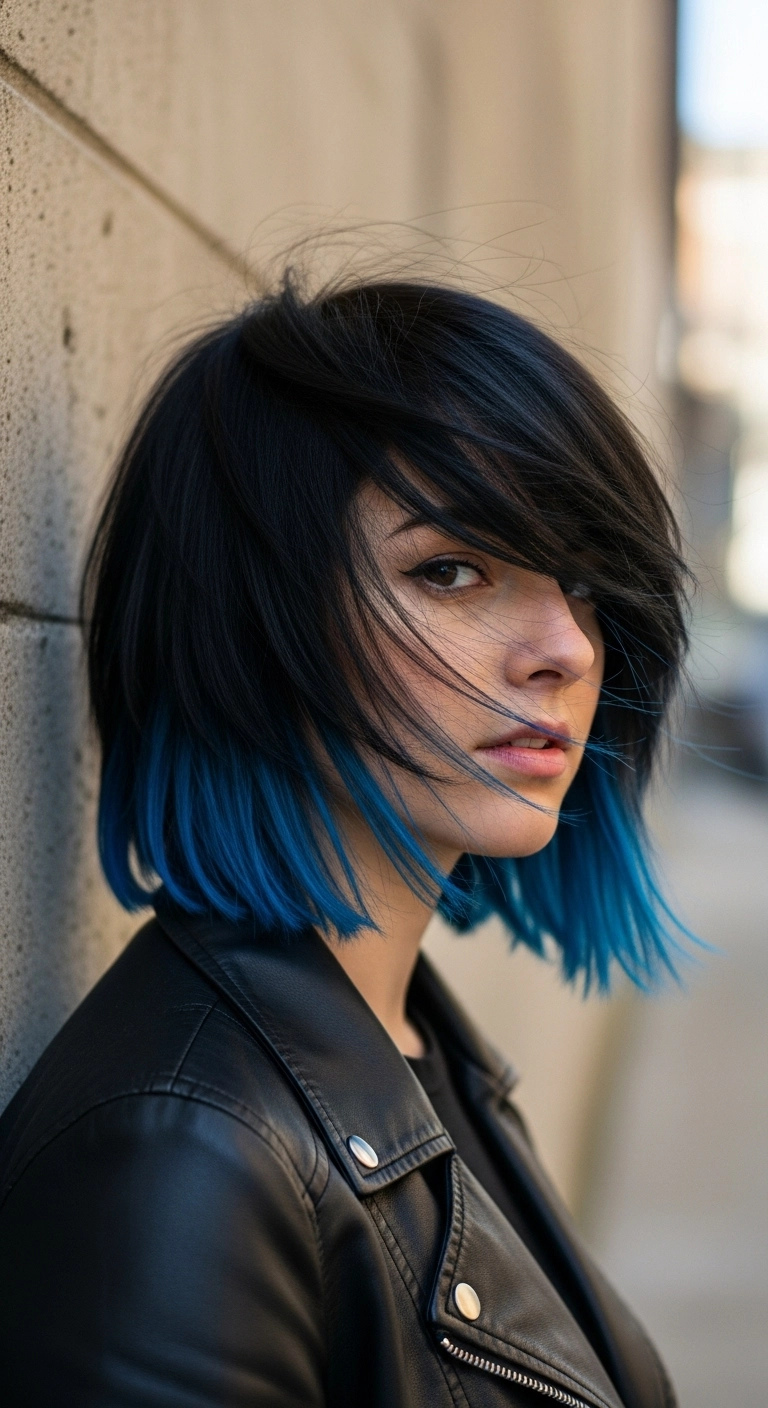
The choppy black bob with cobalt blue ends. Total alt-rock perfection! I love how the vivid blue peeks through the textured ends, giving the cut so much personality and movement. It's effortless, a little moody, and pairs amazingly with a leather jacket.
How to do this
1. Start by sectioning off the lower lengths of the hair where you want the vivid blue pop, and lighten this perimeter using the hair lightening kit listed below until reaching a clean level 9 or 10 pale yellow base.
2. Rinse, blow dry thoroughly, and apply the semi-permanent vivid blue hair dye listed below to the pre-lightened ends, blending slightly upwards into the natural black base to create a soft, seamless dip-dye gradient.
3. Once the color has processed and rinsed clear with cool water, prep damp hair with the lightweight heat protectant spray listed below to shield strands before heat styling.
4. Blow dry the hair with a flat paddle brush, directing the sweeping front fringe across the forehead and slightly flicking the ends for natural separation.
5. Use a mini flat iron on low to medium heat to smooth the crown and create slight piecey bends through the ends.
6. Finish the look by misting the dry texturizing spray listed below through the mid-lengths and ends, shaking it out with your fingers to give it that effortless, windblown edge.
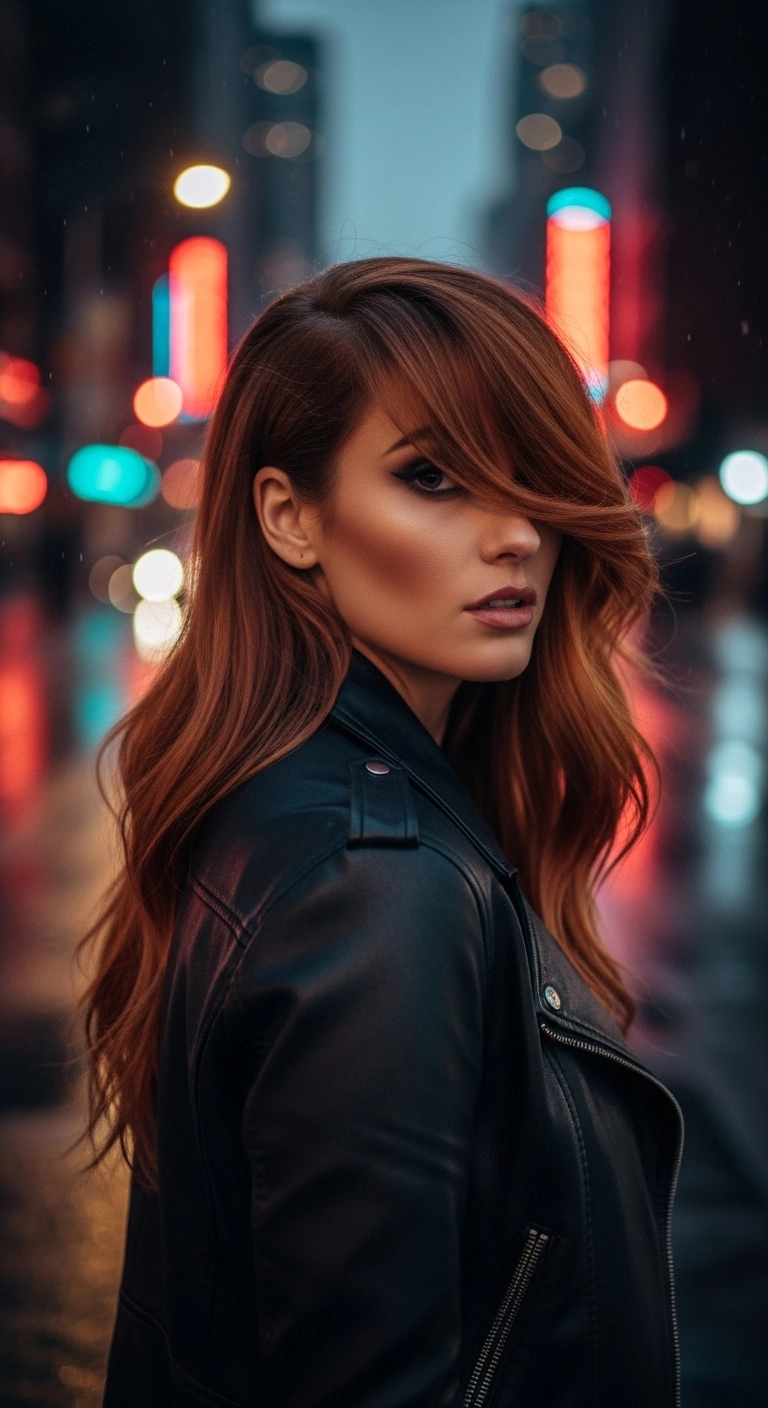
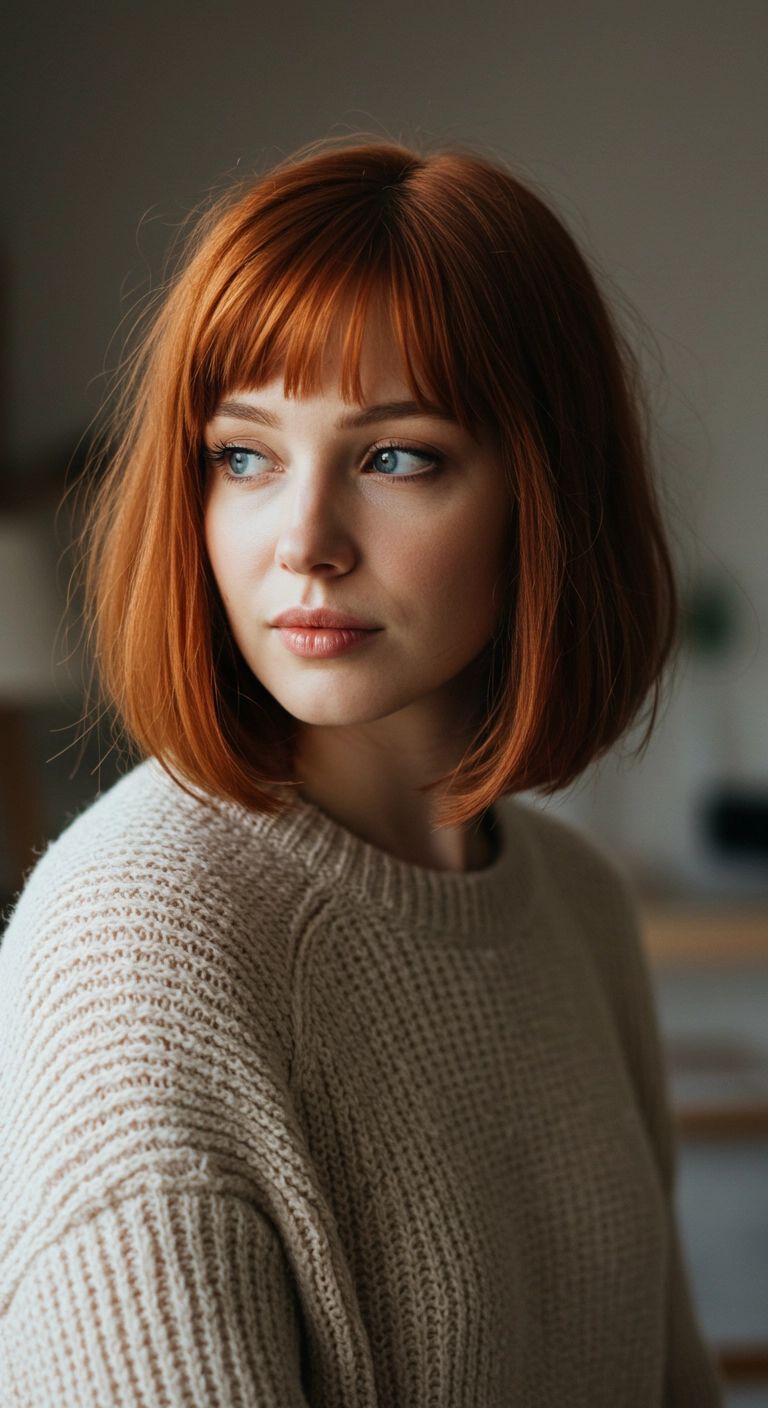
I’m honestly obsessed with this look. It has that sultry, cinematic edge with the deep side part and the dramatic side-swept fringe falling effortlessly over the eye. The rich auburn tones catch the light so beautifully, making it perfect for a night out in the city, concerts, or a date night where you want to look effortlessly cool and glam.
How to do this
1. Start by prepping damp hair with a volumizing root lifter and the heat protectant spray listed below to shield strands from thermal styling.
2. Blow dry hair using a large ceramic round brush listed below, focusing on lifting the roots at a deep side part and smoothing the lengths into a soft curve.
3. When drying the front bangs section, roll the hair forward and away from the side part using the round brush, then pin it with a roller clip to set the sweeping curve as it cools.
4. Take mid-to-ends sections of your hair and wrap them around a 1.5-inch curling iron listed below for just a few seconds to create relaxed, loose S-waves rather than tight curls.
5. Release the pinned front section, gently rake through the waves with your fingers or a wide-tooth comb, and lightly mist with the flexible hold hairspray listed below to keep the dramatic sweep across the face perfectly in place all night.
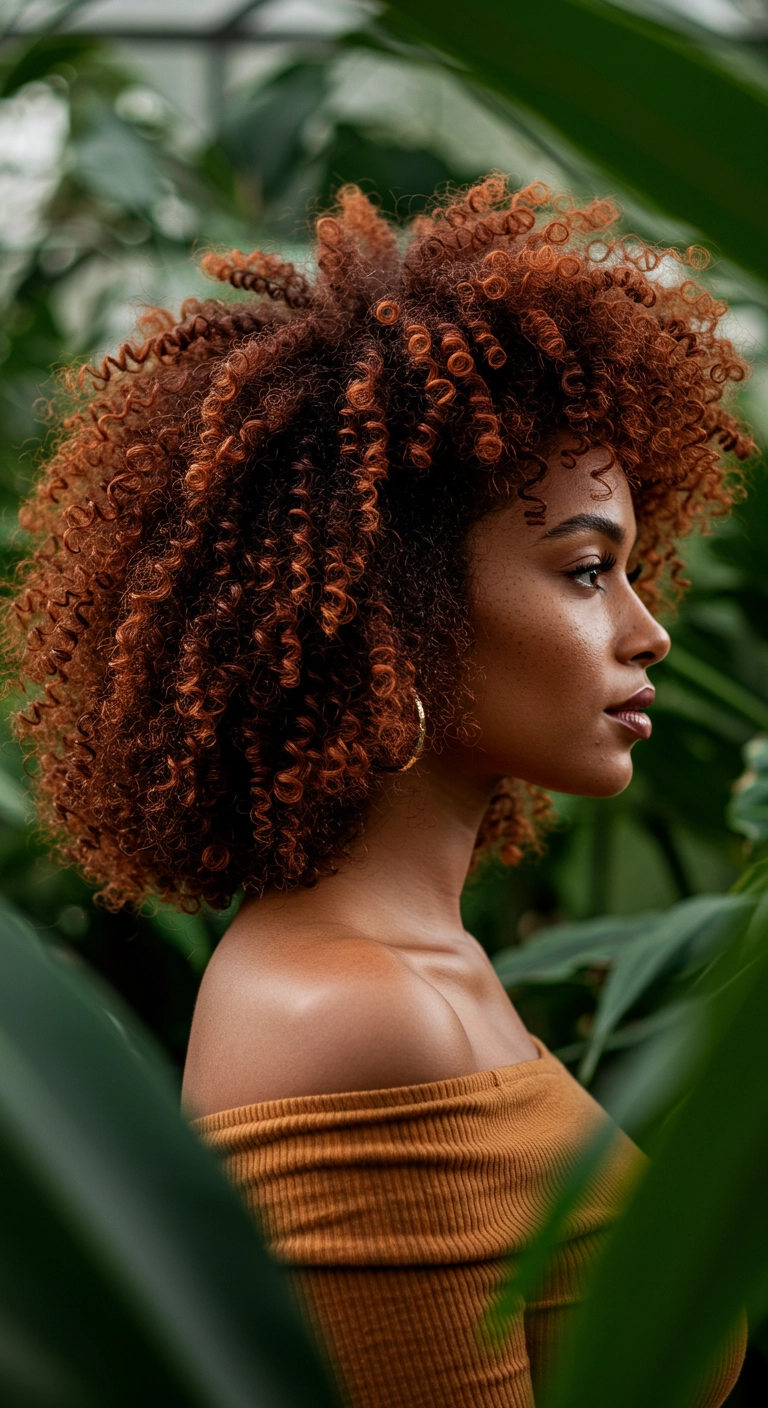
These lush, bouncy copper coils are giving absolutely everything! The rich warmth paired with that gorgeous rounded volume and fringe is pure perfection. Have you ever tried a warm ginger or copper tone on your natural curls?
How to do this
1. Start on freshly cleansed, dripping-wet curls after conditioning with a hydrating treatment.
2. Section your curls and apply a generous amount of the curl defining cream listed below from roots to ends to lock in essential moisture.
3. Work in sections with a lightweight styling gel listed below using the praying hands technique, followed by gentle raking to clump the spiral pattern together.
4. Carefully shape your face-framing coils and fringe over your forehead using a curl defining brush listed below to encourage maximum spring and ringlet formation.
5. Flip your head upside down and gently cup the curls using the universal diffuser attachment listed below on low heat and low speed until hair is 90% dry.
6. Once fully dry, dispense 2-3 drops of the nourishing hair oil listed below between your palms and gently scrunch out the gel cast to fluff and create that jaw-dropping volume.
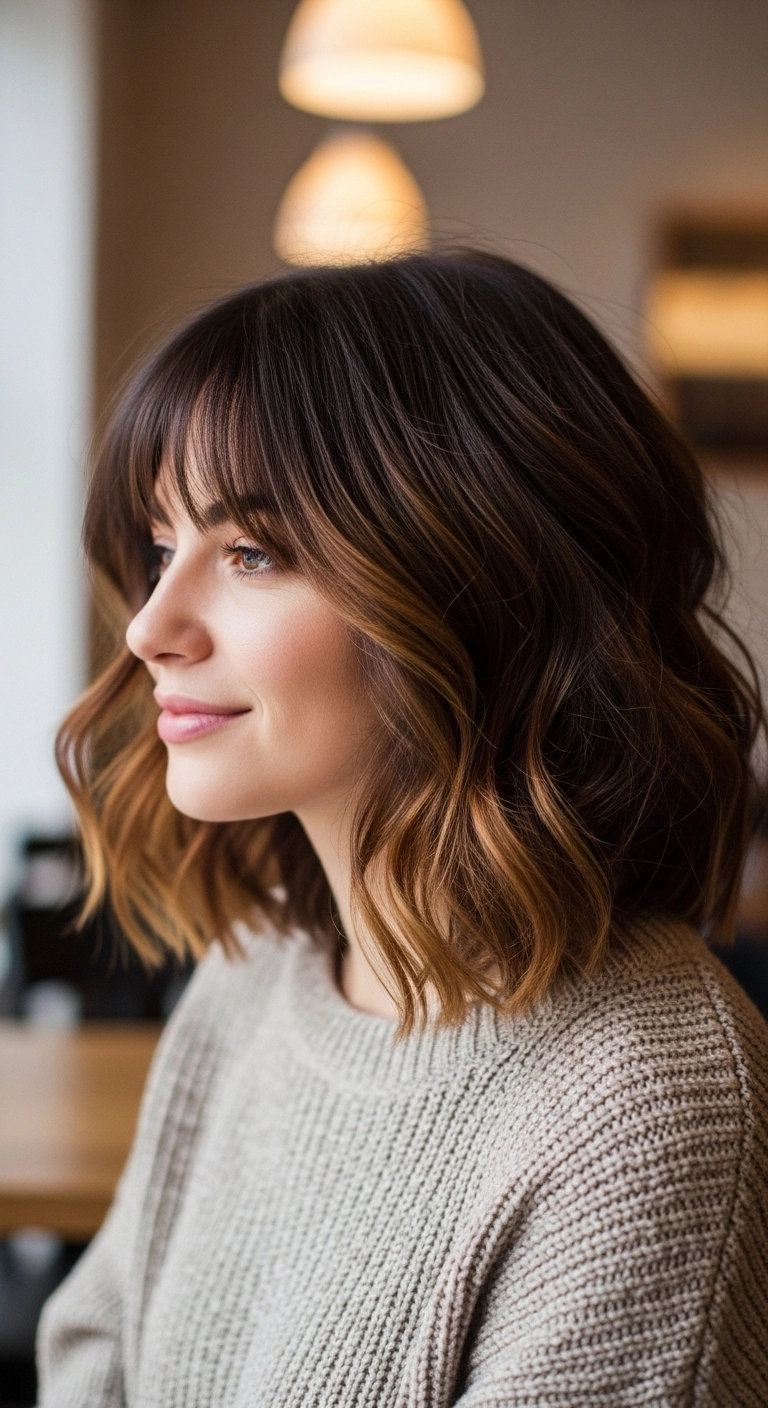
I think a wavy lob paired with soft, wispy bangs is hands down one of the most flattering and effortless cuts you can get. The warm caramel balayage gives the dark base so much dimension, especially when styled in these relaxed, undone bends. It’s perfect if you want that chic French-girl feel without having to spend hours styling every morning!
How to do this
1. Start on freshly washed hair and apply a generous mist of the heat protectant spray listed below to shield strands from hot styling tools.
2. Blow-dry your fringe first using a small ceramic round brush listed below, sweeping back and forth to give the bangs that light, wispy, feathered curve.
3. Rough-dry the rest of the lengths using a lightweight hair dryer until completely dry, lifting at the roots for natural volume.
4. Take a 1.25-inch curling iron listed below and curl 1- to 2-inch vertical sections away from your face, making sure to leave the last inch of the ends straight for that relaxed, modern lob shape.
5. Allow the curls to cool down completely, then lightly run your fingers or a wide-tooth comb through to break them up into soft, dimensional waves.
6. Finish by misting the dry texturizing spray listed below throughout the mid-lengths and ends for lived-in texture and light hold, then add a drop of lightweight hair oil to the ends for shine.
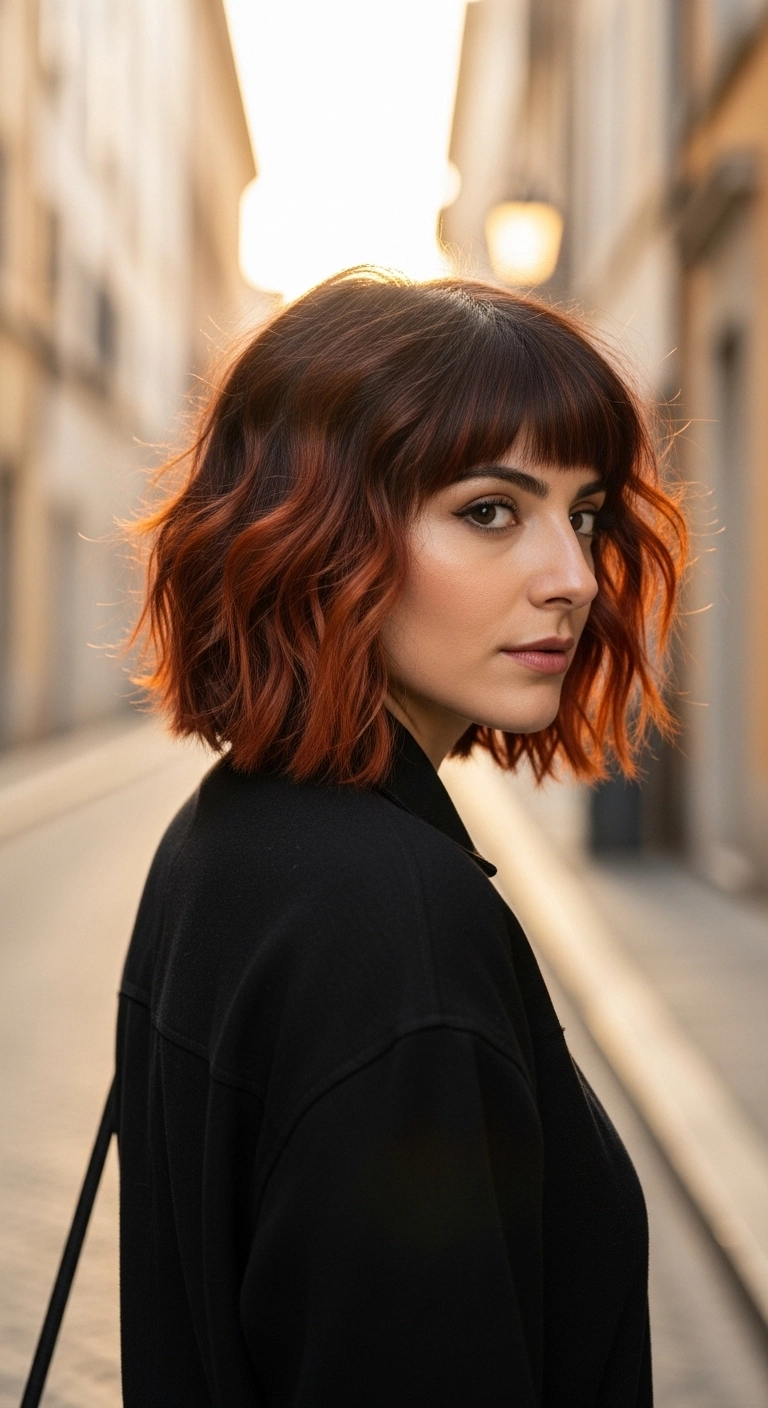
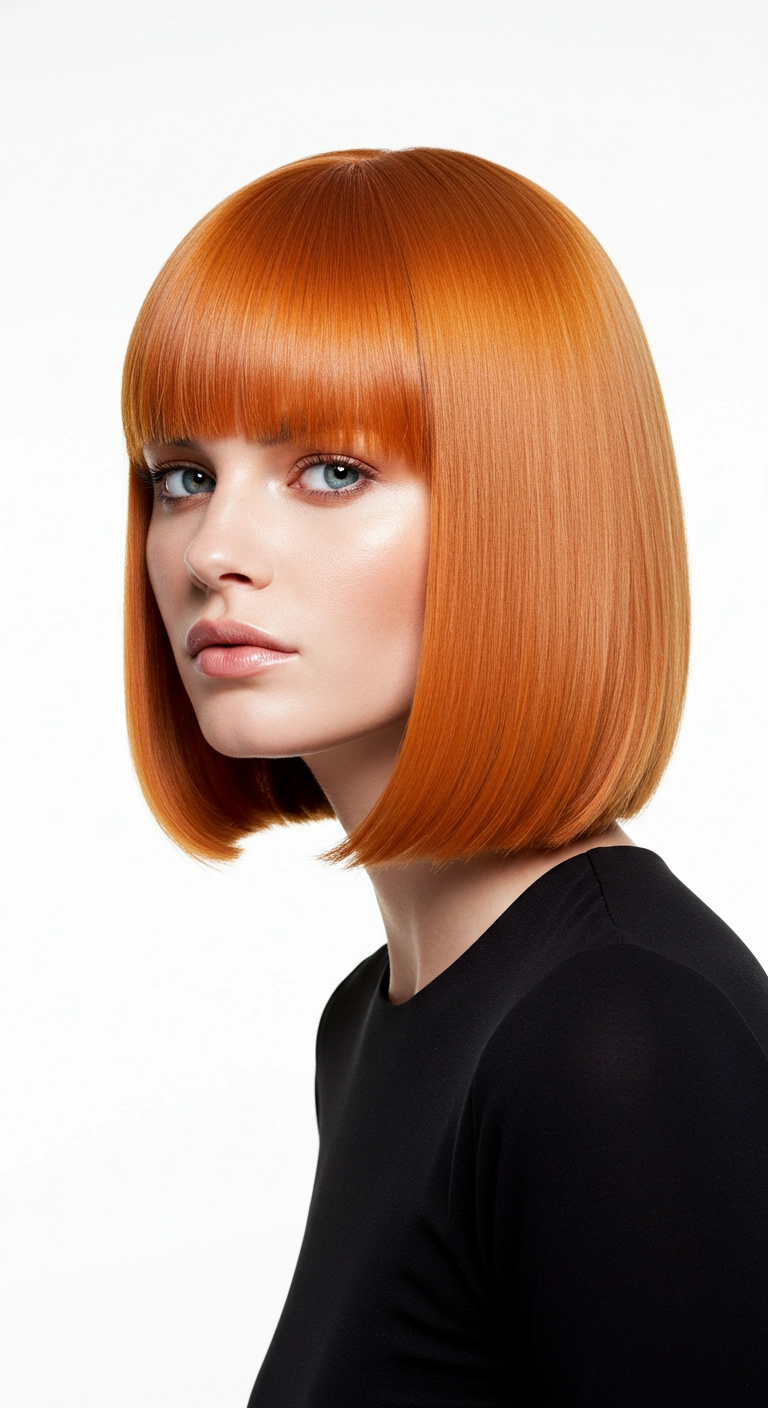
This look is all about that effortless, Parisian-inspired edge. It combines a rich espresso root melting into vibrant warm copper ends with a full, textured fringe. The cut sits right above the shoulders with blunt ends and subtle internal layers to create that tousled, undone movement you can style in under ten minutes.
How to do this
1. Start by prepping damp hair with the lightweight volumizing mousse listed below to give your bob workable body and lift.
2. Blow-dry your hair using a flat paddle brush for the fringe, brushing back and forth to keep your bangs sitting flat and natural, and rough dry the rest of the hair.
3. Mist all over with the heat protectant spray listed below to shield your copper color and strands from thermal styling.
4. Take random 1- to 2-inch vertical sections of hair and wrap them around a 1-inch curling wand, leaving the very ends straight to keep that cool, modern edge.
5. Alternate the direction of your curls—some away from the face, some toward the face—for that effortlessly lived-in wave pattern.
6. Once the hair has cooled down completely, flip your head forward and shake out the waves using your fingers.
7. Mist throughout with the dry texturizing spray listed below, scrunching slightly with your hands to create separation and piecey volume.
8. Finish with a drop of hair shine serum listed below pressed gently onto the mid-lengths and ends to highlight the rich copper-brown gradient.
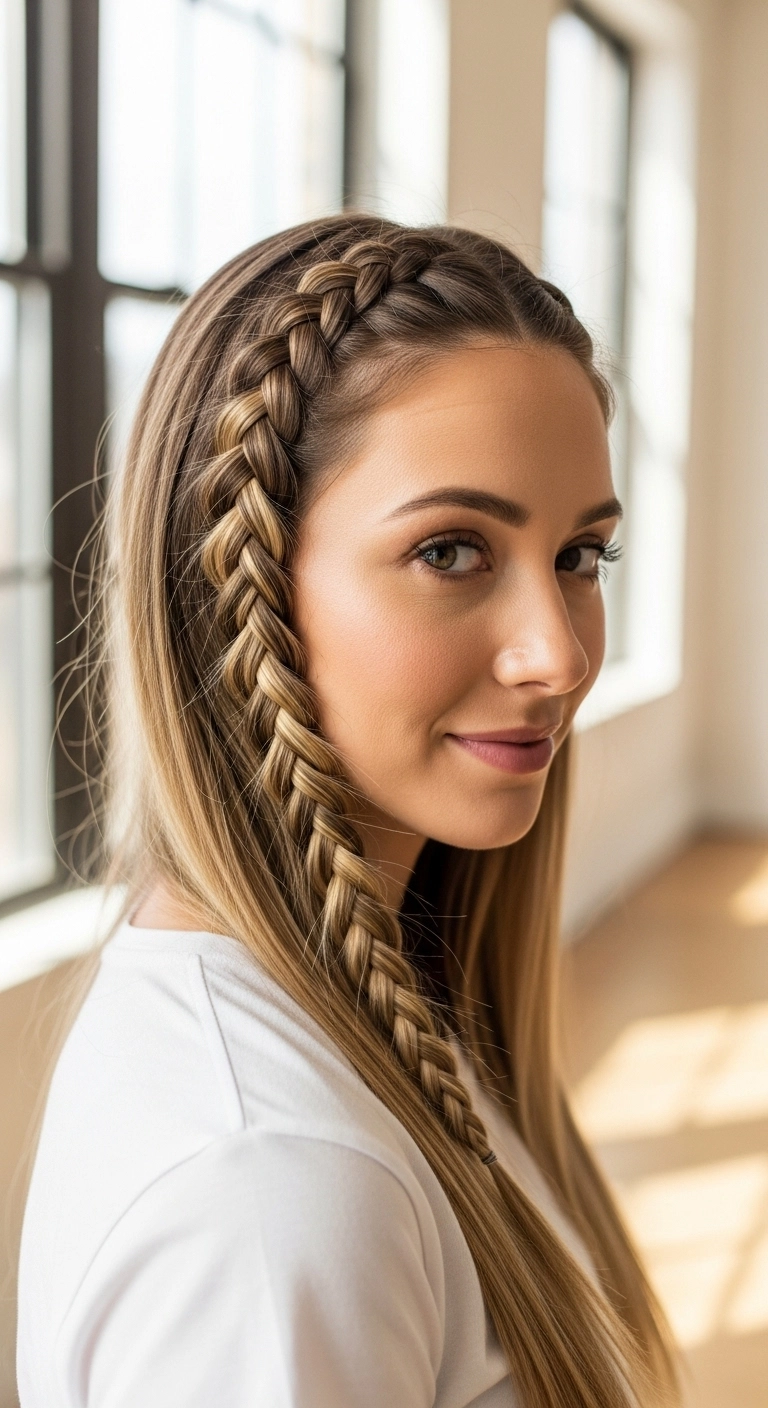
Braids will always be an absolute classic for switching up everyday straight hair. Framing the face with a sleek Dutch braid headband instantly elevates simple, glossy strands into something romantic and effortless. If you want your highlight ribbons to really pop, braiding along the hairline is the best way to show off all those dimensional golden tones.
How to do this
1. Start by prepping clean, dry hair with a lightweight smoothing serum to keep flyaways at bay and ensure sleekness.
2. Flat iron the lengths using a ceramic flat iron listed below to achieve that pin-straight, ultra-glossy finish.
3. Create a clean side part or start right at the hairline, taking a small triangle section near the front temple to begin your braid.
4. Divide into three even strands and begin a Dutch braid (crossing side strands under the middle strand), gradually incorporating hair along the hairline like a crown or headband.
5. Continue braiding along the curve of the ear and down into a classic three-strand plait over the shoulder.
6. Secure the end of the braid with a mini clear elastic band listed below.
7. Finish the entire style with a flexible hold hairspray listed below to tame baby hairs and keep the braid crisp all day.
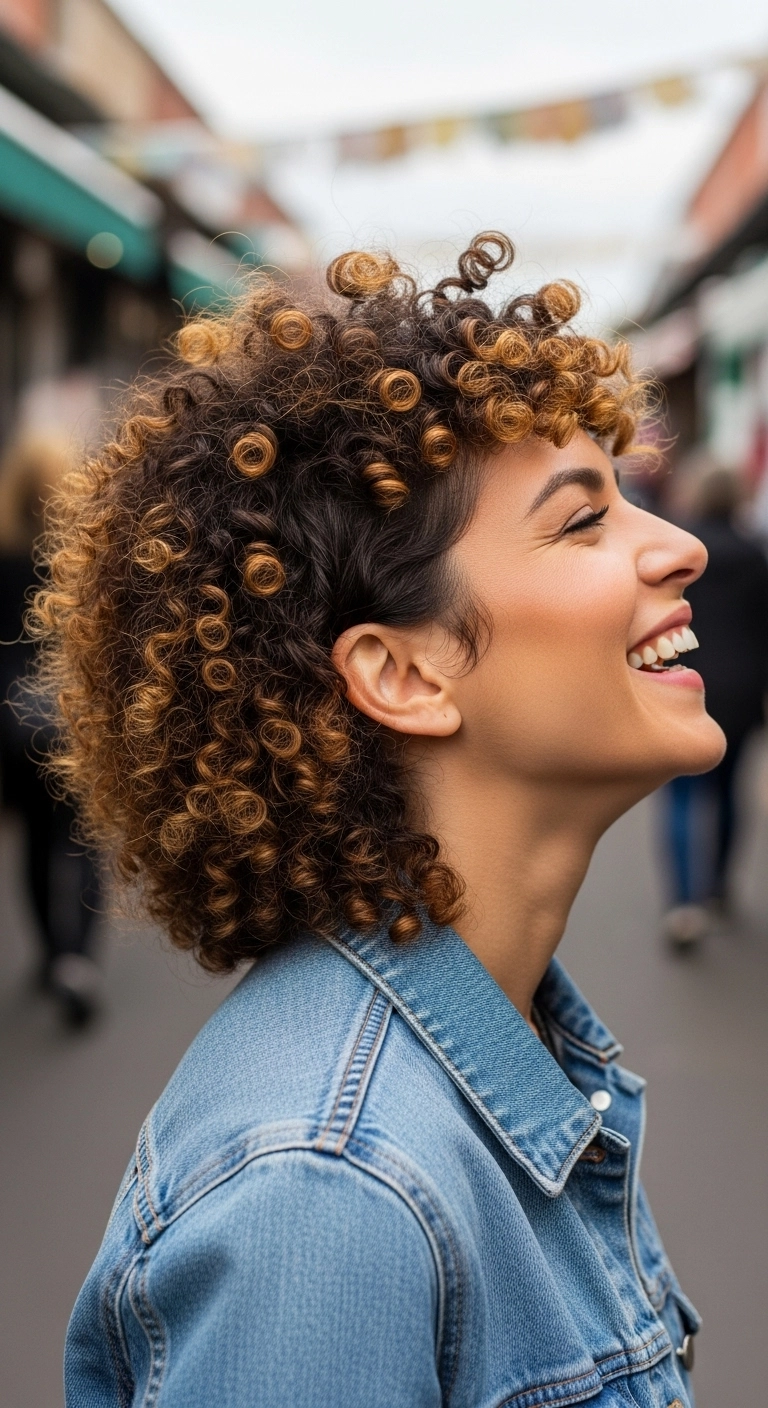
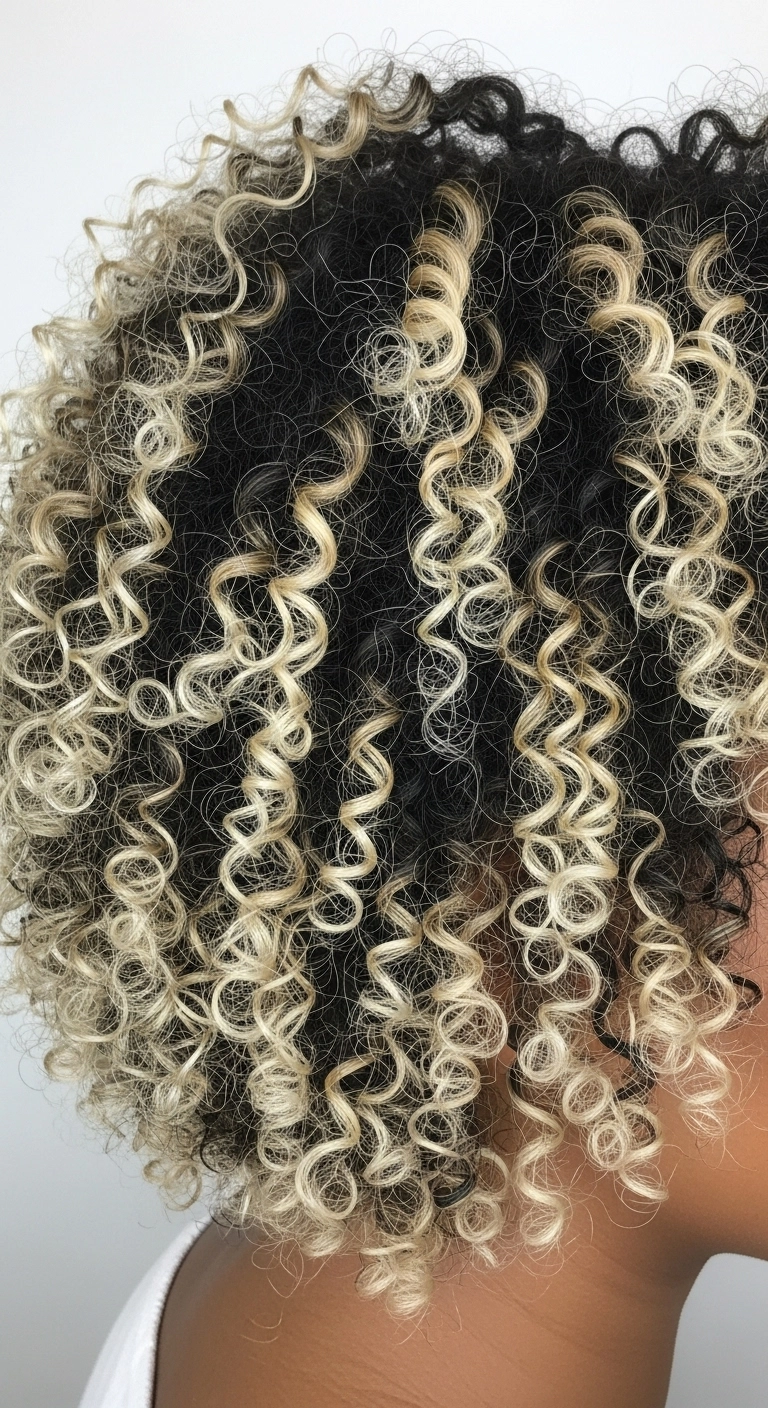
This look is the ultimate fun, rock-and-roll curly shag with a subtle mullet vibe. It's cut with lots of playful, short layers on top and around the forehead to give you full, bouncy fringe, while leaving a little extra length at the back. Honey-golden highlights are painted directly onto individual ringlets so every spiral pops with bright dimension.
How to do this
1. Start on freshly cleansed, dripping wet curls after washing with a hydrating curl shampoo and conditioner.
2. Rake a generous amount of curl defining cream through all sections from roots to tips using the curl defining styling cream listed below to lock in essential moisture.
3. Apply a firm yet flexible hold gel using the curl defining styling gel listed below using the 'praying hands' method over the lengths to seal each ringlet cluster.
4. Use your fingers to twirl and define individual curls around the crown, fringe, and temples, setting the curly mullet shape in place.
5. Attach a universal diffuser to your blow dryer using the collapsible hair diffuser attachment listed below, and dry on medium heat and low speed, cupping curls upwards without touching them directly.
6. Once the hair is 100% dry and has a slight gel cast, warm a few drops of lightweight hair oil in your palms using the lightweight jojoba hair oil listed below and gently scrunch the crunch to reveal soft, springy, dimensional ringlets.
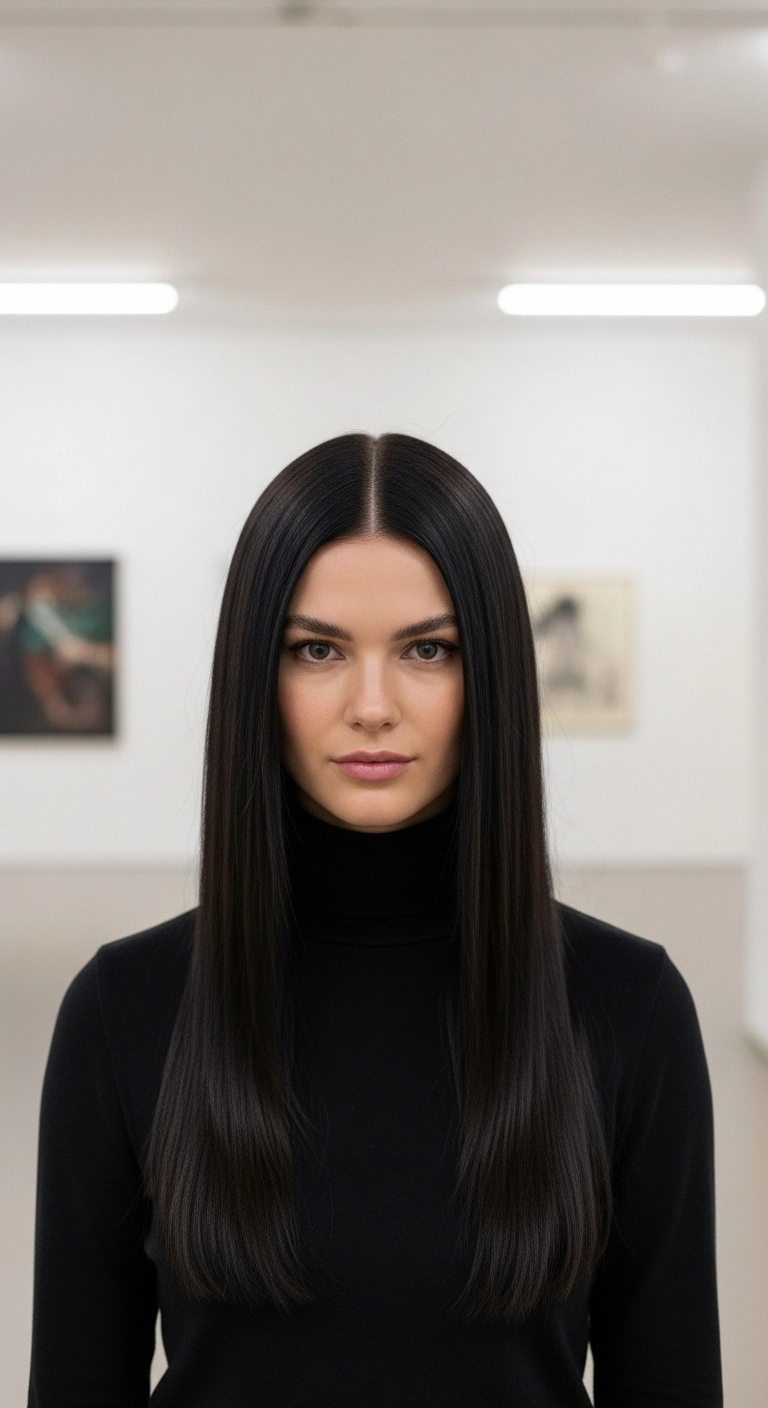
This sleek glass hair look is honestly pure perfection and so effortlessly chic! I am obsessed with the sharp middle part and that insane mirror-like shine against a dark turtleneck. If you have naturally straight or slightly wavy hair and want a super clean, powerful statement look, this is definitely the one for you!
How to do this
1. Start by washing your hair thoroughly and prepping damp strands with the smoothing blow dry cream listed below to lock out frizz and provide thermal protection.
2. Blow dry the hair straight down in sections using a paddle brush and directional concentrator nozzle, directing airflow from roots to ends for maximum cuticle flatting.
3. Use the tail comb listed below to carve out an ultra-precise, crisp center part straight down the middle of your head.
4. Mist thin vertical sections with the heat protectant spray listed below to shield hair from iron heat.
5. Pass a high-quality titanium flat iron down small 1-inch sections, following immediately behind a fine-tooth comb (the chase method) to achieve that glass-like, pin-straight finish.
6. Warm two to three drops of the high-shine hair serum listed below between your palms and smooth gently from mid-lengths down to ends to eliminate flyaways.
7. Set everything into place with a light mist of the anti-humidity finishing spray listed below to keep it sleek and frizz-free all day.
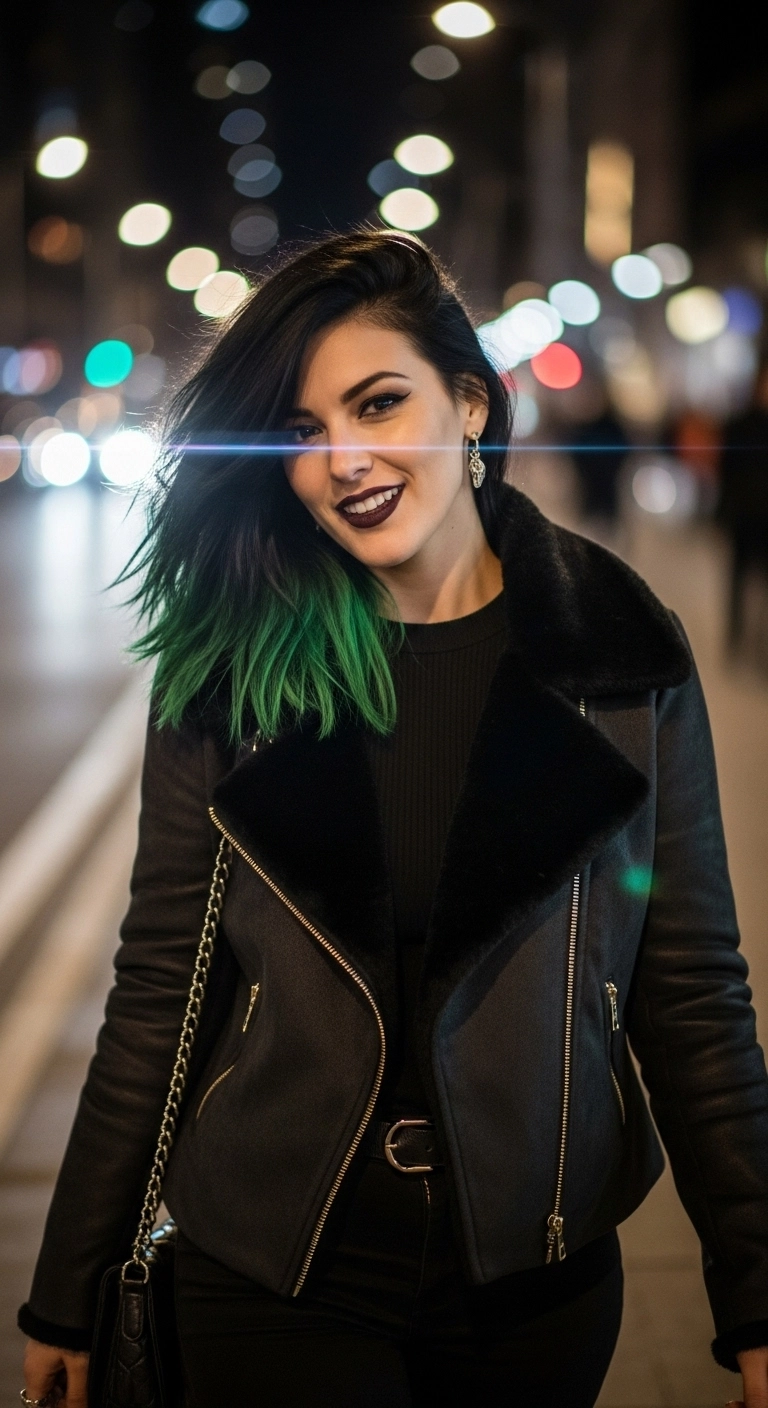
I fell in love with this punchy color combo when I was looking for a fun way to spice up dark hair without committing to an all-over bleach job. The vibrant emerald green dip-dye on the ends creates such a gorgeous contrast against the deep black roots! It gives off that perfect effortless grunge vibe with a deep side sweep. If you want a cool-girl pop of vivid color with low-commitment roots, you definitely have to give this style a try!
How to do this
1. Start by prepping damp hair with the lightweight volumizing mousse listed below, working it from roots to ends for lift and grip.
2. Blow dry the hair using the ceramic round brush listed below, focusing on lifting at the roots to establish a deep, dramatic side part.
3. Once dry, mist with the heat protectant spray listed below to shield colored strands from heat damage.
4. Take random sections and lightly bend them with a 1.25-inch flat iron or curling wand to create loose, piecey, undone texture rather than polished curls.
5. Rub a small amount of the matte styling wax listed below between your palms and piece out the emerald green ends to emphasize the choppy cut.
6. Finish with a generous spritz of the texturizing finishing spray listed below throughout the roots and mid-lengths for lasting volume and that effortless, lived-in edge.
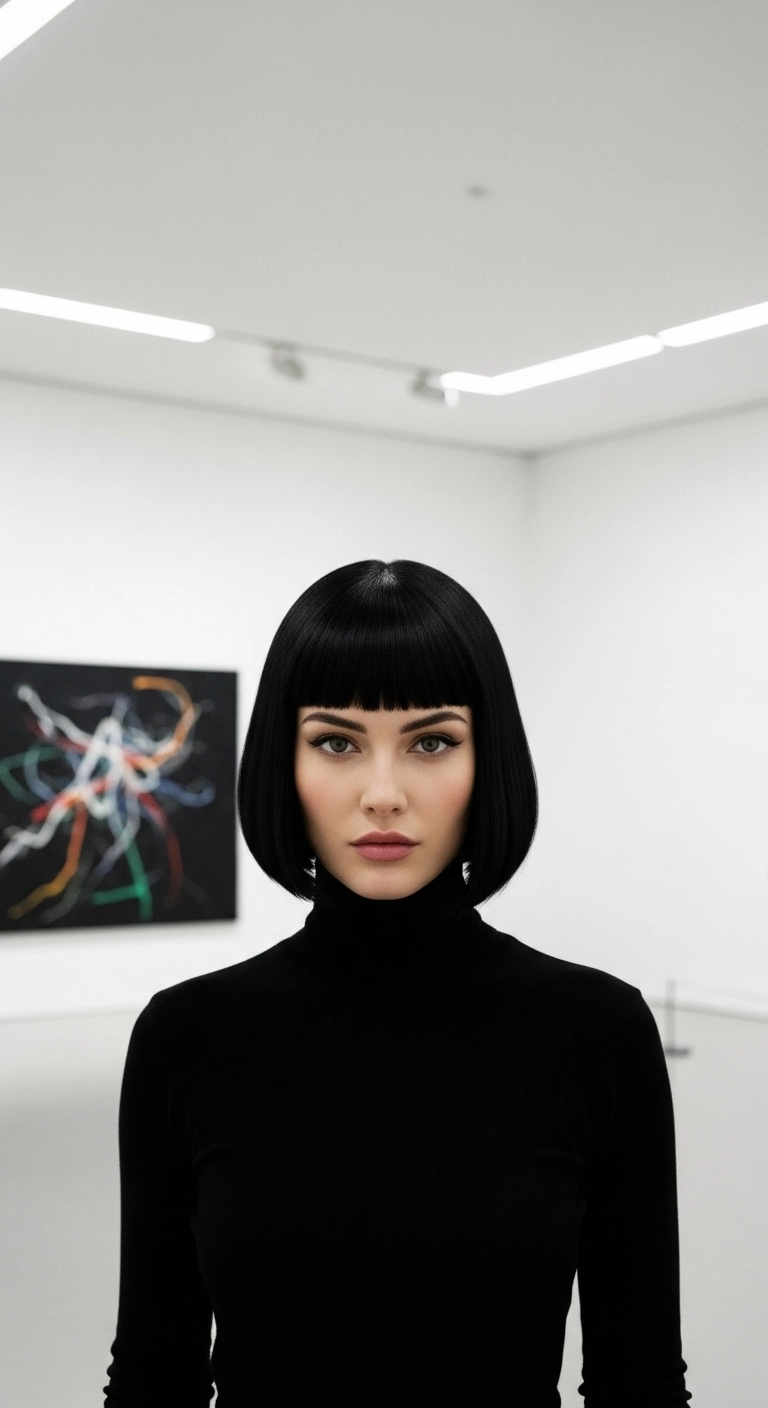
If you want that ultra-chic, high-fashion edge, this geometric jet black bob is it! The blunt bangs framing the eyes combined with an ultra-smooth finish gives major statement vibes while still being effortless to rock daily.
How to do this
1. Start by prepping freshly washed, damp hair with a smoothing blowout cream using the smoothing blowout cream listed below to protect against heat and banish flyaways.
2. Blow-dry the hair completely smooth using a precision flat nozzle and the ceramic round brush listed below, rolling slightly inward at the ends to create that subtle bevel.
3. Blow-dry the bangs straight down flat against the forehead using a fine paddle brush or comb to ensure they sit completely uniform and flat.
4. Section hair and pass a flat iron through small sections using the professional flat iron listed below at a low-to-medium heat setting to lock in extreme glass-like smoothness.
5. Finish by smoothing a tiny amount of the shine hair serum listed below through the lengths and mist lightly with the flexible hold hairspray listed below to keep every strand perfectly in place.
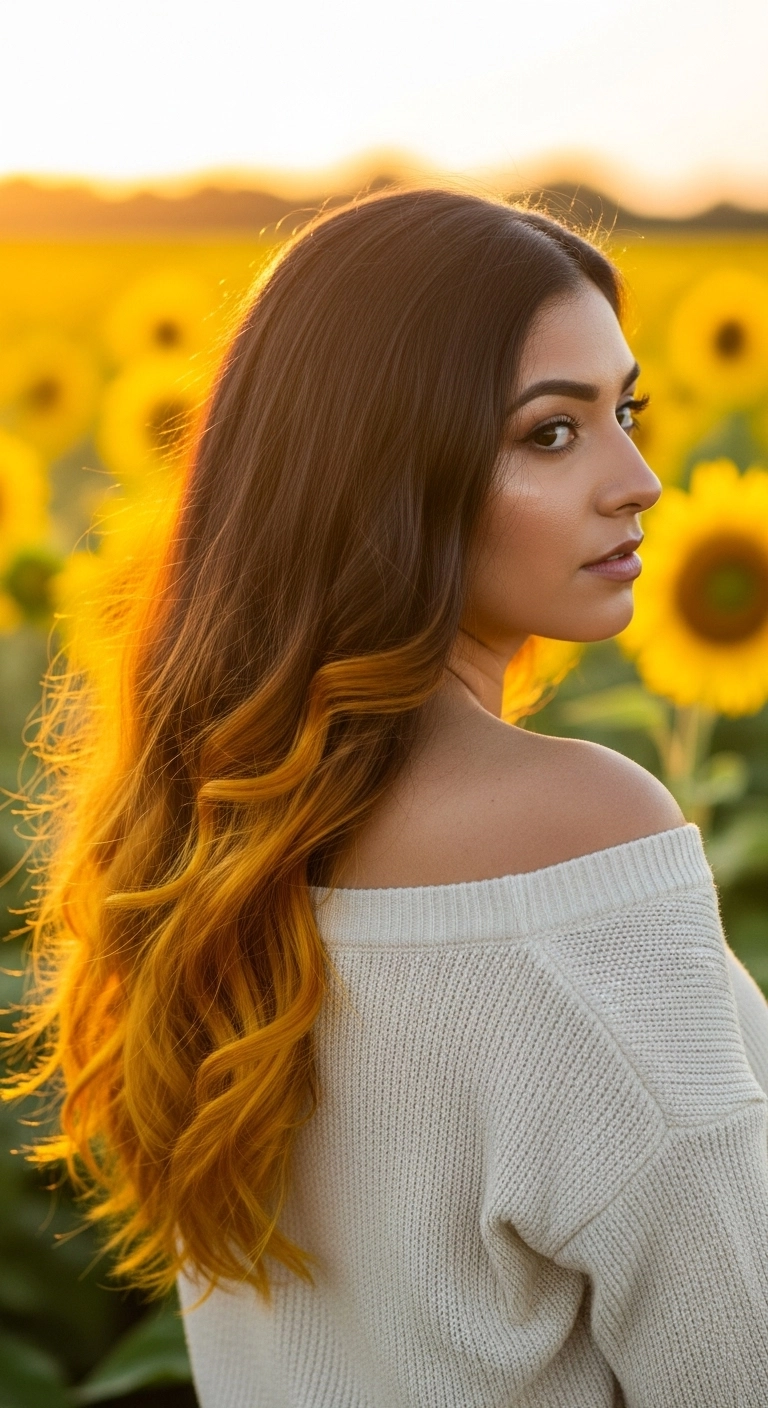
I fell completely in love with this look during a golden hour photoshoot out in the country. The contrast between deep chocolate roots and that pop of warm sunflower yellow on the ends is just incredible. It gives such a warm, sunny vibe without needing an all-over bleach job, and it looks insanely pretty curled into loose waves. If you want a fun splash of color that still feels cozy and effortless, you should definitely give this ombre a shot!
How to do this
1. Start with clean, damp hair and prep from roots to tips using the heat protectant blowout spray listed below to shield strands from hot styling tools.
2. Blow dry hair thoroughly with a round ceramic brush, directing the airflow down the hair shaft to lock in maximum shine and smoothness through the crown and mid-lengths.
3. For the vibrant sunflower ends, a stylist will pre-lighten the bottom section from shoulder level down using the hair lightening bleach kit listed below to achieve a pale blonde canvas before depositing a rich sunflower yellow semi-permanent dye.
4. Once dry and styled, section out the hair and use the 1.25-inch ceramic curling iron listed below to curl the mid-lengths and yellow ends away from the face, holding each section for just a few seconds.
5. Let the curls cool completely, then gently rake through them with the wide-tooth detangling comb listed below to transform them into soft, cascading ribbon waves.
6. Finish off by smoothing a few drops of the nourishing argan hair oil listed below through the ends for high-gloss shine, and mist lightly with the flexible hold finishing hairspray listed below to keep the waves bouncy all day long.
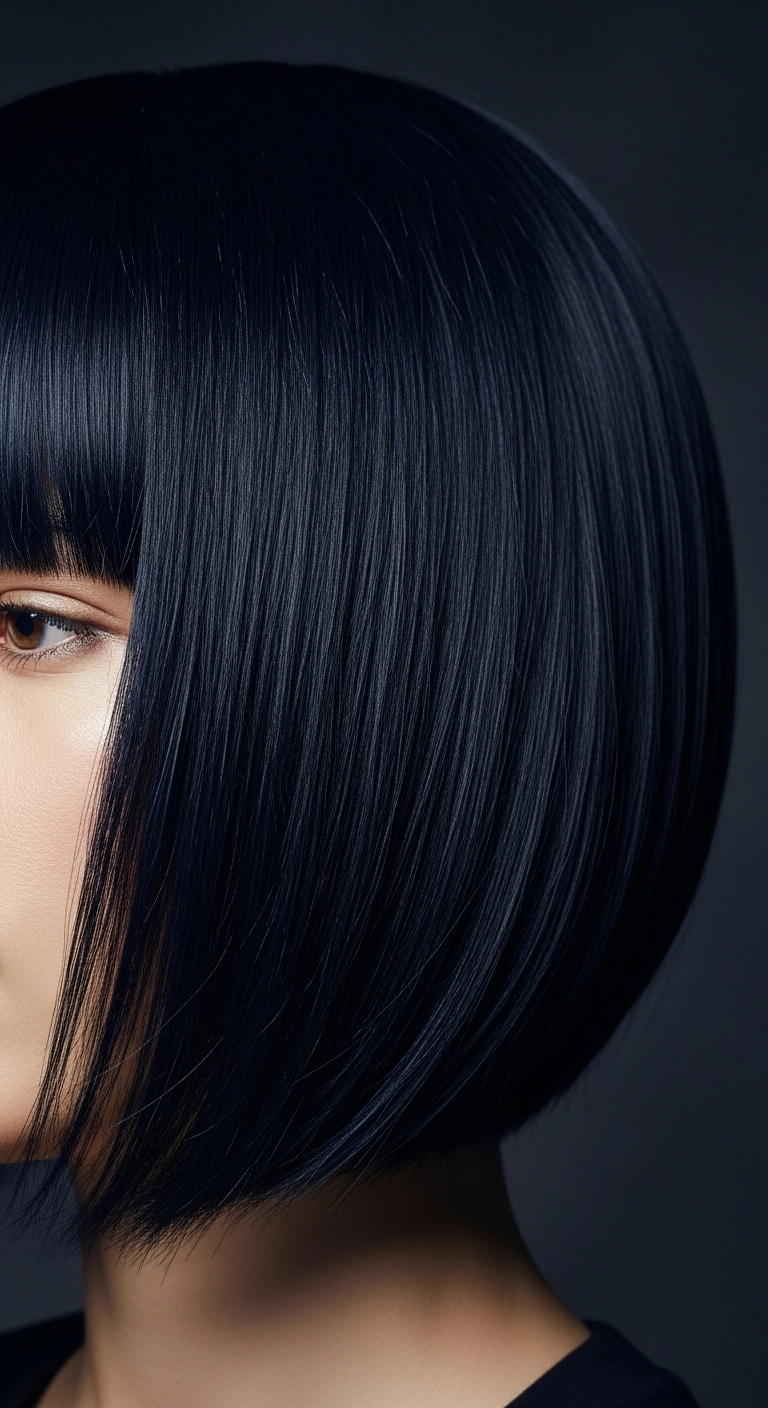
Nothing commands attention quite like a crisp, mirror-shine blunt bob! I love how the sharp brow-skimming bangs frame the eyes while that deep blue-black finish makes the entire cut look effortlessly futuristic and chic.
How to do this
1. Start by washing hair with a smoothing, frizz-control shampoo and conditioning thoroughly to create an ultra-sleek base.
2. Apply a dime-sized amount of the smoothing heat protectant serum listed below evenly throughout damp strands from roots to tips.
3. Blow-dry hair completely using a boar bristle round brush listed below, directing the airflow downward to flatten the cuticle and curve the ends slightly inward.
4. Clip hair into small, manageable horizontal sections and slowly glide the titanium flat iron listed below down each section at 380°F to get that signature glass-hair finish.
5. Precision-iron the blunt bangs straight down, slightly curving the ends inwards so they sit perfectly flat right at brow level.
6. Finish off by misting the high-shine finishing spray listed below and comb through with the fine-tooth rat tail comb listed below to tame any stray flyaways.
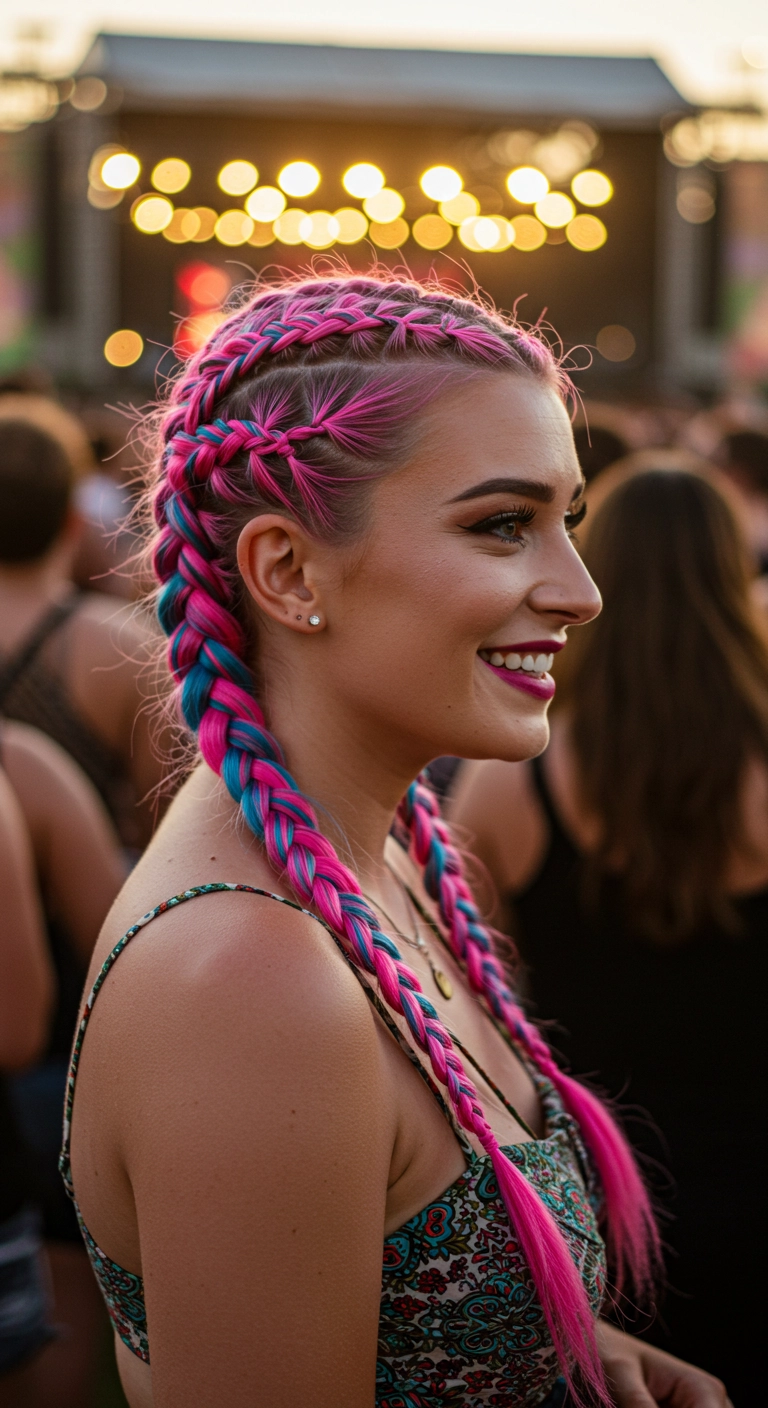
Festival braids are honestly the ultimate vibe when you want zero hassle and maximum impact. Adding colorful feed-in synthetic hair in electric pink and teal makes the entire look pop without any commitment to permanent color. Keep your parts super clean and use a bit of styling pomade on your roots so everything stays completely sleek and bounce-proof all day and night.
How to do this
1. Start by thoroughly detangling clean, dry hair using the wide-tooth detangling comb listed below to ensure every section is smooth and knot-free.
2. Create a crisp, straight center part from your forehead all the way down to the nape of your neck using the tail comb listed below, clipping one side out of the way.
3. Apply a small amount of the edge control smoothing pomade listed below along your hairline and down the parting line to keep flyaways tamed and provide grip.
4. Separate pre-stretched synthetic braiding hair in vibrant pink and teal shades. Take a small triangle section at the front hairline and begin a reverse three-strand Dutch braid, crossing strands under the middle.
5. As you work down the scalp, gradually feed in small sections of the colorful braiding hair along with your natural hair, maintaining firm, consistent tension.
6. Once you reach the nape of the neck, continue braiding the three strands under one another over your shoulder, securing the end with a small clear elastic band.
7. Repeat the exact same steps on the opposite side to create an even, matching twin braid look.
8. Mist the completed style generously with the firm hold finishing hairspray listed below to lock everything into place for an all-day festival hold.
Products Used
Synthetic Braiding Hair Extensions in Neon Pink and Aqua
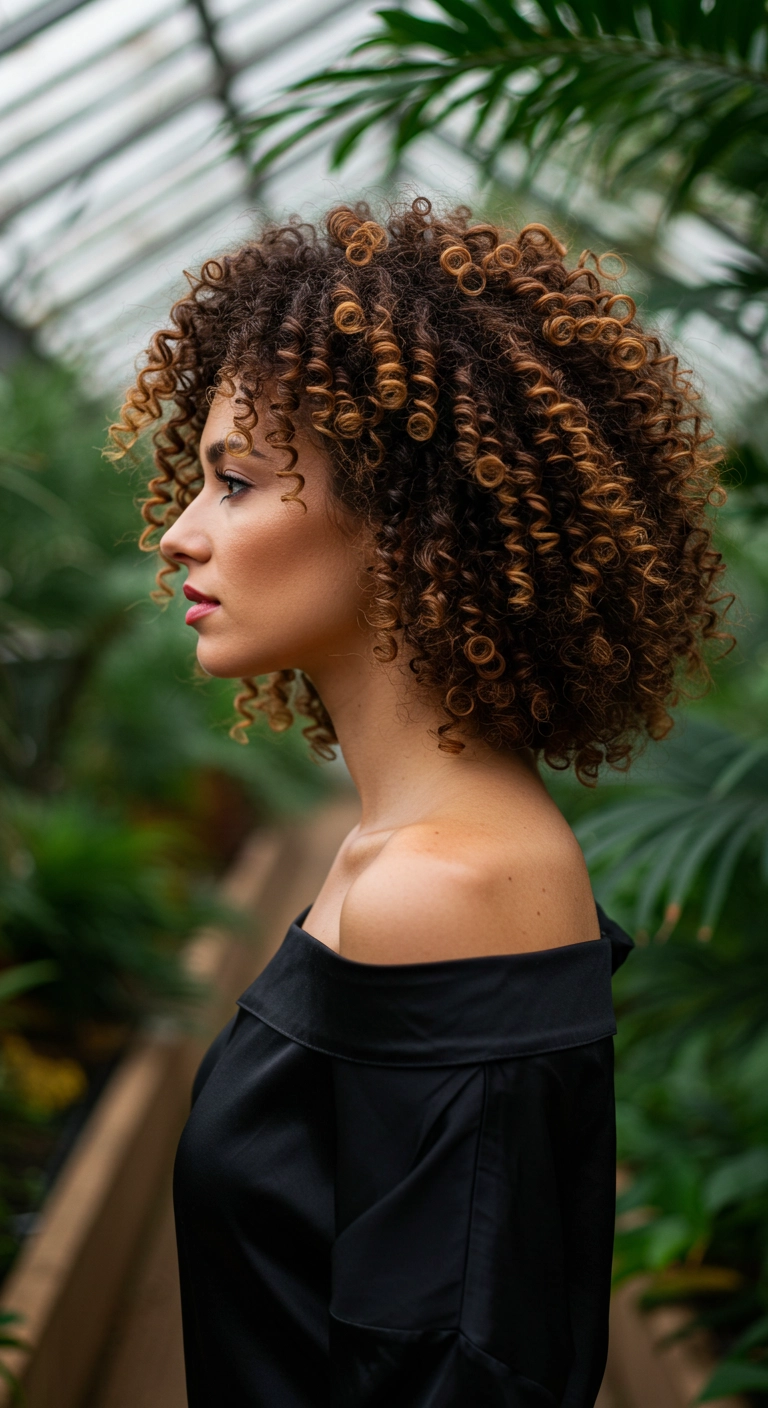
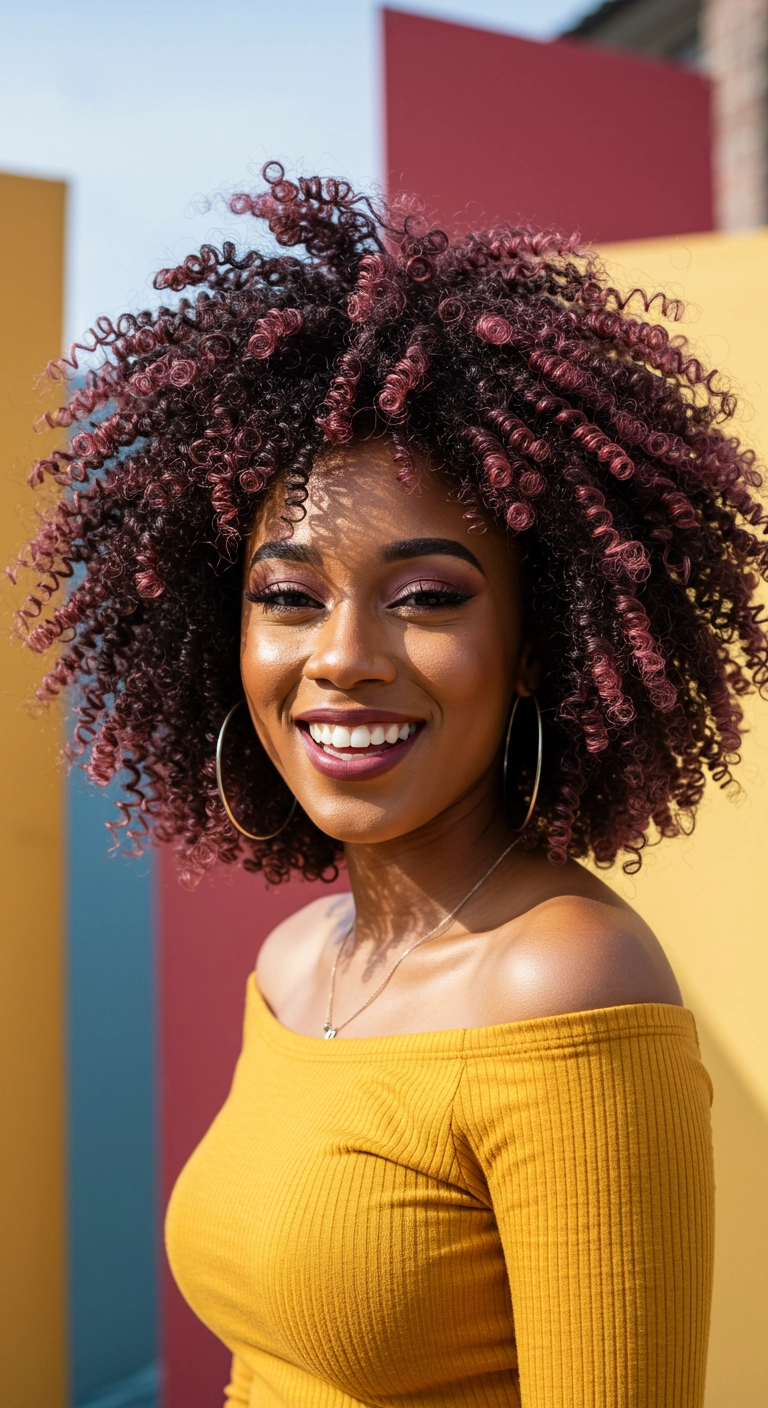
I am completely obsessed with this bouncy, defined curly bob! The warm honey and caramel pintura highlights catch the light so beautifully and give every single spiral ringlet so much depth. If you have thick natural curls and want a cut that feels light, playful, and super stylish without weighing you down, this silhouette is pure perfection!
How to do this
1. Start by washing and deeply conditioning your hair with a hydrating, sulfate-free curl cleanser to build maximum moisture foundation.
2. On soaking wet hair, apply a generous amount of the curl defining leave-in cream listed below from roots to tips, using your fingers to rake and detangle.
3. Section by section, smooth a dime-sized amount of the strong hold styling gel listed below down each curl bundle, then gently finger-coil specific front and crown sections around your index finger to encourage tight, uniform ringlets.
4. Use the microfiber hair drying towel listed below to gently scrunch out excess water without creating unwanted friction or frizz.
5. Attach the professional collapsible curl diffuser listed below to your blow dryer, tipping your head side-to-side and diffusing on low heat and medium airflow until 90% dry.
6. Once the gel cast is fully set and dry, put 2-3 drops of the lightweight nourishing hair oil listed below between your palms and gently scrunch the curls to break the crunch, fluffing roots with an afro pick for dramatic, bouncy volume.
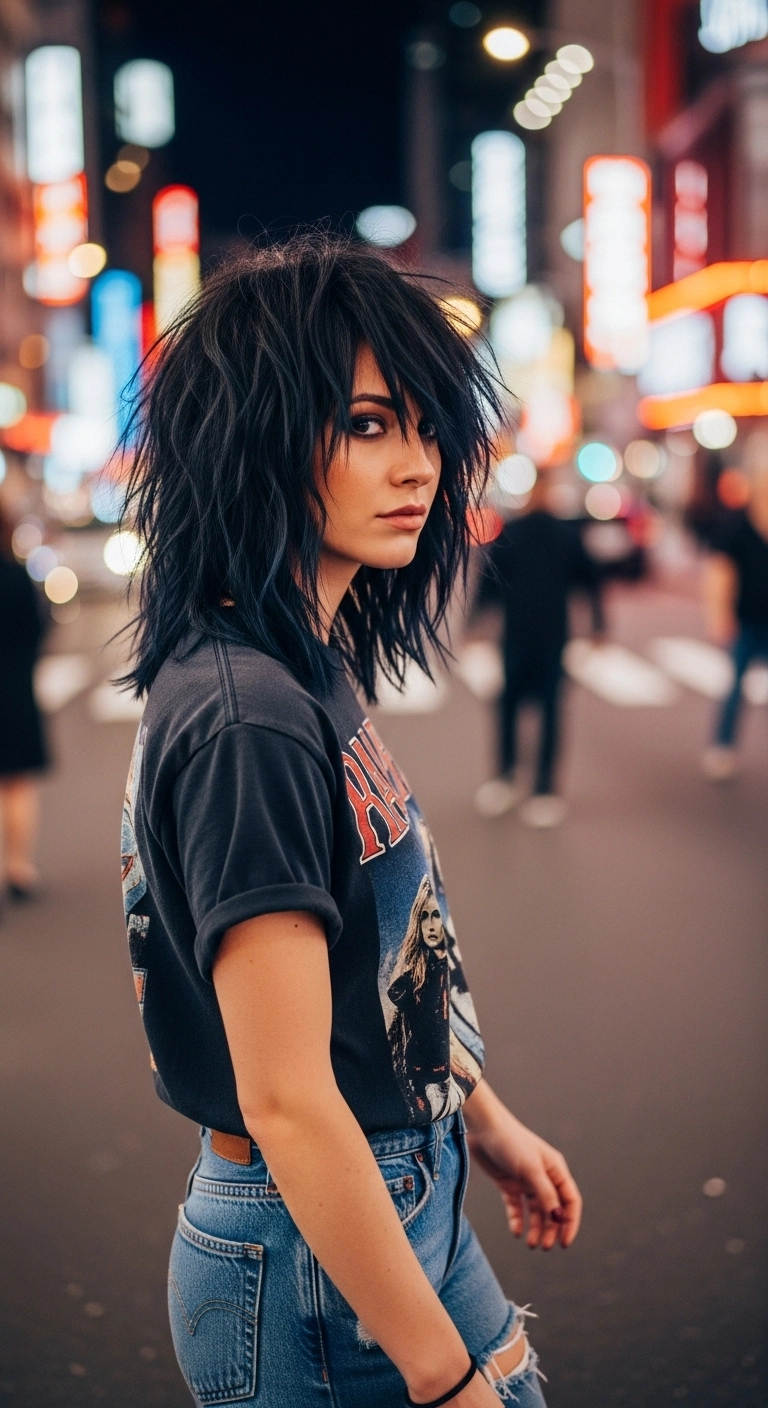
Total 80s rock-and-roll icon vibes right here. I’ve always been obsessed with heavy shag layers, and pairing that chopped-up fringe with deep inky black is just unmatched. It’s got that cool, lived-in bedhead volume that looks effortlessly cool paired with a graphic tee. Seriously, if you want something with tons of attitude and movement, this cut is it.
How to do this
1. Start on freshly washed, towel-dried hair and apply a golf-ball-sized dollop of the texturizing styling foam listed below from roots to ends for gritty body.
2. Flip your head upside down and rough-dry using a blow dryer with a concentrator nozzle, vigorously shaking your roots with your fingers to build maximum crown lift.
3. Once the hair is fully dry, take random 1-inch pieces and use a flat iron to create subtle, alternating bends and jagged flicks rather than smooth curls.
4. Generously mist the dry texturizing spray listed below throughout the mid-lengths and root area, flipping your head back and forth to disperse the grit.
5. Work a small dime-sized amount of the matte styling wax listed below between your palms and pinch individual tips around your fringe and outer layers to define that signature piecey, razor-cut texture.
6. Finish with a spritz of the flexible hold hairspray listed below to keep the edgy rock-and-roll volume intact all night.
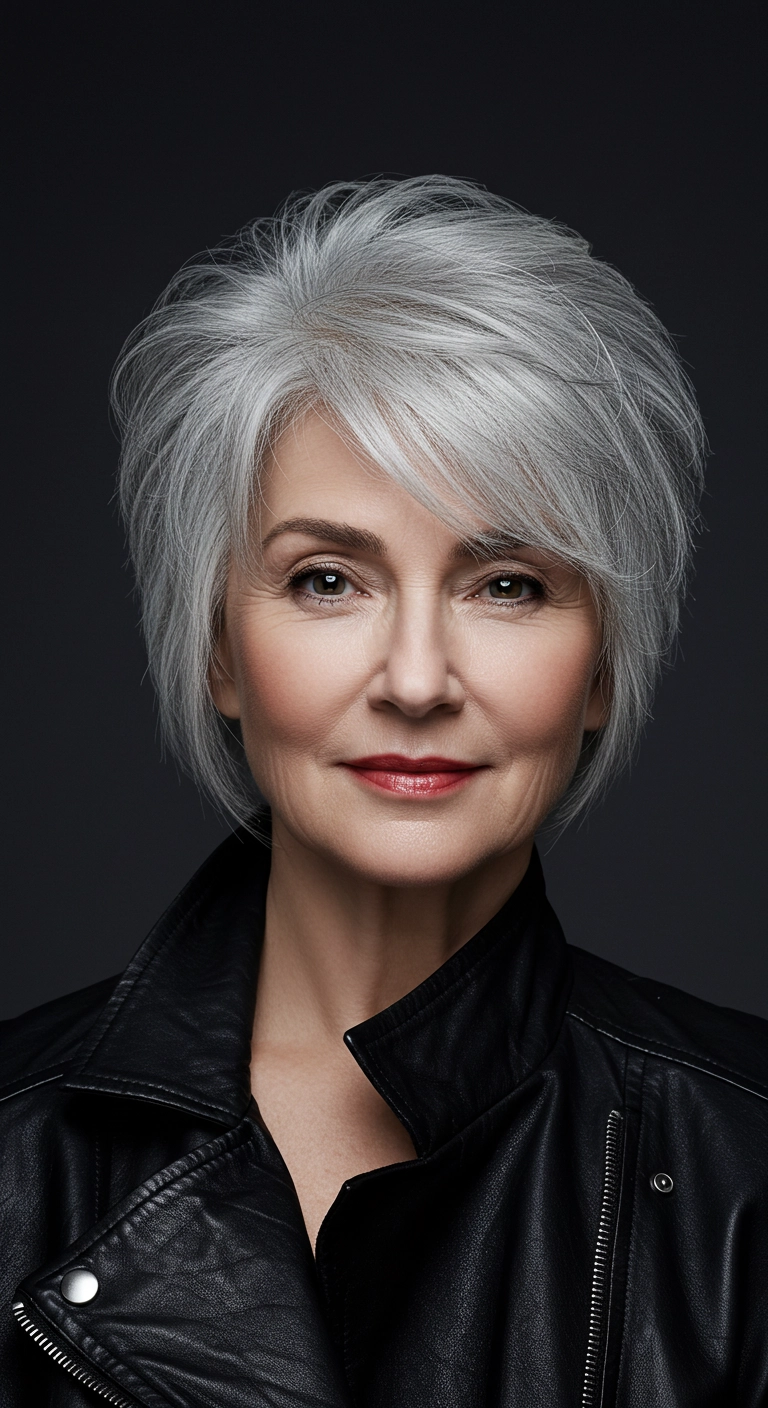
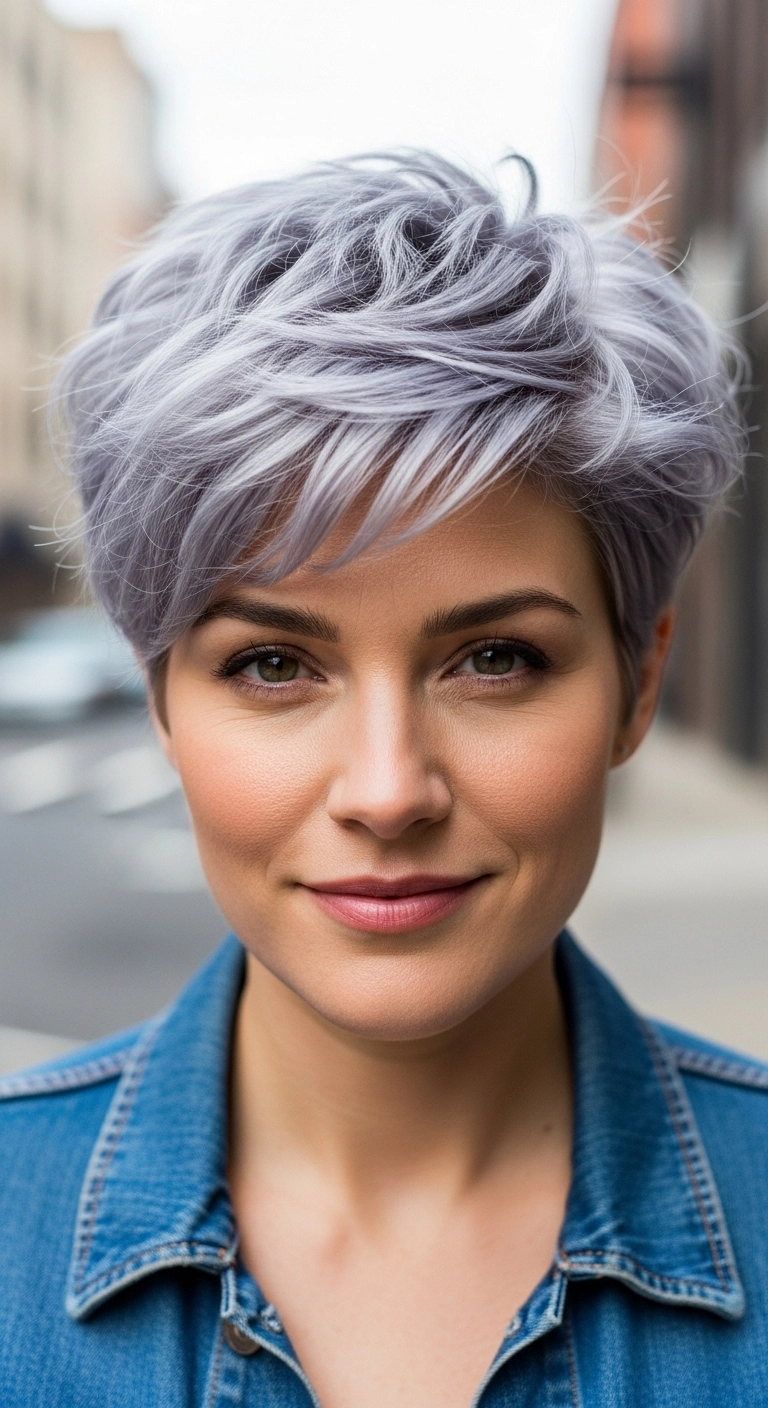
A chic, edgy silver bixie cut that brings all the volume and sophistication. I love how the feathered layers create instant lift at the crown while keeping the edges sleek around the jawline. Paired with a leather jacket, it’s giving confident rock-and-roll elegance without having to spend hours styling.
How to do this
1. Start on freshly washed, damp hair and prep with a lightweight volumizing mousse listed below, focusing on the roots to build that gorgeous crown height.
2. Mist through a heat protectant spray listed below from roots to ends before touching any hot tools to keep your silver strands super bright and healthy.
3. Using a small-to-medium ceramic round brush listed below and a blow dryer with a concentrator nozzle, lift sections upward at the crown and blow-dry against the natural fall to maximize lift.
4. Blow-dry the side-swept front bangs over to one side, curving the ends gently back and away from the face to create that soft, face-framing sweep.
5. For the side sections, direct the airflow downwards and curve the brush gently under towards the jawline for a tailored, tapered silhouette.
6. Emulsify a dime-sized amount of the lightweight styling paste listed below between your fingers, then piece out the ends and smooth down any unruly flyaways around the ears.
7. Lock in the volume and airy movement with a quick spritz of the flexible hold hairspray listed below all over.
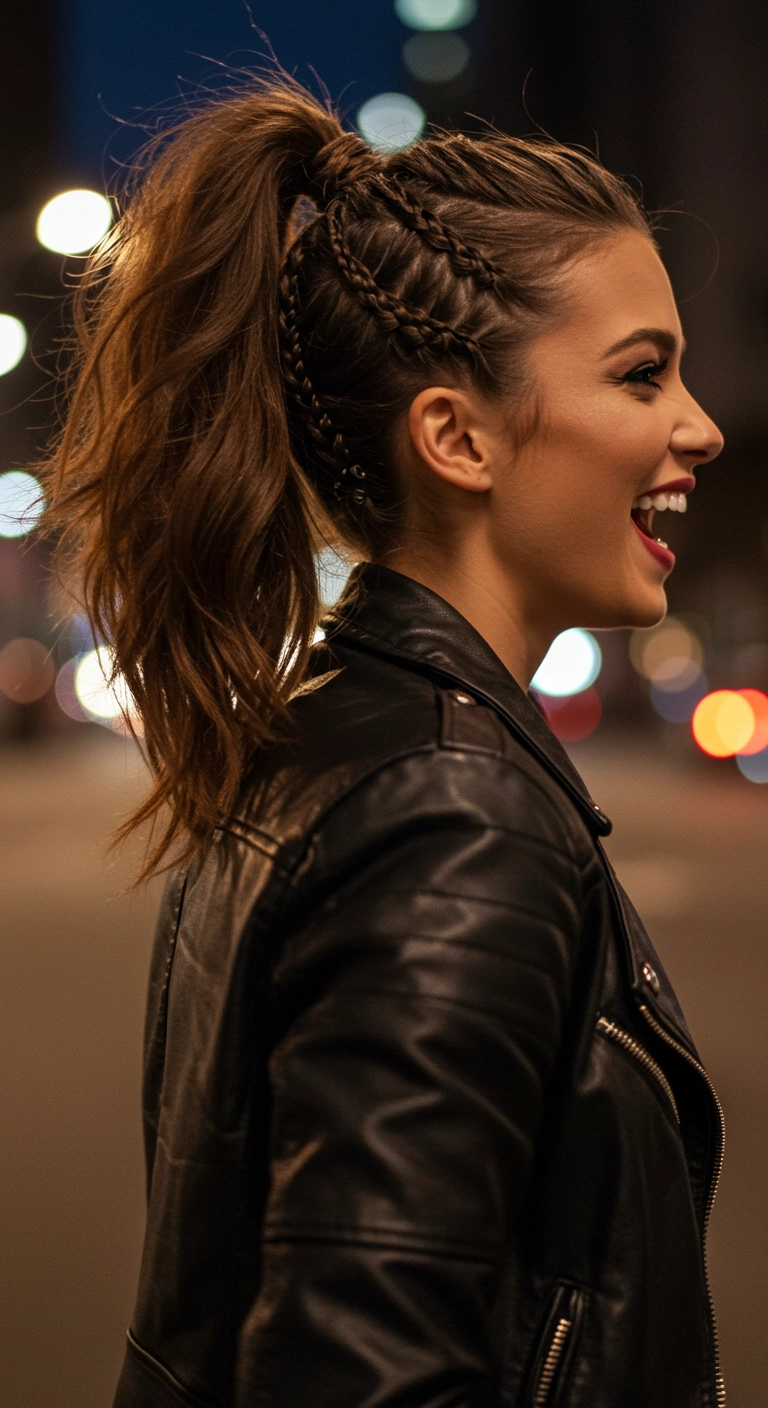
The braided high ponytail. So edgy and cool! I love how the tight side braids give it a fierce rocker vibe while keeping all your hair securely pulled back. Perfect for concert nights or when you want your ponytail to have that extra punch of attitude.
How to do this
1. Prep dry, clean hair with a light texturizing spray using the dry texturizing spray listed below to give your strands extra grip and volume.
2. Section off the sides above the ears into two to three distinct diagonal parted rows using a fine-tooth rat tail comb.
3. Braid each side section into tight Dutch cornrows moving backward and upward toward the crown of your head, securing each with a tiny elastic.
4. Gather the remaining hair along with the ends of the side braids up into a high ponytail at the crown, securing firmly with a strong elastic.
5. Take a small 1-inch section of hair from underneath the ponytail and wrap it around the base to conceal the elastic band, pinning it discreetly underneath with a bobby pin.
6. Use a 1.25-inch curling wand to add loose, undone bends through the ponytail lengths, then finger-comb to break them up into effortless waves.
7. Finish the entire style by misting with a flexible hold hairspray listed below to lock in the edge and keep flyaways controlled.
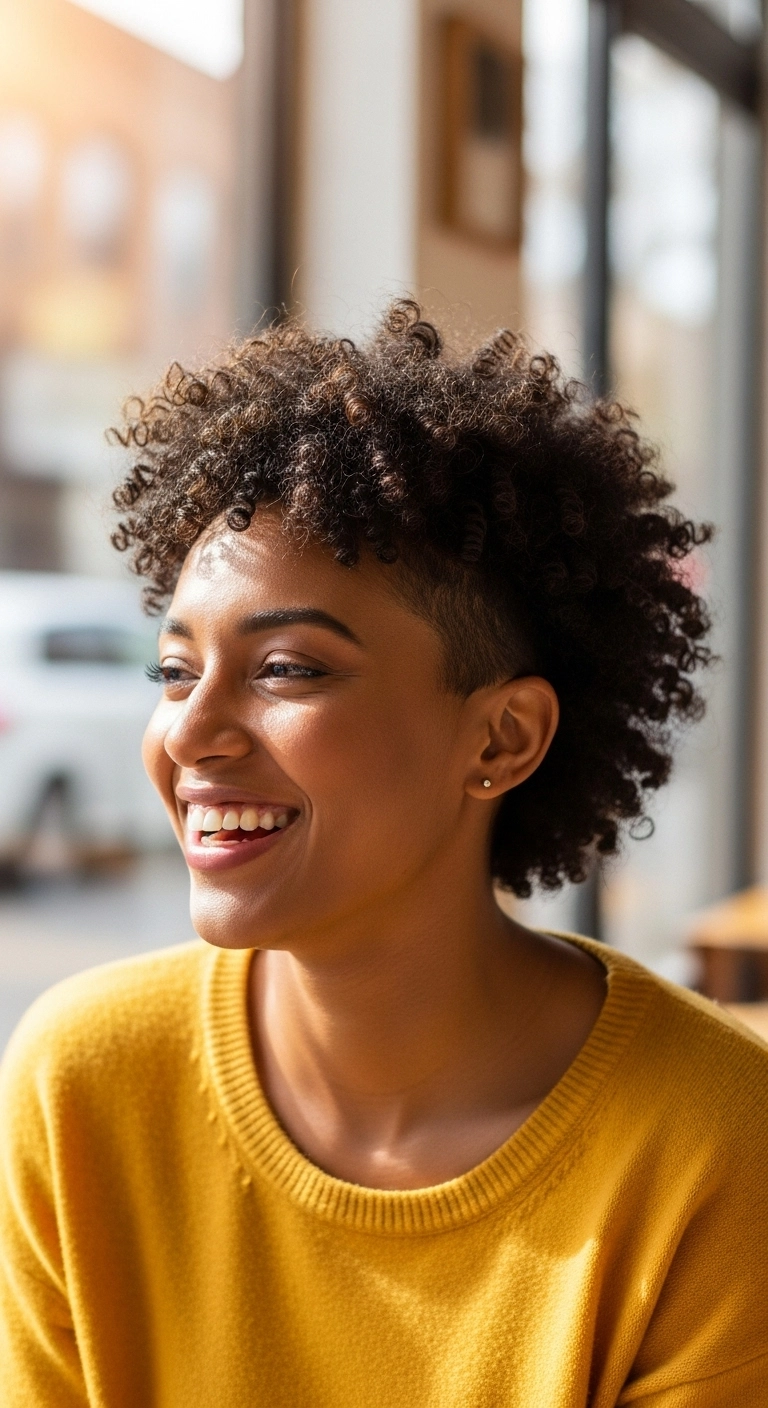
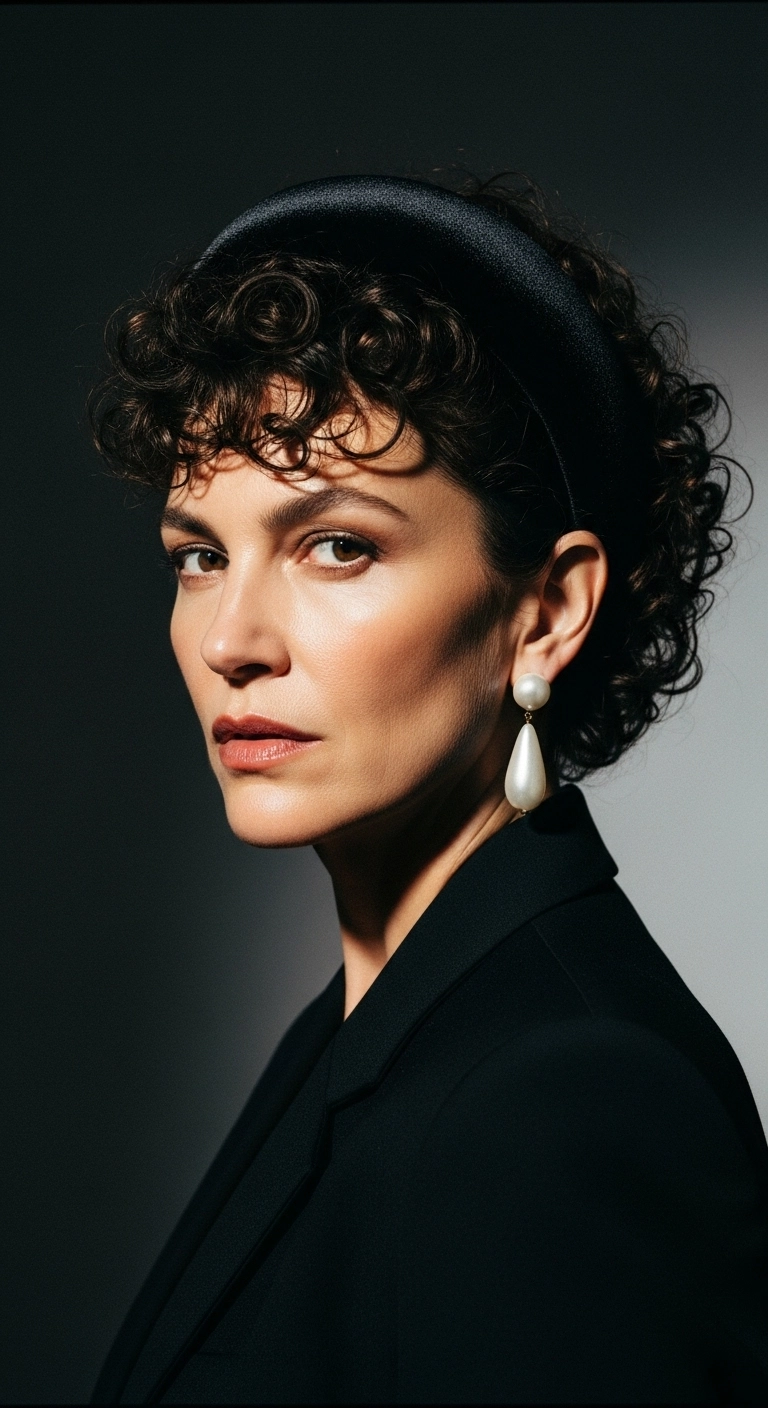
I am completely obsessed with this tapered curly cut!! The contrast between the closely shaved undercut along the temples and the full, bouncy crown of tight curls is just so fresh and stylish. It's the perfect way to show off your natural curl pattern while keeping things super lightweight, edgy, and effortlessly cool.
How to do this
1. Start by prepping cleanly washed, damp hair using the curl defining leave-in cream listed below to provide maximum slip and intense moisture.
2. Section out the longer top and crown curls, keeping the closely buzzed undercut sides neat and clean.
3. Apply a dollop of curl defining styling gel listed below in small sections, finger-coiling or shingling the curls to encourage bouncy spiral definition.
4. Allow a few curled pieces to fall naturally forward across your forehead to frame your face softly as baby bangs.
5. Attach a diffuser to your blow dryer using the universal hair diffuser attachment listed below on low speed and medium heat, gently cupping the curls upward without disturbing the pattern.
6. Once fully dry, massage a few drops of the nourishing lightweight hair oil listed below between your palms and gently scrunch the curls to break any gel cast, adding softness and luminous shine.
Products Used
Curl Defining Leave-In Conditioner
curl defining leave in conditioner for 3c 4a curls