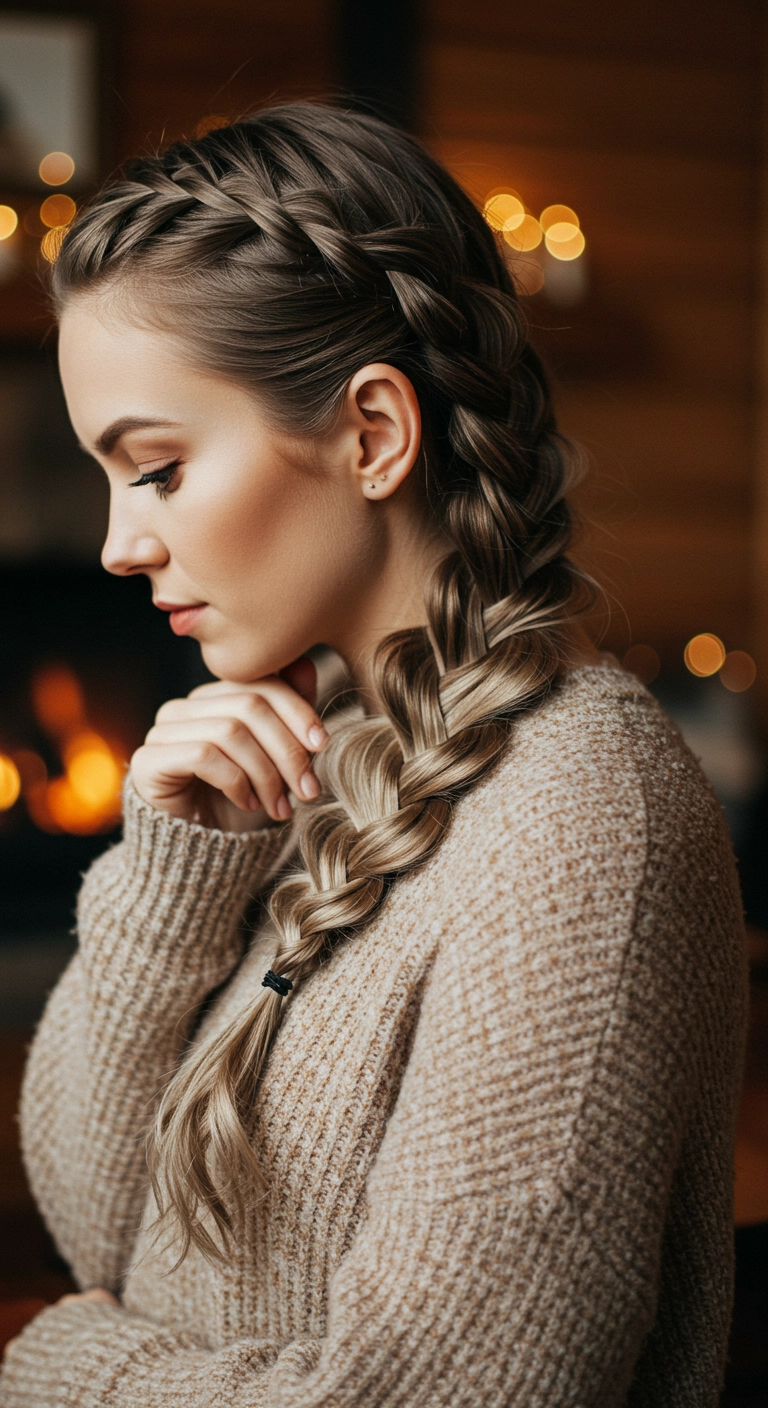
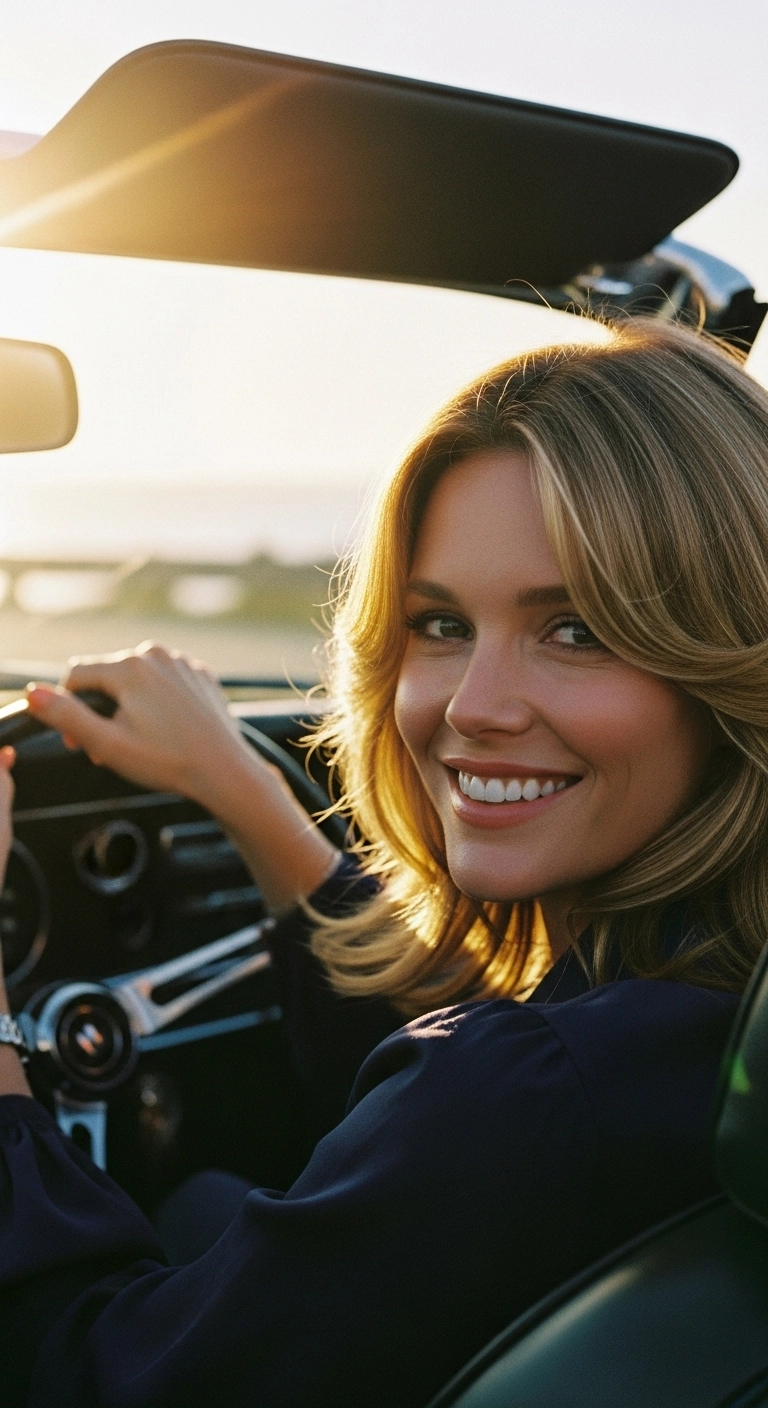
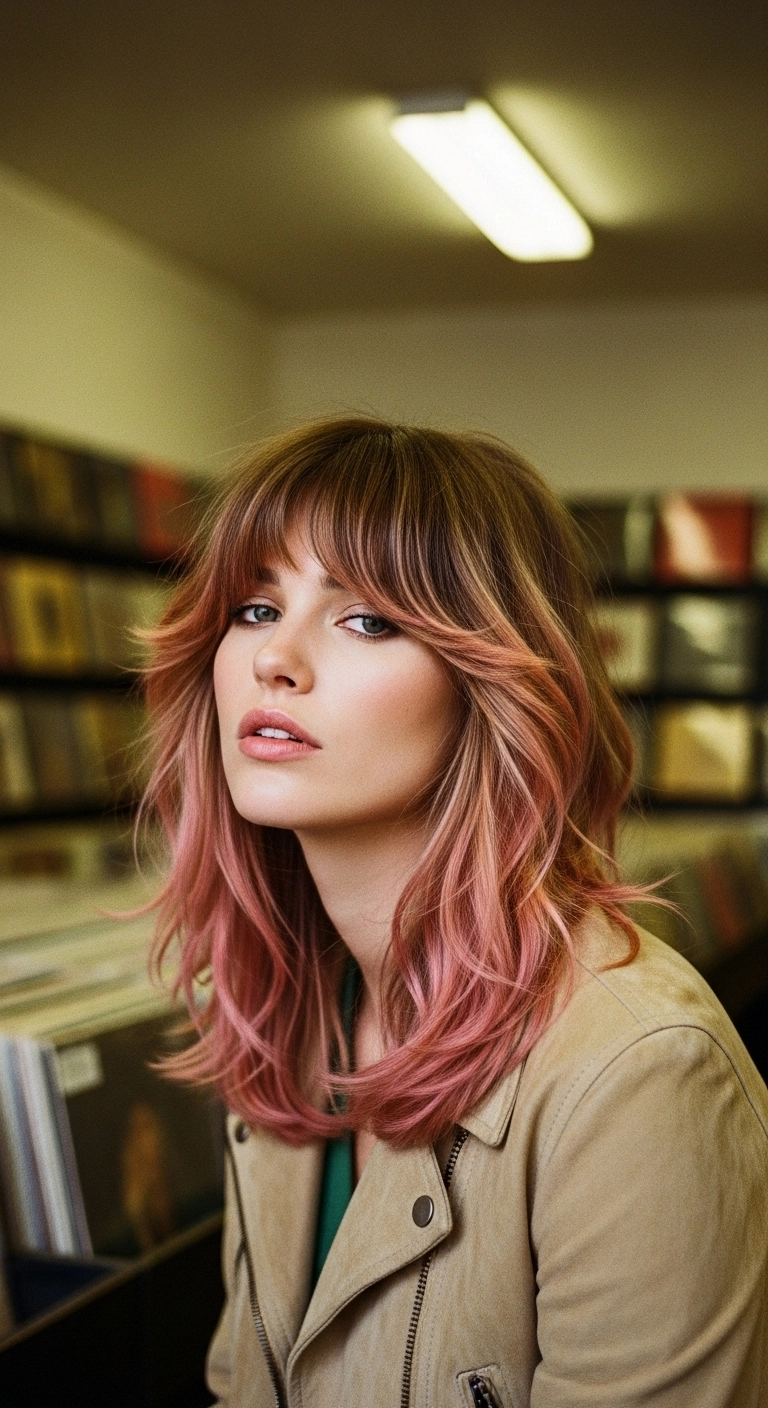
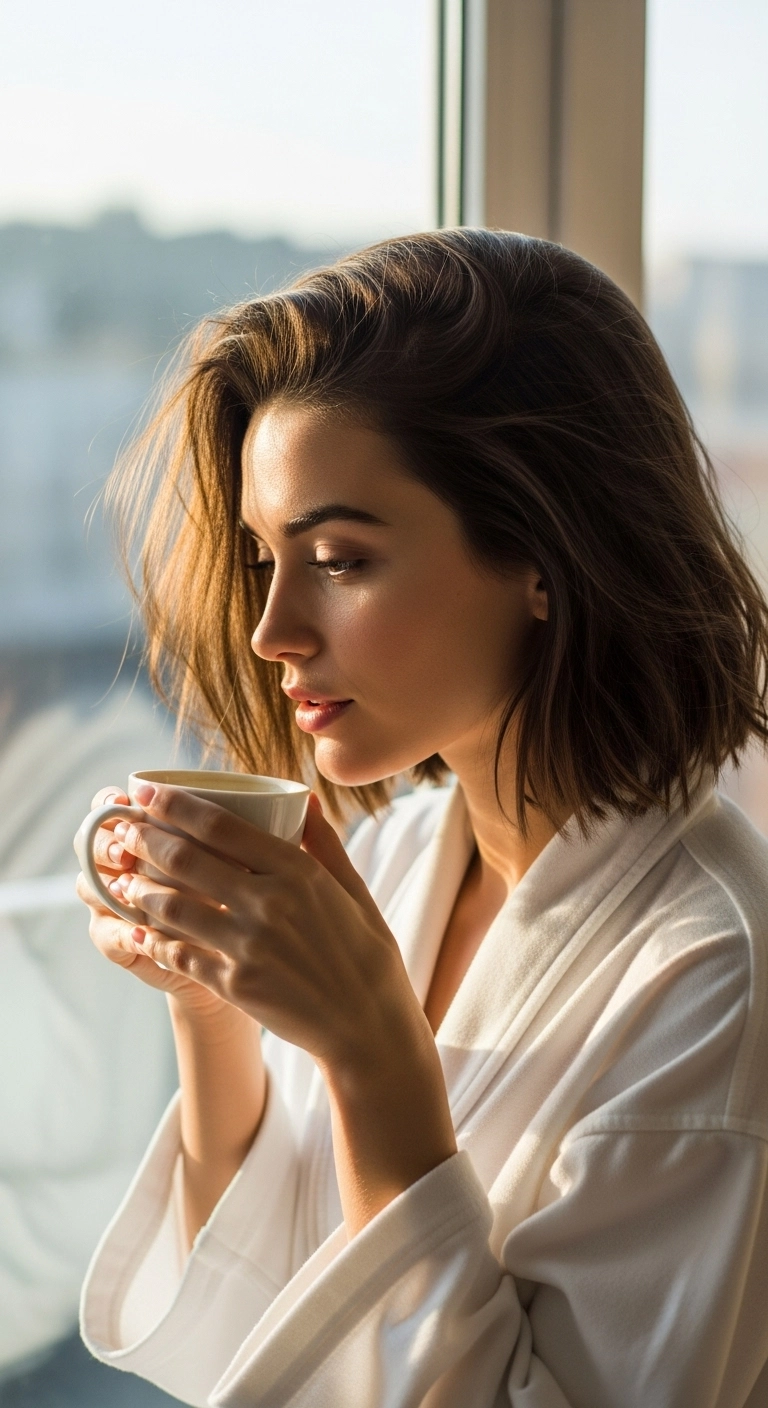
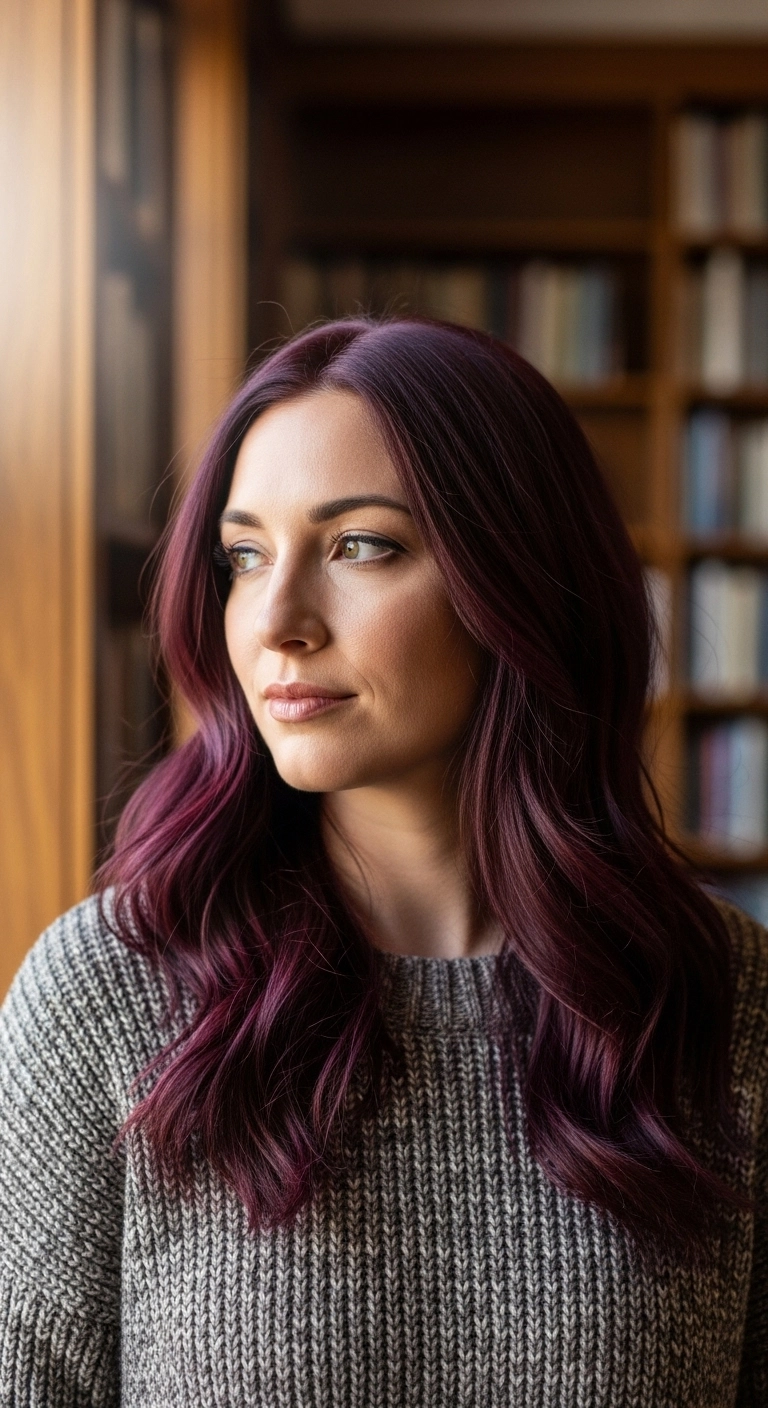
This hairstyle is what I like to call the cozy fireside side braid. You start right along your front hairline, weaving a reverse French or Dutch braid so the plait pops right off your head. Gather all your hair diagonally down around your ear and pull it over your shoulder. Once you tie off the end, just gently pancake the outer edges to make it look effortlessly full and thick.
How to do this
1. Prep your dry hair by misting lightly with the dry texturizing spray listed below to give your strands extra grip and volume.
2. Create a deep side part or angle the hairline back, then take a three-inch section of hair right along the front hairline.
3. Divide this piece into three equal strands and begin a Dutch braid (crossing the side strands under the middle strand) to make the braid sit prominently on top.
4. As you work your way down around the curve of your head and behind your ear, continuously incorporate small sections of hair into the outer strands.
5. Direct the braid diagonally across the nape of your neck so that all remaining hair gathers neatly over one shoulder.
6. Continue braiding down the length of your hair as a standard three-strand braid, leaving about two to three inches at the end.
7. Secure the end tightly using the small elastic hair ties listed below.
8. Gently pull and tug on the outer loops of the braid (pancaking) to widen the stitches and create that soft, thick, dimensional look.
9. Finish with a spritz of the flexible hold hairspray listed below to tame flyaways while keeping the style flexible and cozy.
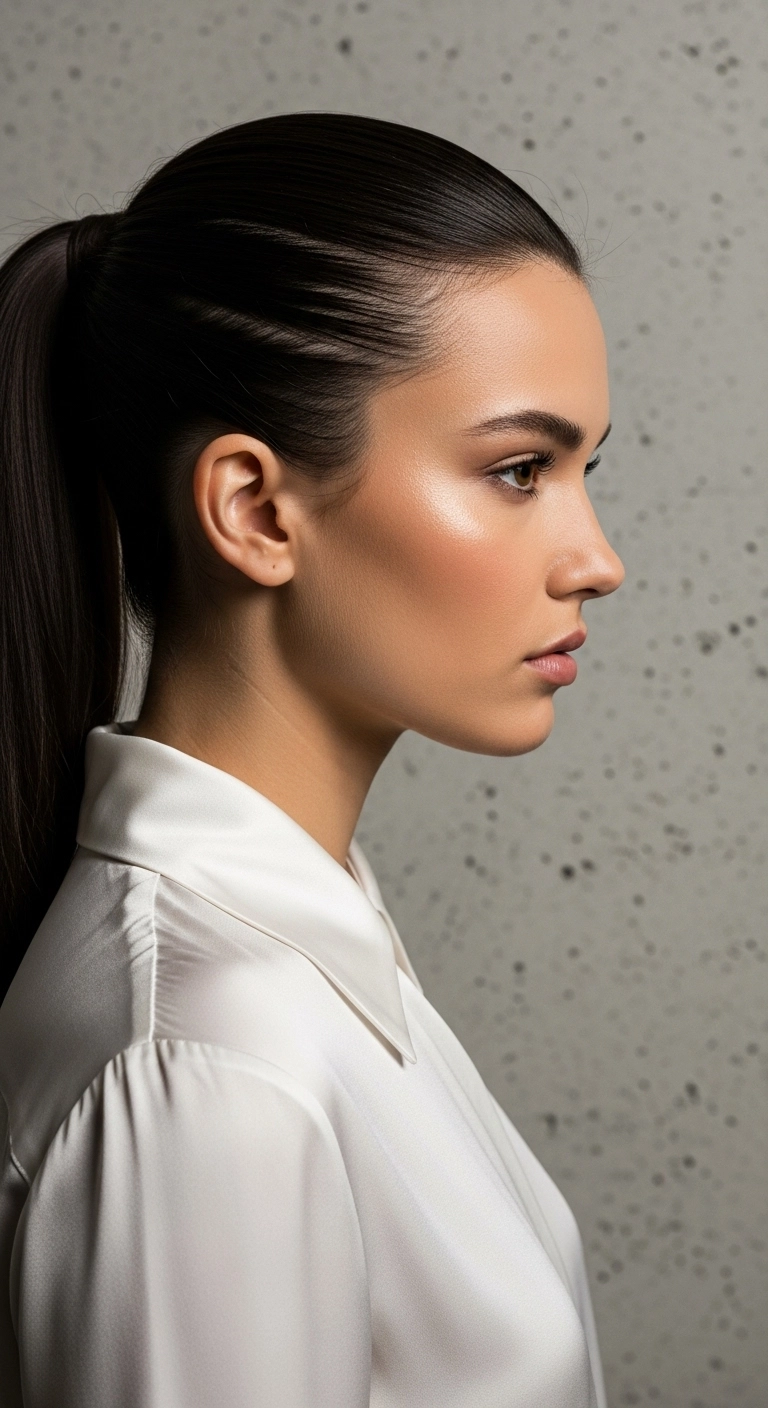
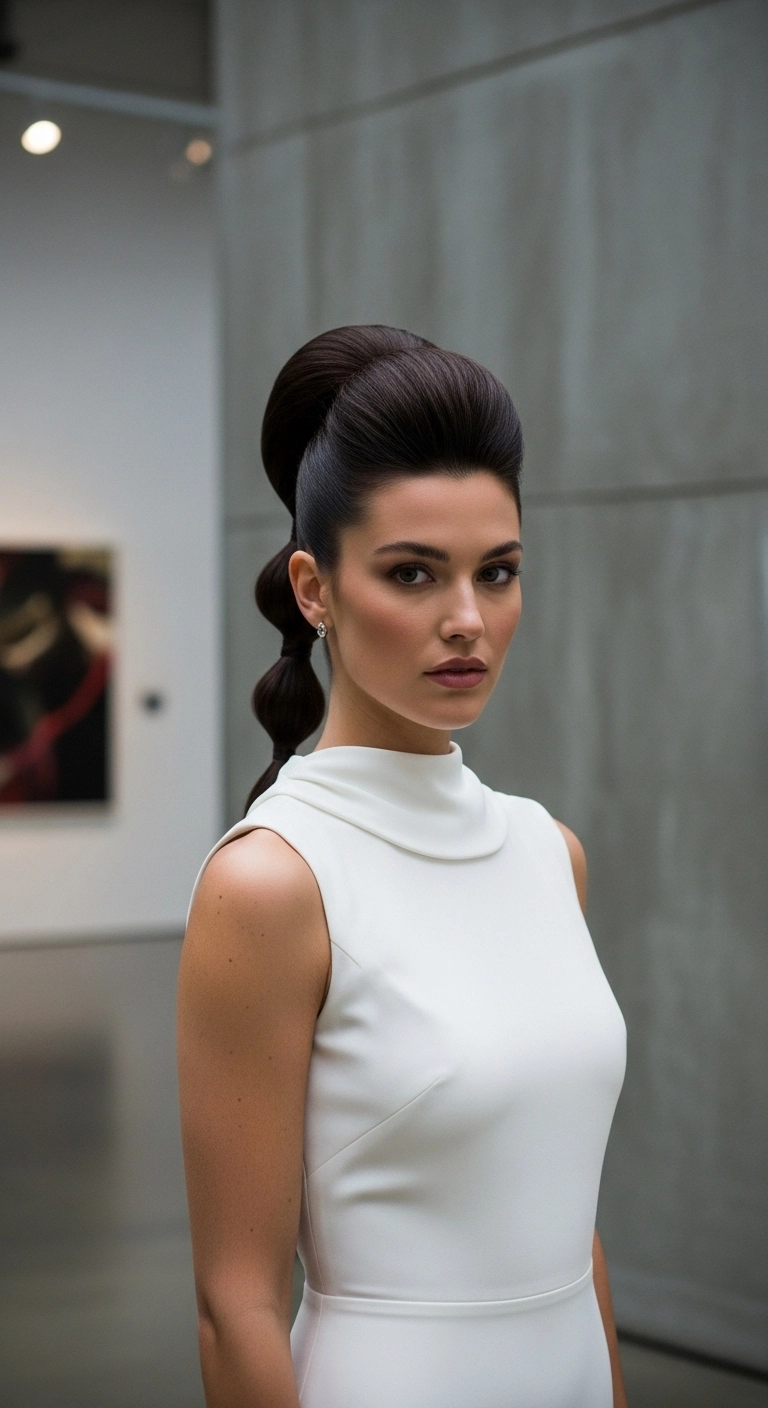
I’m honestly obsessed with this hairstyle. It gives that ultimate clean girl, snatched vibe that instantly elevates your entire face. It's chic enough to rock on a red carpet or at a formal event, but honestly looks just as amazing paired with a crisp button-down for the office or a casual dinner date. It's sophisticated, polished, and surprisingly quick to pull together once you get the brushing technique down.
How to do this
1. Start by prepping damp hair with a smoothing blow-dry cream listed below and blow it out straight using a round brush or paddle brush.
2. Once completely dry, run a flat iron through small sections to get that glass-like, pin-straight finish.
3. Apply a small amount of sleek styling pomade or hair wax listed below to your roots, temple, and hairline area.
4. Using the boar bristle smoothing brush listed below, sweep all your hair upward and back towards the crown, working section by section to eliminate any lumps or bumps.
5. Secure tightly at the crown with a strong snag-free elastic hair tie listed below.
6. Take a small half-inch piece of hair from underneath the ponytail and wrap it cleanly around the base to hide the hair tie, pinning it underneath with a bobby pin.
7. Finish the look by misting a strong-hold sleek hairspray and high-shine glossing mist listed below to tame every single flyaway and lock in incredible shine.
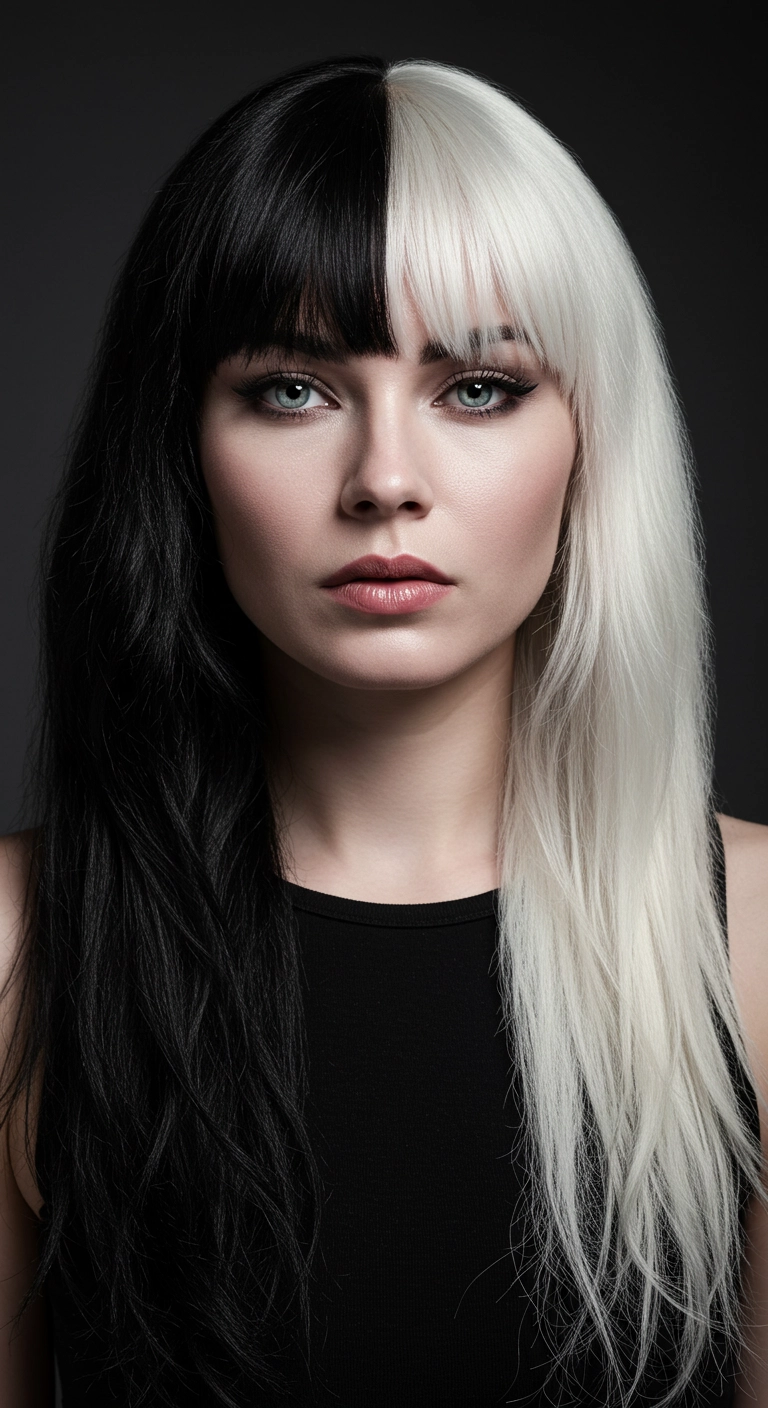
If you are ready to make a bold statement, this dual-tone split dye look is the ultimate cool-girl style. The high-contrast black and crisp white hair creates maximum drama, especially when paired with neat, eyebrow-skimming bangs. It definitely takes some commitment to maintain both shades, but the head-turning payoff is worth every minute in the salon chair.
How to do this
1. Start by parting clean, dry hair precisely down the center from the front hairline all the way to the nape of the neck using the rat tail comb listed below.
2. Secure the side you plan to dye black completely out of the way to avoid any accidental bleach transfer.
3. Apply lightener to the opposite half to achieve a clean pale yellow base using the hair bleach kit listed below, following all development safety times.
4. Tone the lightened side to an icy, stark white finish using the purple toning hair mask listed below, while simultaneously applying a rich jet black semi-permanent color to the untouched side.
5. Cut straight-across blunt bangs hitting just at the eyebrow line across both colored sections, ensuring the center split remains razor-sharp.
6. Mist damp hair with the heat protectant spray listed below before blow-drying straight with a paddle brush.
7. Finish the look by running a ceramic flat iron down the lengths and smoothing flyaways with the lightweight hair serum listed below to keep both contrasting sides looking sleek and polished.
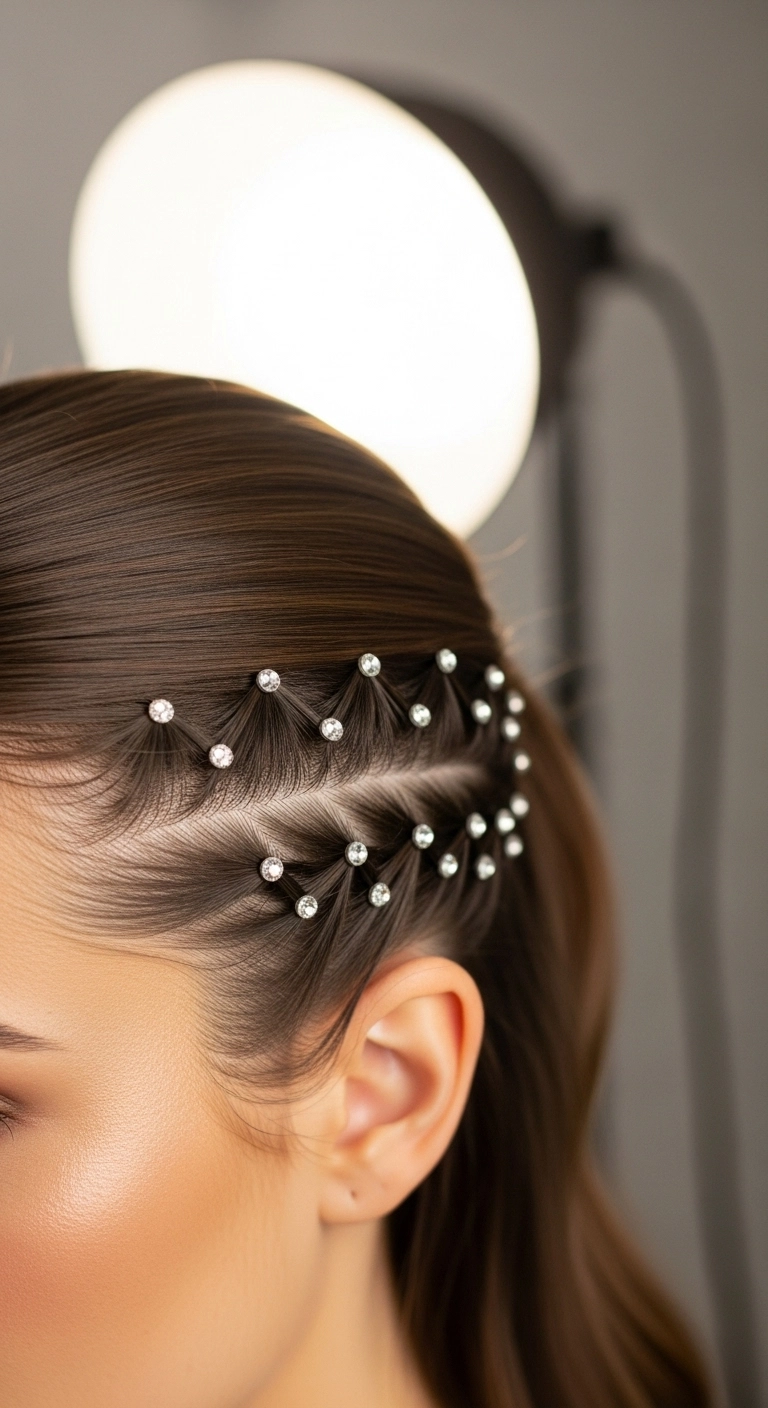
I think one of the most stunning ways to elevate a sleek straight hairstyle for a party or festival is with geometric elastic sectioning! By weaving small micro-ponytails into a criss-cross pattern along the side of the head and topping each connection with a crystal gem, you get a showstopping, jewelry-like effect that completely transforms your everyday look.
How to do this
1. Start on clean, straightened hair and prep with the smoothing hair oil listed below to tame flyaways and add a high-shine finish.
2. Using the rat tail tail comb listed below, create clean, diagonal zigzag or parallel subsections starting above the temple and working back toward the ear.
3. Secure small micro-sections along the hairline with the clear mini elastics listed below, forming your first row of small ponytails.
4. Split each micro ponytail in half and cross the strands diagonally into adjacent sections to create a geometric, honeycomb-like criss-cross lattice pattern.
5. Fasten each intersection securely with another clear elastic band to maintain high tension and clean lines.
6. Carefully affix the rhinestone hair gems listed below directly over each elastic node using the hair gem applicator or lash-safe adhesive.
7. Set the sleek look in place and eliminate stray baby hairs with a firm spritz of the strong hold hairspray listed below.
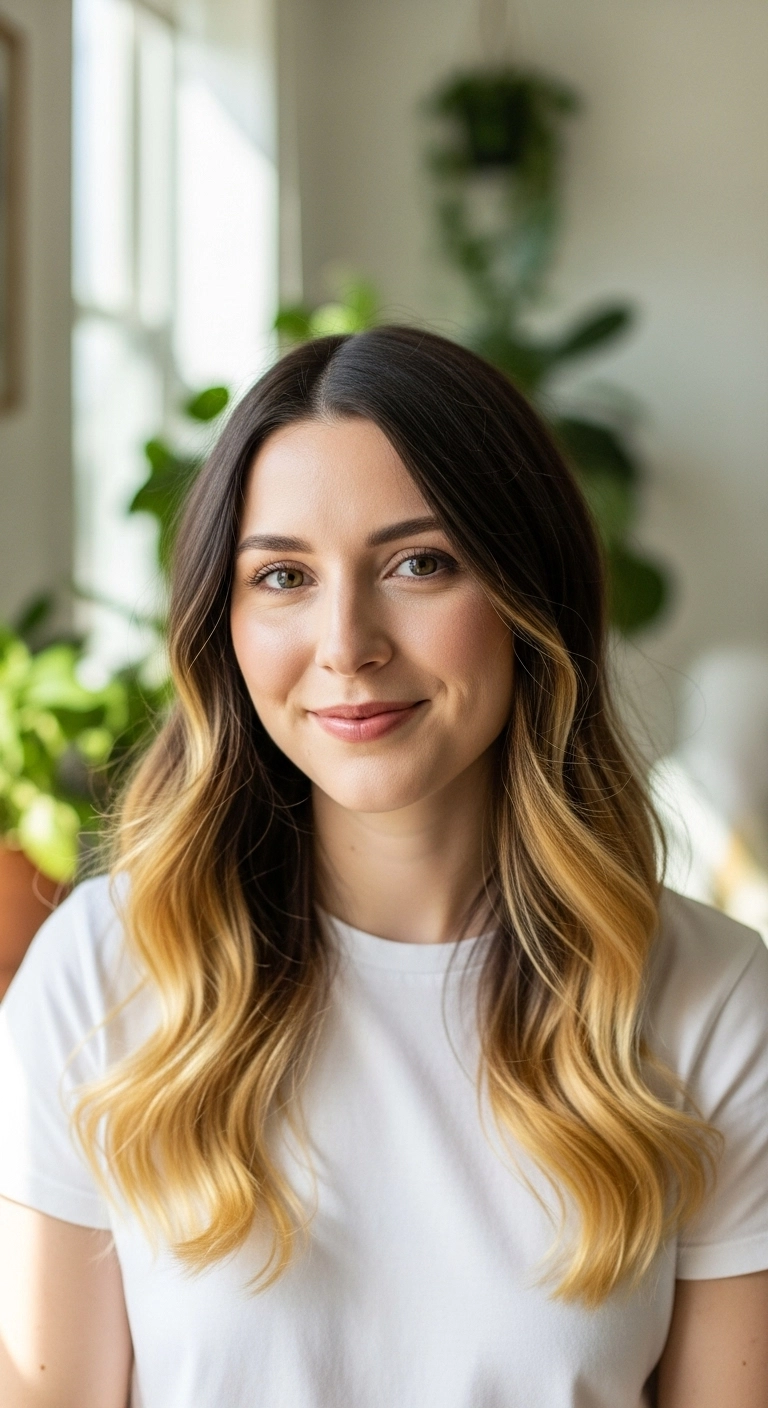
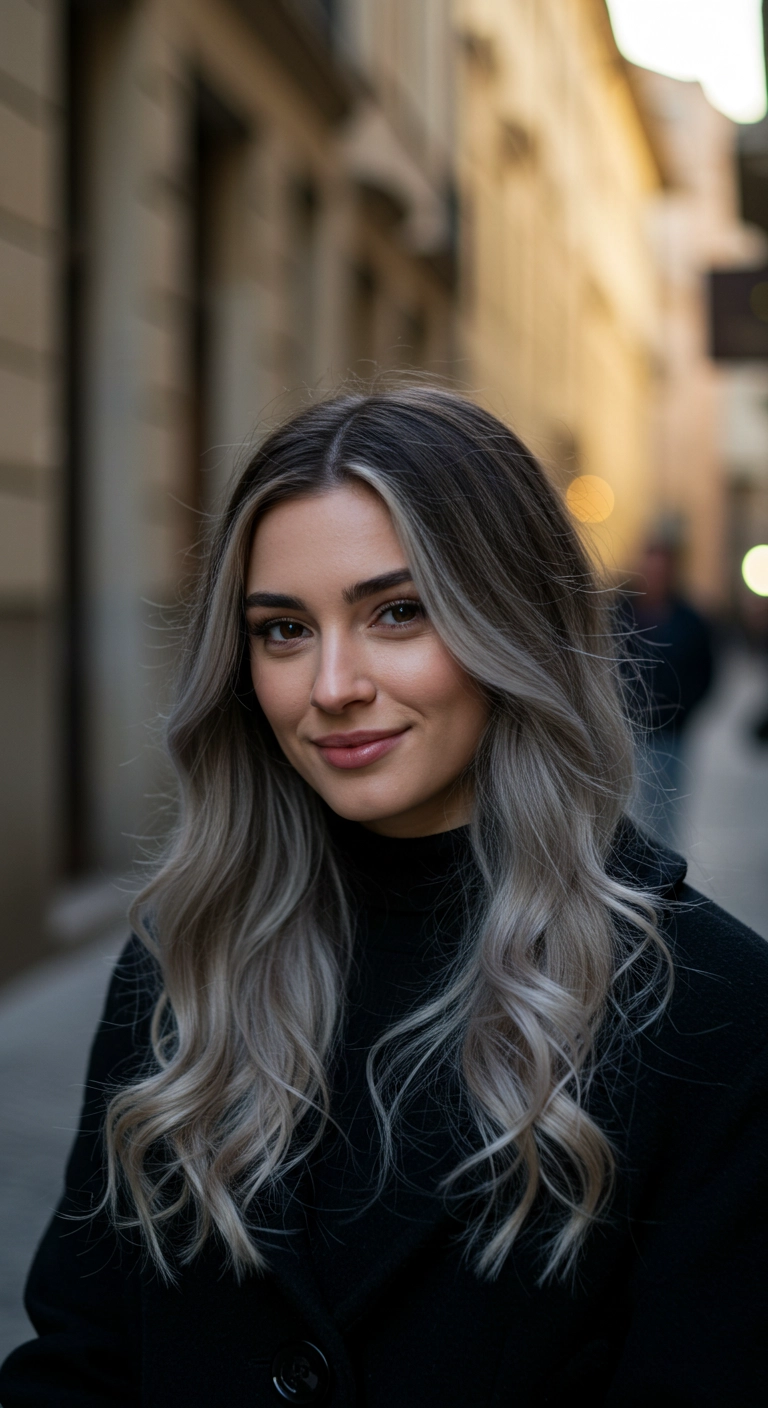
Are you completely obsessed with that lived-in, sun-kissed contrast? I just had to include this gorgeous dark brown to warm golden blonde ombre balayage because it gives the perfect effortless glow! The deep natural roots keep maintenance totally stress-free, while the soft honey blonde waves frame your face and brighten everything up so beautifully. It’s such an easy, versatile style whether you’re heading to the office or getting dressed up for a fun date night!
How to do this
1. Start by prepping damp hair with a thermal protectant spray using the heat protectant spray listed below to shield strands from hot styling tools.
2. Blow-dry the hair smooth using a large ceramic round brush to achieve natural root volume and a soft, sleek finish.
3. Create a clean, centered middle part down to the crown using a fine-tooth tail comb.
4. Divide hair into horizontal sections and use a 1.25-inch ceramic curling iron listed below to wrap vertical mid-shaft sections away from the face, leaving the very bottom ends slightly relaxed.
5. Once curled, allow the ringlets to cool completely before gently combing through with a wide-tooth detangling comb to soften into fluid waves.
6. Apply a few drops of lightweight nourishing hair oil listed below to the bleached golden ends to add radiant shine and eliminate any frizz.
7. Mist lightly with a flexible hold hairspray to lock in movement and hold the face-framing sweep throughout the day.
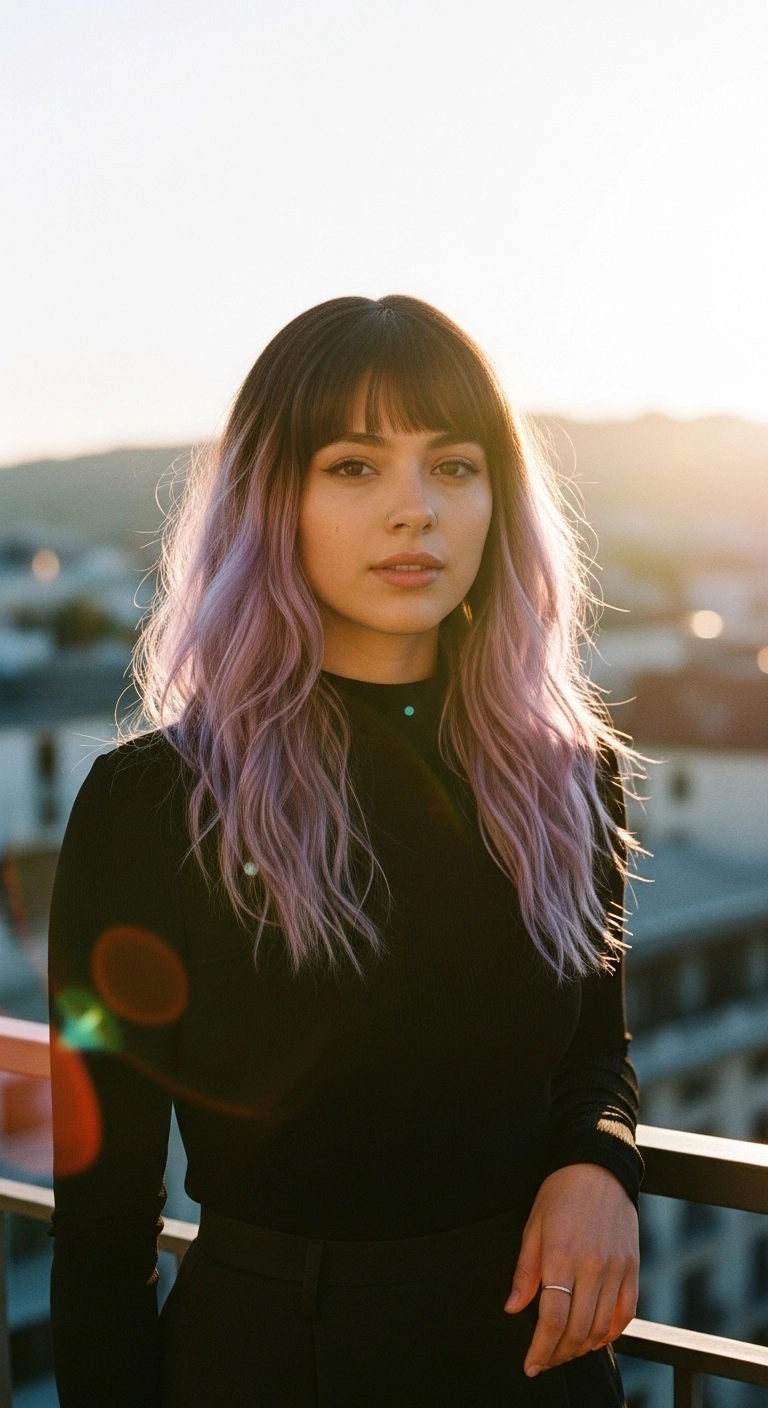
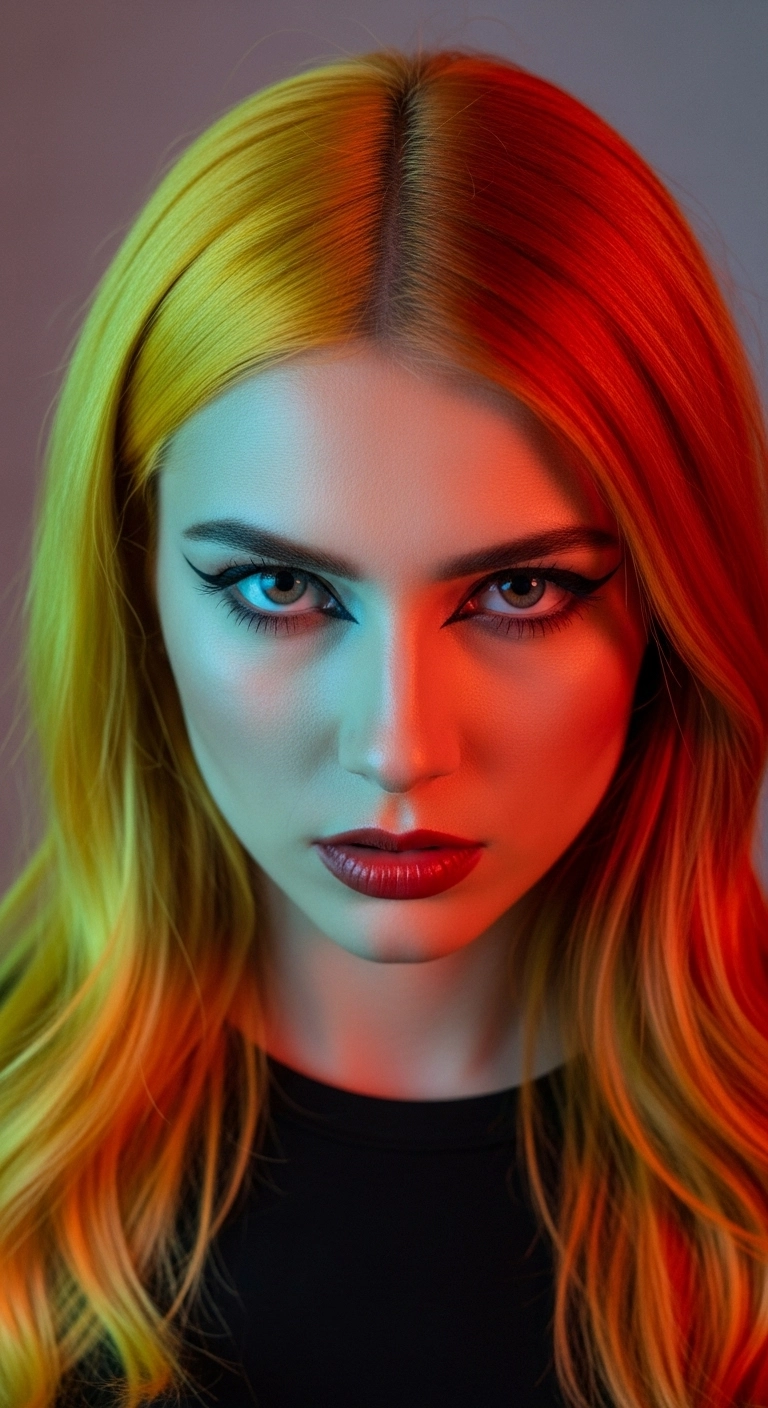
Honestly, if you've been wanting to play with pastel color without committing to high-maintenance root touch-ups every four weeks, this look is your sign! The seamless shadow root melts right into a soft, dreamy lavender shade that feels edgy yet surprisingly wearable. Paired with piecey bangs and undone waves, it's effortless cool-girl perfection.
How to do this
1. Prep dry, clean hair with a light mist of the heat protectant spray listed below to shield strands from hot styling tools.
2. Blow-dry the bangs straight down using a small round brush, slightly beveling the ends inward for a soft, natural curve.
3. Section the mid-lengths and ends of your hair, then use the 1.25-inch ceramic curling wand listed below to wrap 1-to-2 inch sections away from the face, leaving the very ends straight for that effortless, lived-in bend.
4. Allow the waves to cool down completely, then rake through them gently with the wide tooth comb listed below to soften the curl into relaxed S-waves.
5. Spritz the mid-lengths and pastel ends with the dry texturizing spray listed below to add airy separation, lift, and separation.
6. Keep the lilac hue crisp and brass-free between washes by using the purple toning hair mask listed below once weekly.
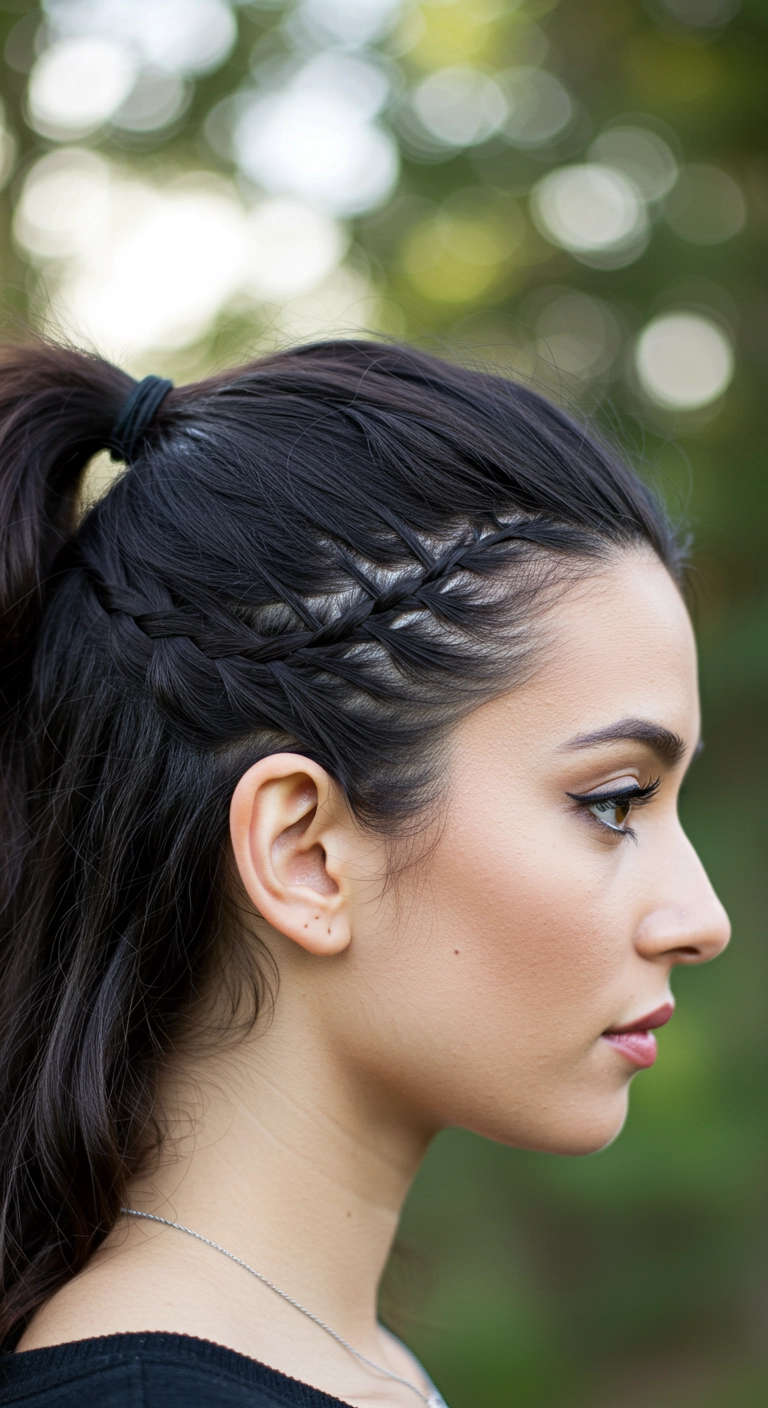
This look gives everyday half-up hair an edgy, athletic upgrade with delicate side lace braiding. You create tight diagonal braided accents along the temple that seamlessly feed into a lifted, sleek half-ponytail, leaving the rest of your hair flowing freely down the back.
How to do this
1. Start by detangling dry hair with a detangling paddle brush listed below, then divide the hair into top and bottom sections.
2. On one side along the temple/recession area, take a thin subsection of hair and begin a tight lace braid, adding small, clean strands only from the hairline as you work diagonally backward toward the crown.
3. Repeat this lace braiding technique on the opposite side so both braided details meet evenly at the crown of your head.
4. Gather the top half of your hair along with the ends of both side braids into a high half-ponytail, smoothing out bumps using the smoothing boar bristle brush listed below.
5. Secure the half-ponytail tightly with the seamless black hair ties listed below.
6. Apply a small dab of the edge control styling gel listed below along the hairline and side parts with a fine edge brush to tame flyaways and sharpen the braided lines.
7. Finish the entire style by misting a light veil of the flexible hold hairspray listed below over the top and lengths for lasting hold.
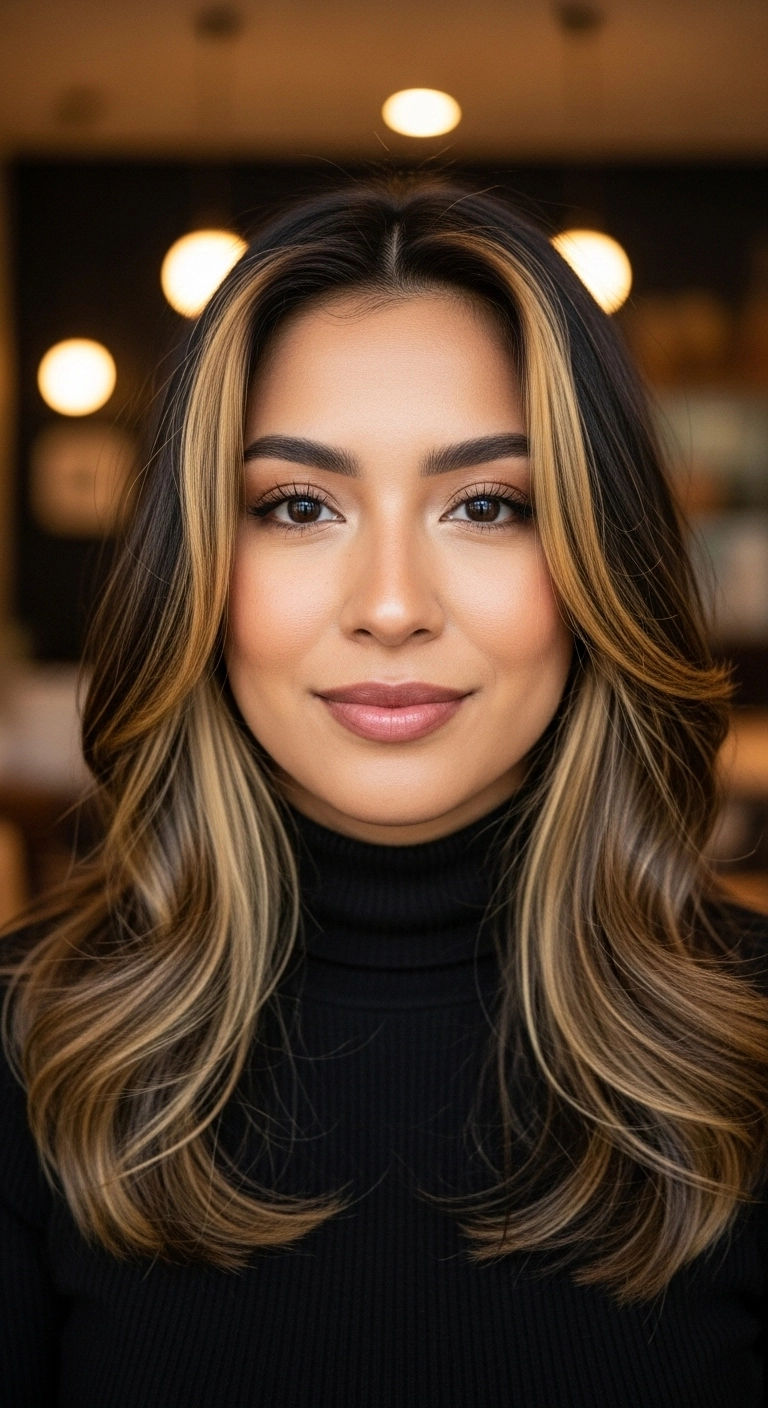
This blowout is seriously so gorgeous and that honey blonde money piece brightens up the whole face instantly! It gives that perfect expensive-brunette energy without needing high-maintenance upkeep at the roots. If you love a classic bouncy 90s-inspired blowout that frames your cheekbones just right, you definitely need to try this look!
How to do this
1. Prep freshly washed, towel-dried hair with a generous misting of the thermal heat protectant spray listed below to shield strands and add slip.
2. Apply a dollop of lightweight smoothing styling cream listed below through the mid-lengths down to the ends to ensure frizz-free shine and hold.
3. Using a large ceramic round brush listed below, blow-dry the hair in horizontal sections, pulling upwards at the root for volume and rolling the ends under and outward for that bouncy bend.
4. For the front money piece and curtain layers, wrap the strands around the round brush directing them backward away from the face, setting them with cool air or popping them in a velcro roller for 10 minutes.
5. Gently remove any rollers, shake out the blowout with your fingers, and warm up a drop of nourishing hair shine oil listed below in your palms to glide over the ends.
6. Lock in the bouncy shape with a light veil of the flexible hold finishing hairspray listed below so your face frame stays perfectly in place all day.
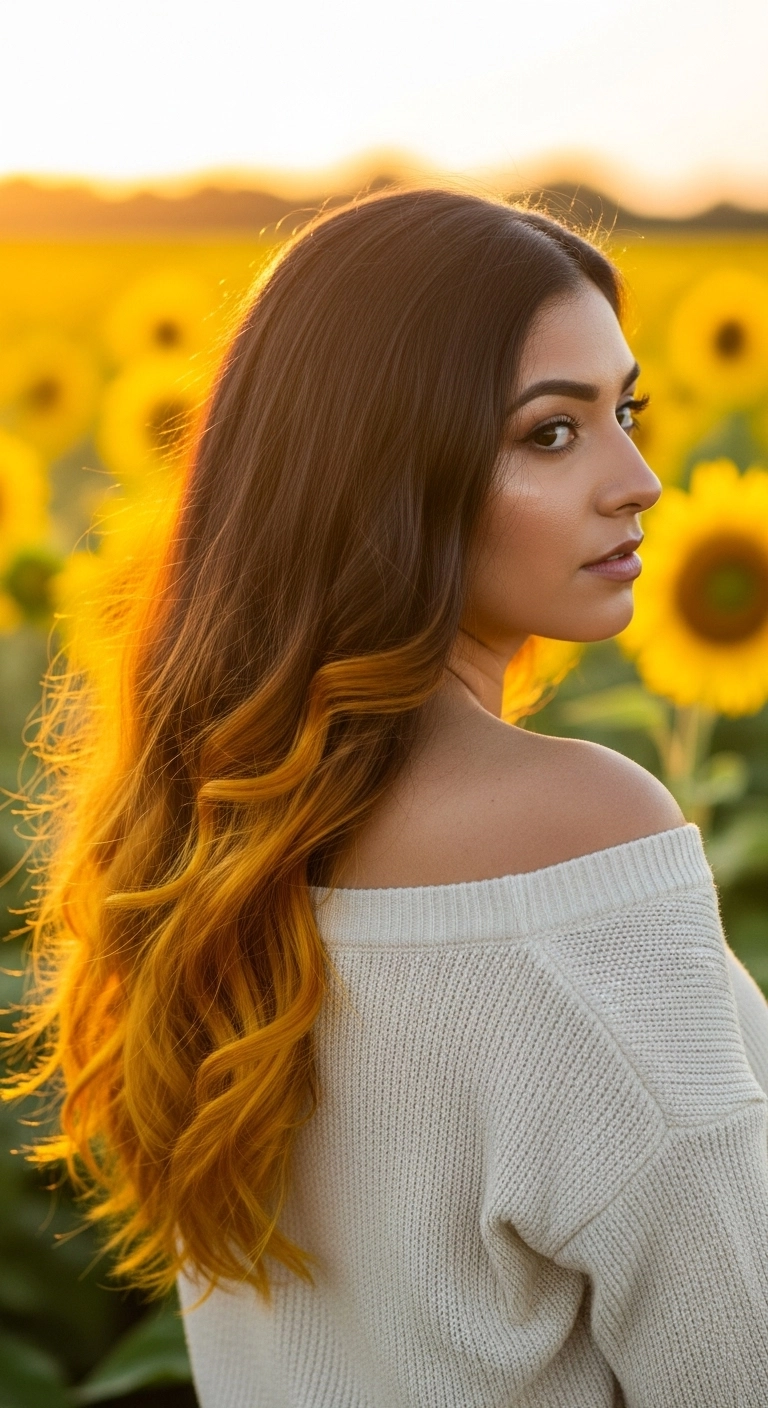
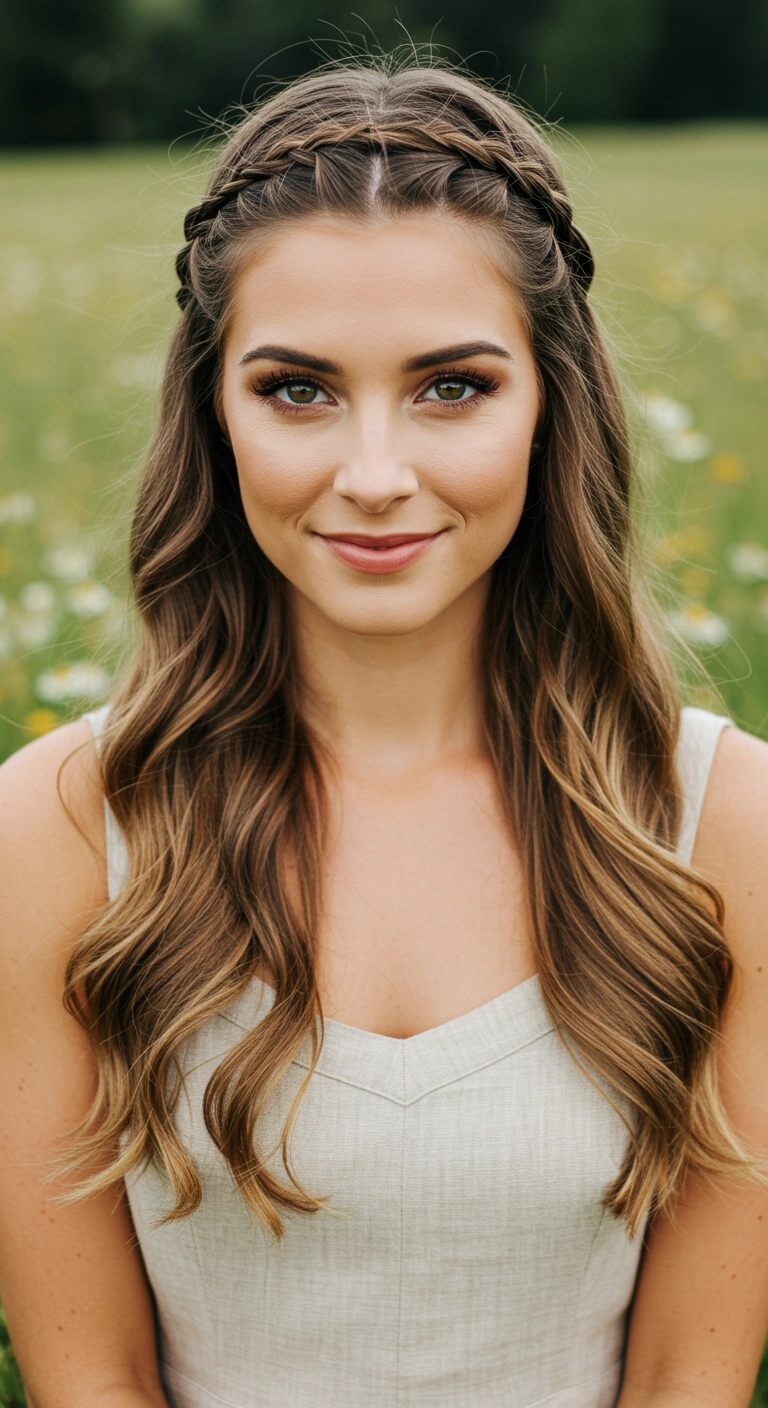
I fell completely in love with this look during a golden hour photoshoot out in the country. The contrast between deep chocolate roots and that pop of warm sunflower yellow on the ends is just incredible. It gives such a warm, sunny vibe without needing an all-over bleach job, and it looks insanely pretty curled into loose waves. If you want a fun splash of color that still feels cozy and effortless, you should definitely give this ombre a shot!
How to do this
1. Start with clean, damp hair and prep from roots to tips using the heat protectant blowout spray listed below to shield strands from hot styling tools.
2. Blow dry hair thoroughly with a round ceramic brush, directing the airflow down the hair shaft to lock in maximum shine and smoothness through the crown and mid-lengths.
3. For the vibrant sunflower ends, a stylist will pre-lighten the bottom section from shoulder level down using the hair lightening bleach kit listed below to achieve a pale blonde canvas before depositing a rich sunflower yellow semi-permanent dye.
4. Once dry and styled, section out the hair and use the 1.25-inch ceramic curling iron listed below to curl the mid-lengths and yellow ends away from the face, holding each section for just a few seconds.
5. Let the curls cool completely, then gently rake through them with the wide-tooth detangling comb listed below to transform them into soft, cascading ribbon waves.
6. Finish off by smoothing a few drops of the nourishing argan hair oil listed below through the ends for high-gloss shine, and mist lightly with the flexible hold finishing hairspray listed below to keep the waves bouncy all day long.
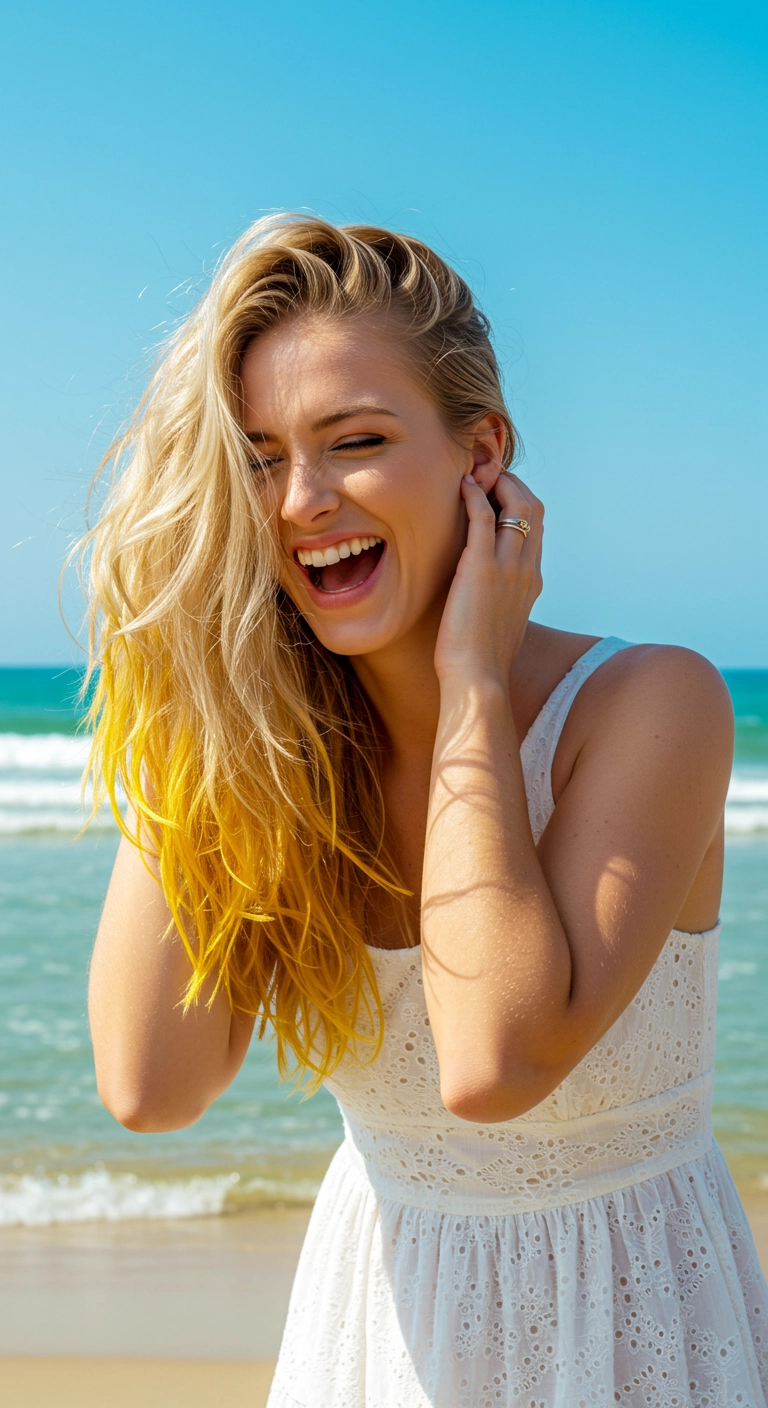
Can we talk about how fun and sunny this look is?! I love taking classic, effortless blonde beach waves and tossing in an unexpected pop of color at the ends. The vibrant yellow dip-dye feels so summery and carefree, don't you think?! It’s playful, easy to recreate with semi-permanent color, and gives your everyday beachy texture an instant festival-ready edge. Grab your salt spray and let those windswept waves do their thing!
How to do this
1. Start on dry or towel-dried hair by prepping your lengths with the leave-in conditioner spray listed below to keep bleached and colored ends hydrated.
2. If creating the color from scratch, lighten the lower ends using a gentle bleach kit, then apply the semi-permanent neon yellow hair dye listed below to the bottom 4-6 inches for that fun sunburst dip-dye effect.
3. Mist damp hair generously with the sea salt texturizing spray listed below to encourage your hair's natural loose wave pattern.
4. Blow dry using a diffuser or let your hair air dry naturally while scrunching upward with your fingers to build volume and texture.
5. For extra definition around the face, wrap random 1-inch sections around a wide-barrel curling wand for just a few seconds, leaving the ends straight.
6. Finish by misting the dry texturizing spray listed below throughout the roots and mid-lengths, flipping your head over, and giving it an effortless, windswept toss.
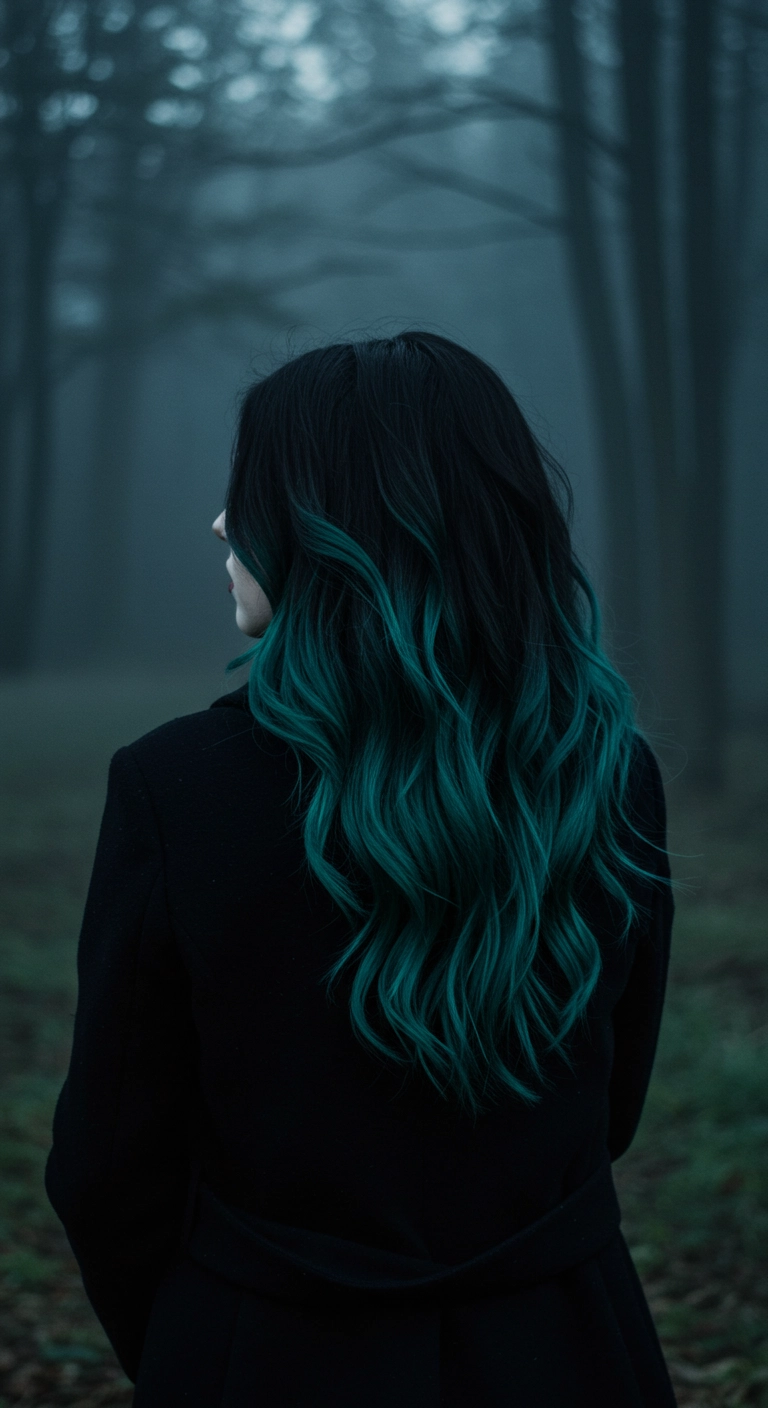
Black melting into moody deep forest teal? Yes please, I am obsessed! The soft flowing waves give it such an enchanting, ethereal fairytale vibe. Would you dare to try this dark emerald shade?
How to do this
1. Start by sectioning dry, clean hair and pre-lighten the mid-lengths to ends in a seamless balayage sweep using the hair bleach lightening powder kit listed below.
2. Once the hair lifts to a clean pale yellow (level 9 or 10), rinse thoroughly and shampoo to prep the hair cuticle.
3. Apply a rich black base color at the roots, then saturate the lightened mid-lengths and ends using the deep teal semi-permanent hair dye listed below, smudging the transition zone with your fingers for a soft gradient.
4. Allow the color to process according to the instructions, then rinse in cool water and lock in hydration with the color-depositing conditioner listed below.
5. Before heat styling, mist the lengths generously using the thermal heat protectant spray listed below to shield vivid pigment from heat damage.
6. Take 1.5-inch sections and wrap them loosely around a wide curling wand to create relaxed S-waves, leaving the very tips slightly straight for an effortless shape.
7. Finish by gently raking through the curls with your fingers and misting with the weightless shine finishing spray listed below to enhance the moody, glossy emerald tones.
Bottleneck bangs paired with a classic layered blowout are honestly the most effortless combo you can do. It gives you all the face-framing softness without the high-maintenance upkeep of full heavy bangs, and the long subtle layers give your hair that gorgeous, bouncy movement whether you curl it or just rough dry!
How to do this
1. Start with freshly washed, damp hair and apply a smoothing blowout cream using the smoothing blowout cream listed below to control flyaways and add heat protection.
2. Section out the bangs and blow-dry them forward with a medium round ceramic brush, then softly direct the sides outward to create a curved bottleneck curtain effect.
3. Blow-dry the remaining lengths using a large round ceramic barrel brush listed below, lifting at the roots for volume and rolling the ends under for smooth movement.
4. Take 1.5 to 2-inch vertical sections through the mid-lengths and wrap them loosely around a large barrel curling wand listed below away from the face, leaving the very ends soft.
5. Let the curls cool completely, then gently comb through them using a wide-tooth detangling comb listed below to transform them into soft, lived-in waves.
6. Finish by misting a light veil of flexible hold hairspray listed below and a drop of lightweight hair shine oil through the ends for a silky, healthy shine.
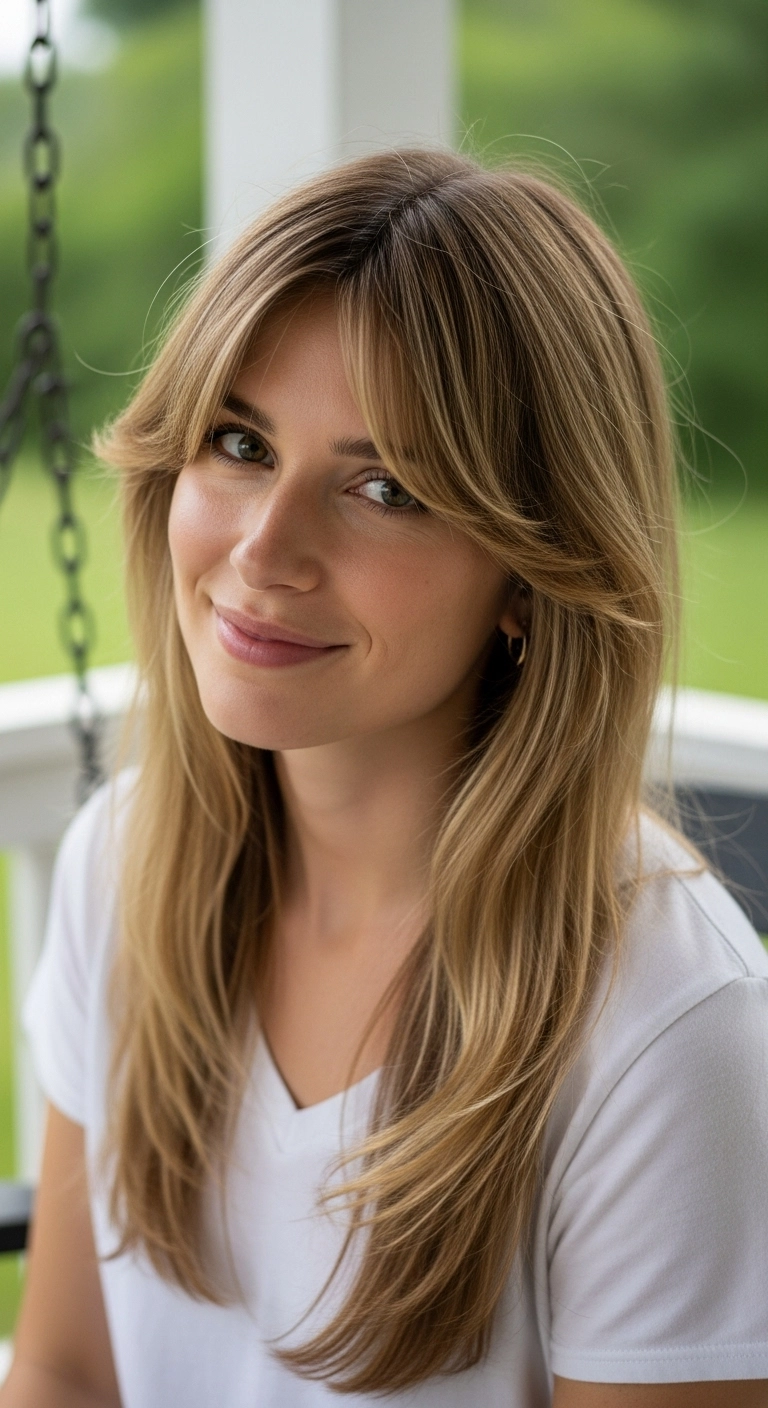
This layered cut is so effortlessly chic and gives off the ultimate French-girl vibe! The wispy curtain bangs softly frame the eyes without feeling heavy, and the tapered layers keep long hair feeling light and full of natural movement. If you want a classic, low-fuss style that instantly makes you look put-together, this one is gorgeous!
How to do this
1. Start on freshly washed, damp hair and prep lengths with a lightweight smoothing blow dry cream listed below.
2. Section out the bangs and blow dry them forward first using a medium ceramic round brush listed below, rolling the ends under and then flicking slightly outward to achieve that soft French-girl drape.
3. Move to the face-framing layers and mid-lengths, blowing them out in diagonal forward sections to create smooth, curved-under movement around the collarbones.
4. Mist the entire style with a heat protectant spray listed below if touching up with a flat iron to gently bevel the tips.
5. Warm a couple of drops of lightweight hair smoothing serum listed below between your palms and smooth over the lengths to tame flyaways and add a silky shine.
6. Finish with a light dusting of flexible hold hairspray listed below to keep the curtain fringe parted and airy all day.
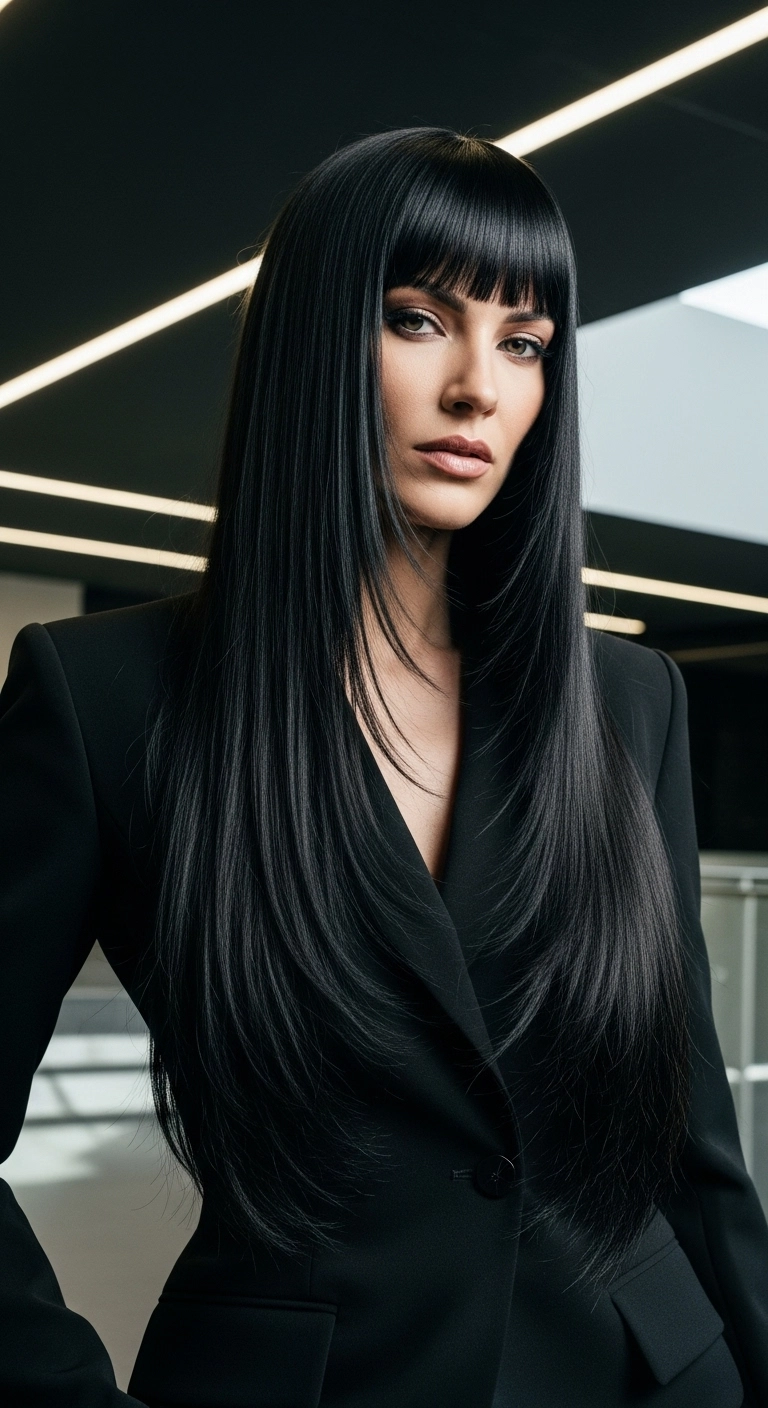
Can we talk about how insanely chic and powerful a glossy black blowout looks?! I had to include this sleek, layered style because it effortlessly blends high-fashion drama with everyday sophistication. The arched eyebrow-skimming bangs bring total focus right to your eyes, while those soft cascading layers give long hair so much dynamic movement instead of hanging heavy. It feels so polished paired with tailored blazers or a classic evening dress. If you’ve been looking for an edgy yet timeless transformation, this ultra-shiny look is definitely your sign to try it!
How to do this
1. Start by prepping clean, damp hair with a generous mist of the heat protectant spray listed below to shield strands from high heat styling.
2. Blow-dry hair straight down using a smoothing concentrator nozzle and a large ceramic round brush, making sure to dry the bangs straight forward without adding too much lift at the root.
3. Section the hair into manageable horizontal layers and run a flat iron from roots to ends, gently beveling the ends inward around the collarbone and chest layers to highlight the curved face-framing cut.
4. For the fringe, gently pass the flat iron over the bangs in one smooth, quick downward stroke to keep them pin-straight and sleek across the brow line.
5. Warm a tiny drop of the lightweight hair serum listed below between your palms and smooth it over the lengths to eliminate flyaways and seal in an ultra-reflective, glass-like shine.
6. Finish with a light mist of the flexible hold hairspray listed below across the top and fringe to hold the sleek silhouette locked in place all day.
Products Used
Heat Protectant Smoothing Spray
thermal heat protectant smoothing spray for straight hair
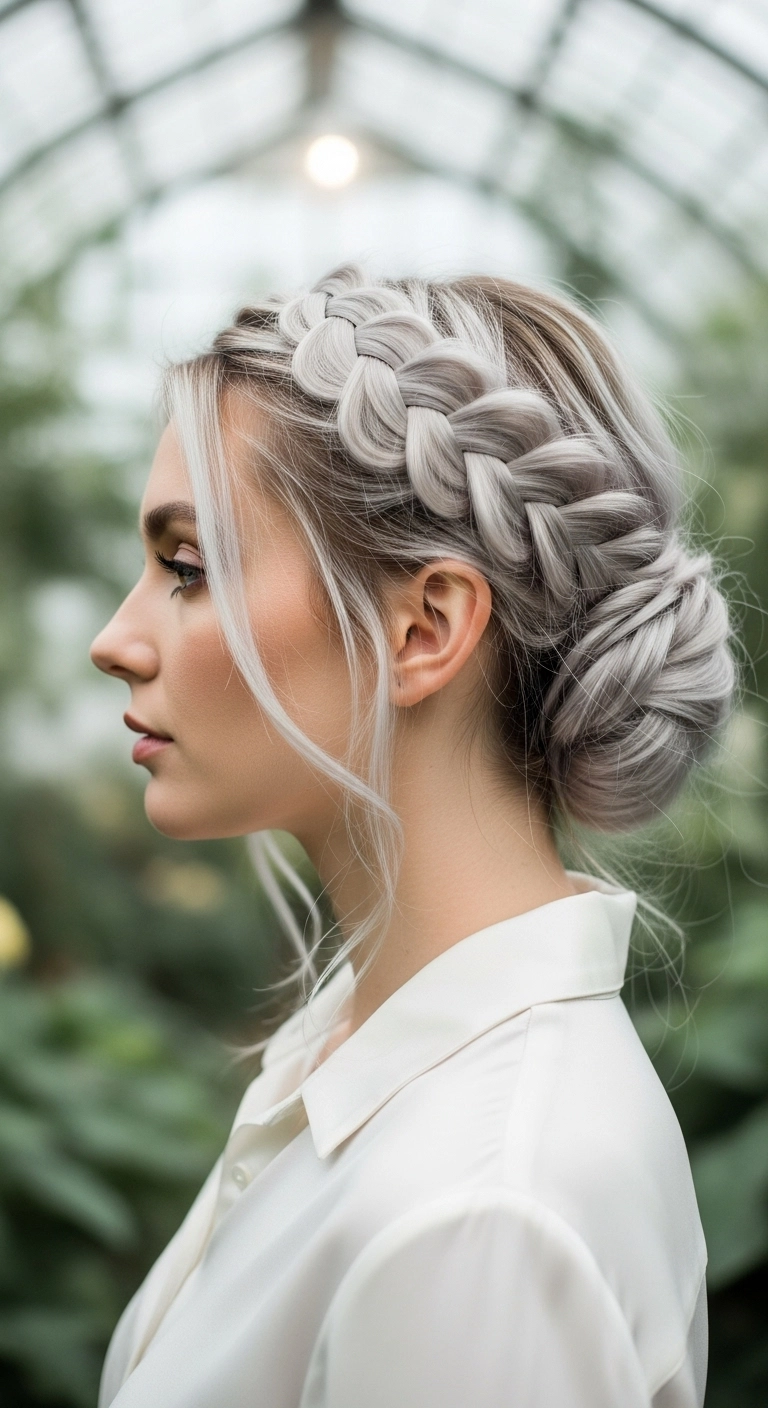
This look is the ultimate romantic Dutch braid into a low bun. You begin by carving out a thick section right along your hairline and Dutch braiding it under to create that thick, elevated crown effect. Then, wrap everything back into a soft chignon at the nape, gently pull out the edges of the braid for max volume, and let a few wispy face-framing tendrils float freely.
How to do this
1. Start by prepping your dry hair with the texturizing spray listed below to give your strands enough grip and volume for braiding.
2. Leave out a soft section of hair in front of each ear to act as your face-framing tendrils later on.
3. Create a deep side parting and begin an inverted Dutch braid along the hairline, weaving the outer strands underneath the center strand while gathering small sections from both sides as you work backward toward the nape.
4. Once the braid reaches behind your ear, transition into a standard three-strand braid to the ends and secure it temporarily using the clear mini elastic bands listed below.
5. Gather the remaining loose hair at the back into a low ponytail at the nape, then wrap and twist it into a neat, textured low bun, pinning it securely with the sturdy bobby pins listed below.
6. Wrap the tail of your Dutch braid over and around the base of the bun, tucking the tail underneath and pinning it firmly in place.
7. Gently pull and pancake the outer loops of the Dutch braid to create that wide, voluminous, plush appearance.
8. Soften your face-framing tendrils with a quick touch from a styling iron and lock the entire updo in place with the flexible hold finishing hairspray listed below.
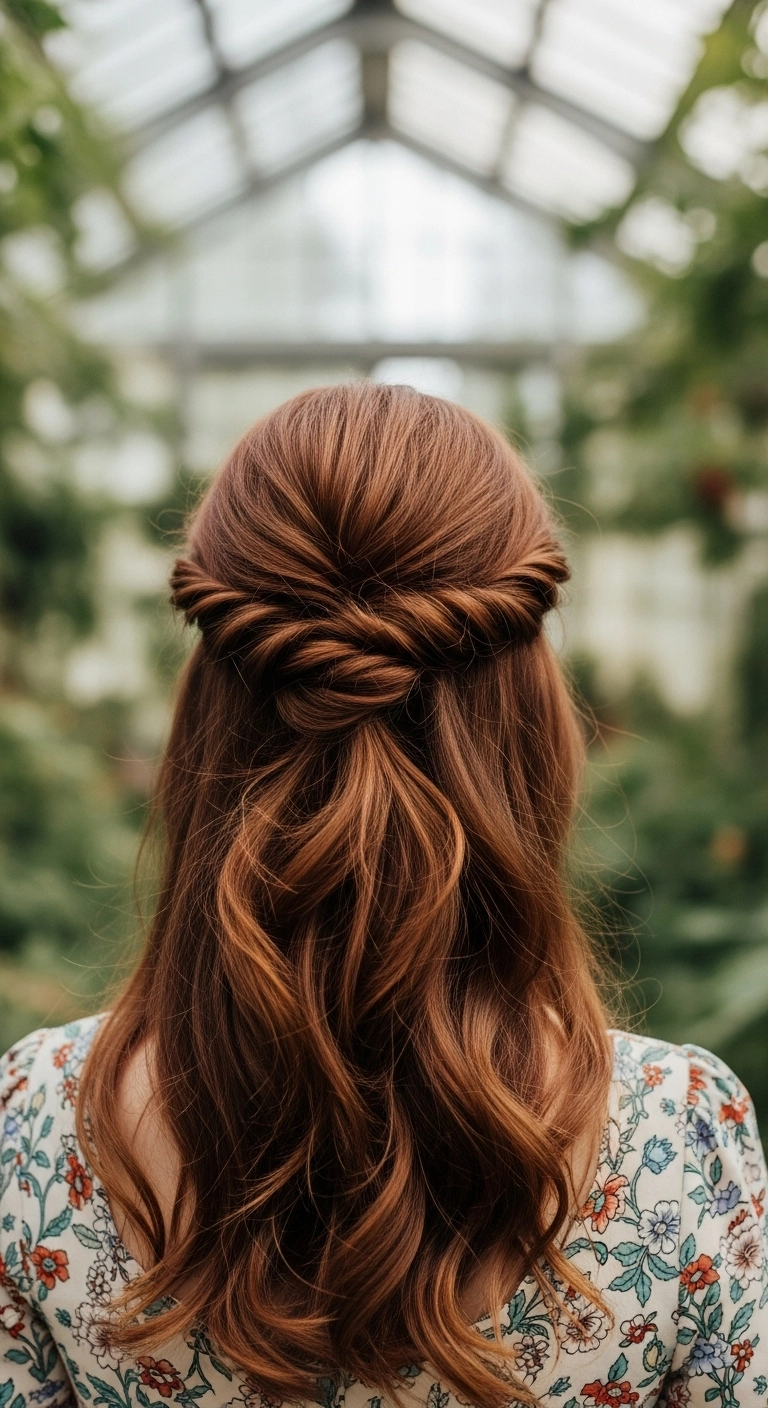
Can we just talk about this gorgeous twisted half-up look? It is giving total fairytale cottagecore romance and I am completely obsessed! That rich auburn shade paired with soft cascading waves is just perfection for any wedding or special date night.
How to do this
1. Start with clean, dry hair prepped with the heat protectant spray listed below to shield strands and build smooth shine.
2. Use the 1.25-inch curling wand listed below to curl medium sections of hair away from the face, creating soft, uniform S-waves through the mid-lengths and ends.
3. Lightly mist the waves using the flexible hold hairspray listed below and gently finger-comb them to break up the curl into effortless, romantic cascades.
4. Take a medium section of hair from above the left temple, divide it into two strands, and twist them tightly backward towards the center back of the head.
5. Repeat the exact same rope twist technique on the right side, gently pancaking each twist for added volume and texture.
6. Cross the two rope twists over each other at the center back of your head, tucking the ends under and securing firmly with the curved bobby pins listed below.
7. Finish the entire style with a generous spritz of the shine mist listed below for a luminous, greenhouse-ready bridal glow.
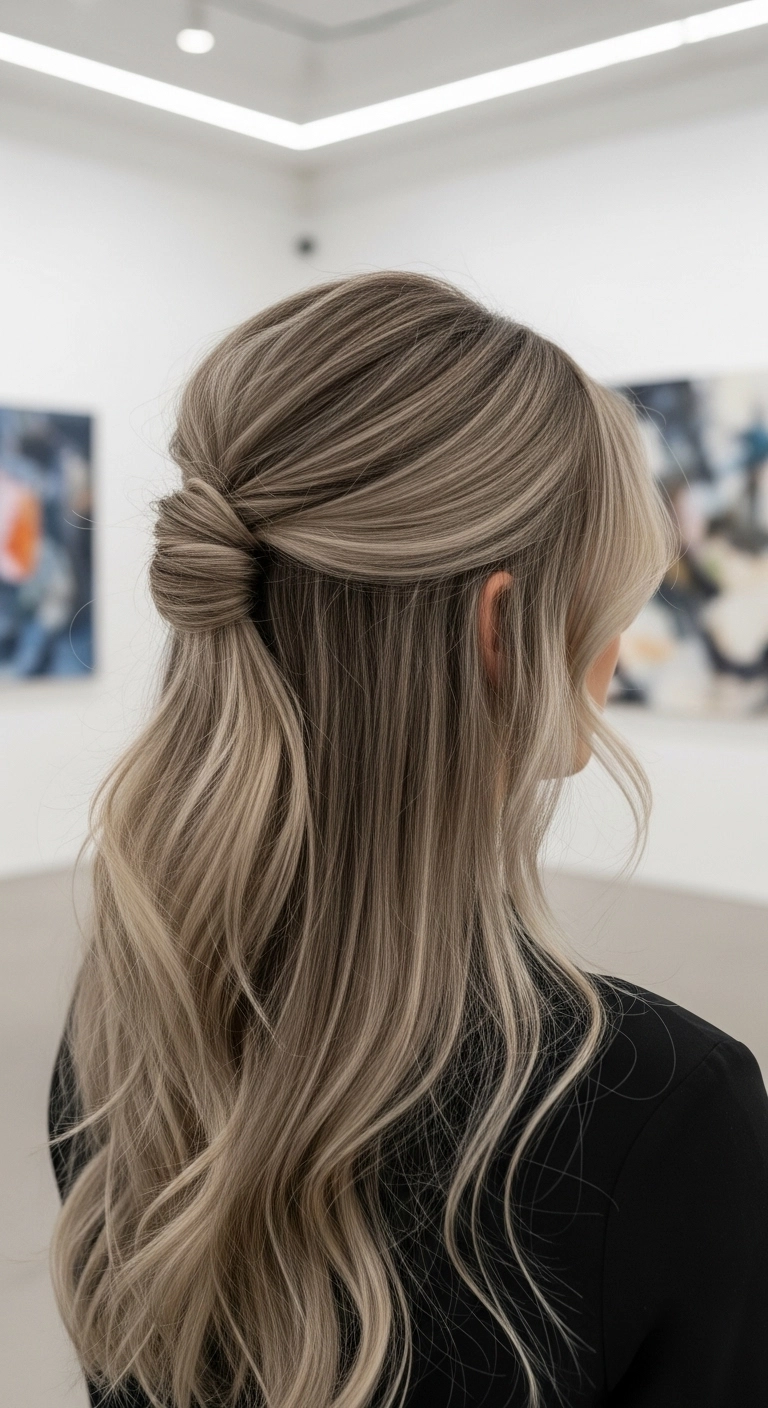
This hairstyle is super chic and effortless, which makes it an absolute go-to for dates, wedding guest outfits, or even just elevated workdays – I wore this half-up look to an art gallery opening and received so many compliments all night!
How to do this
1. Start by prepping damp hair with a heat protectant spray and blow dry smooth with a large round brush to build soft crown volume.
2. Add loose, gentle waves through the mid-lengths and ends using a 1.25-inch curling iron listed below, leaving the ends slightly soft.
3. Leave soft, face-framing tendrils out around both cheeks and ears.
4. Gather the top half of your hair starting from above each ear and pull it back toward the center of your head.
5. Twist the gathered section into a compact mini wrap or twist knot, securing underneath with bobby pins listed below.
6. Gently pinch and pull sections at the crown to add subtle texture and dimension.
7. Finish the look with a mist of flexible hold hairspray listed below to keep flyaways smoothed while retaining natural bounce.
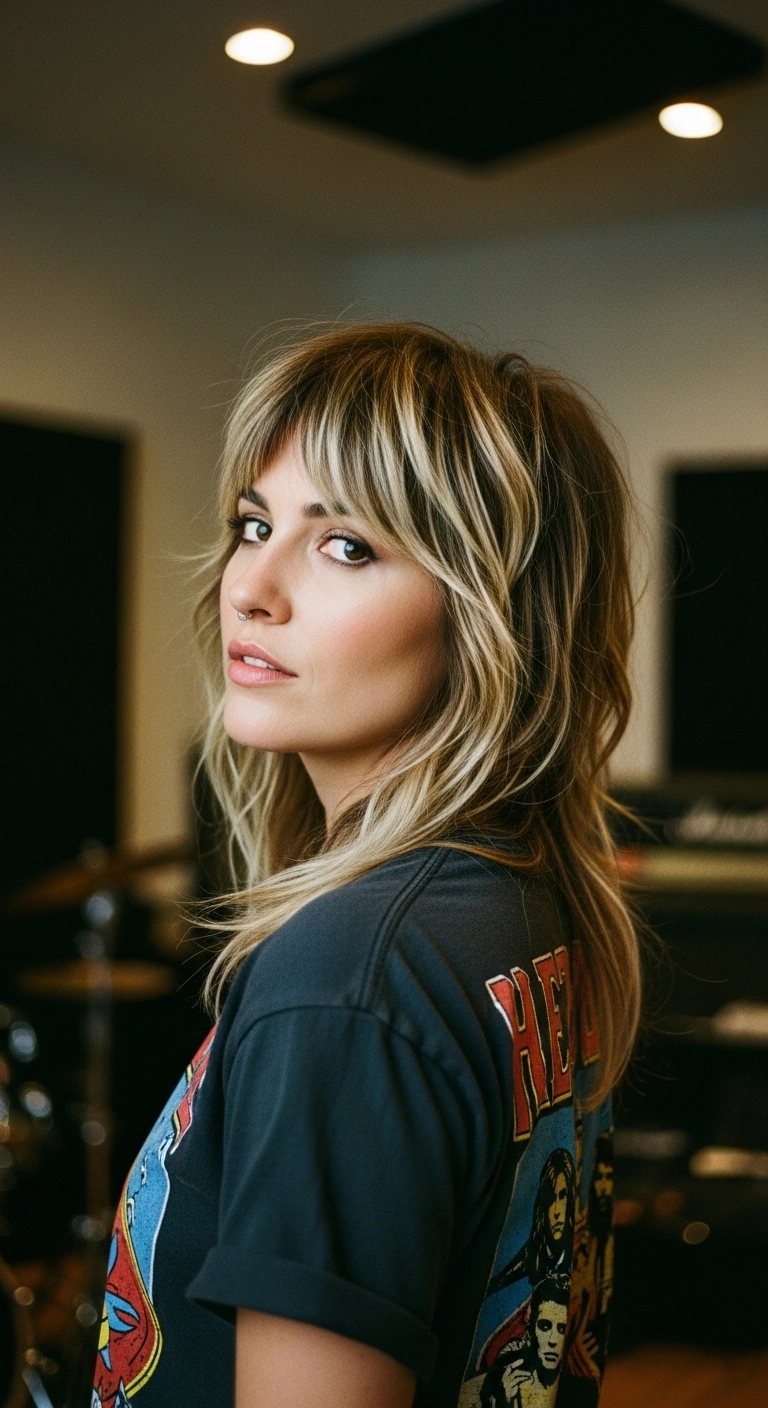
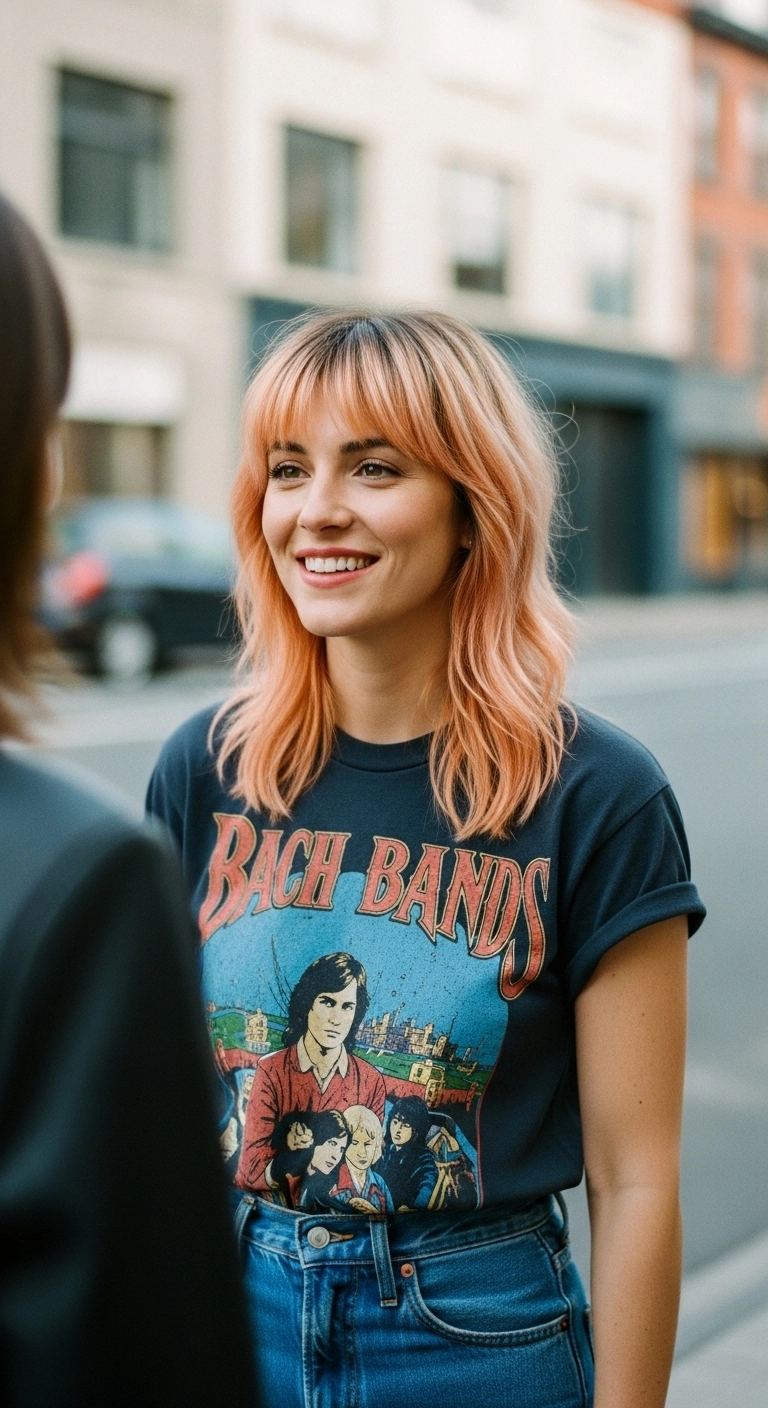
If you love that effortless, cool-girl rockstar vibe, this modern shag is seriously everything!! The piecey bangs and choppy layers give your hair so much natural movement without trying too hard + the blonde dimensional highlights make all the texture pop perfectly.
How to do this
1. Start by prepping damp hair with the lightweight volumizing mousse listed below, focusing on the roots and crown for natural lift.
2. Blow dry the bangs forward using a small round brush, rolling them under slightly and then shaking them out with your fingers to keep them pieced and airy.
3. Rough-dry the rest of the hair with a diffuser or by finger-raking, using the nozzle directed downwards to enhance the natural feathered layers.
4. Once completely dry, take random 1-inch pieces around the crown and face frame and create subtle bends using the 1-inch flat iron listed below, alternating directions for a lived-in wave.
5. Spray the dry texturizing spray listed below generously from mid-lengths to ends, lifting sections to build separation.
6. Finish by emulsifying a pea-sized amount of the matte styling wax listed below between your fingertips and gently pinching the tips of your bangs and face-framing layers to define the choppy texture.
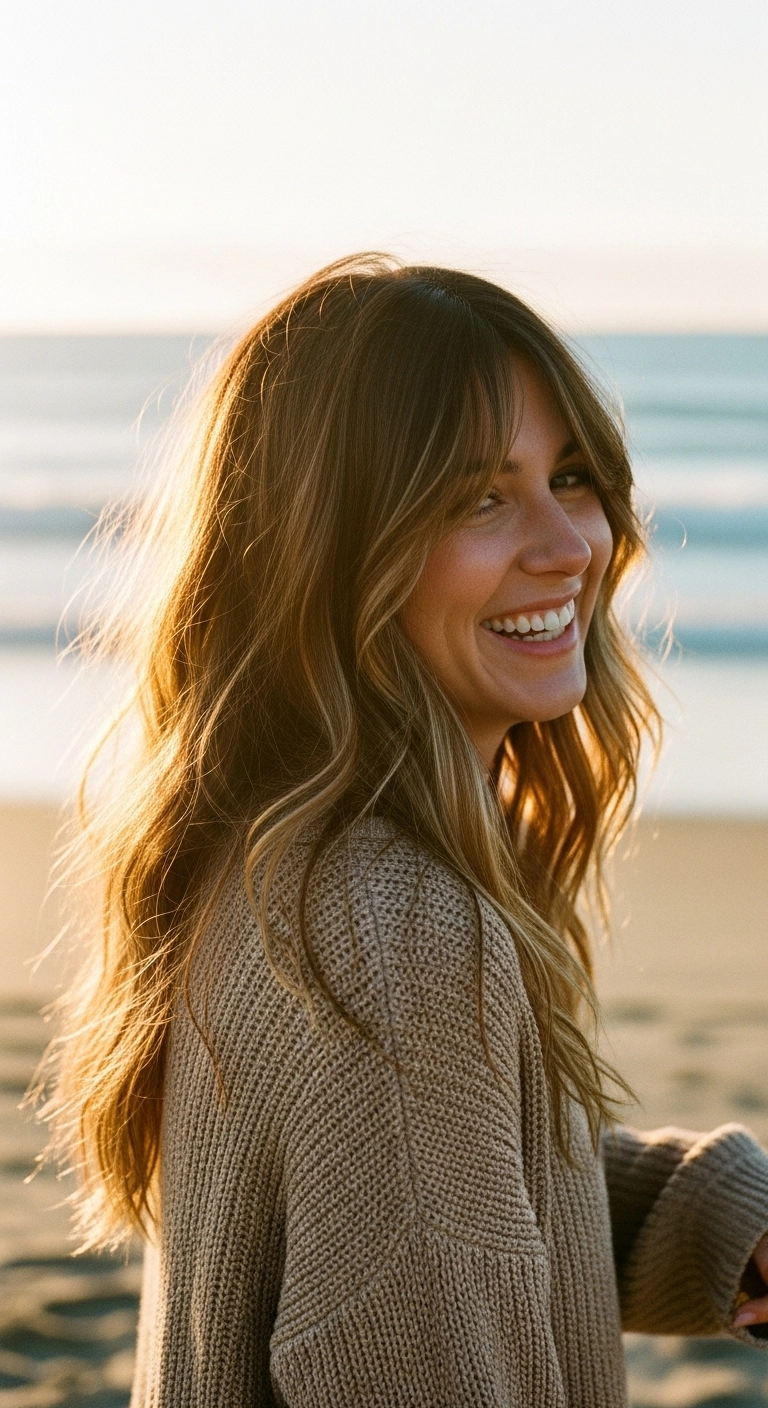
I’m absolutely in love with this hairstyle because it’s the ultimate effortless beachy look that never goes out of style. The soft golden balayage adds so much dimension, and the curtain bangs frame the face in the most flattering way. Whether you're hanging out by the coast or dressing it up for a casual dinner, it always looks perfectly lived-in. Definitely give this hairstyle a try, it's a lot easier to pull off than you would think!
How to do this
1. Prep clean, towel-dried hair with a lightweight styling mousse and the heat protectant spray listed below to prep for heat styling.
2. Blow-dry the hair using a round ceramic brush, lifting at the roots to build natural volume and curving the ends slightly outward.
3. Style the curtain bangs by rolling them forward with the round brush and directing the airflow backward away from the face to create that signature sweep.
4. Take 1- to 2-inch vertical sections through the mid-lengths and wrap them loosely around the 1.25-inch curling iron listed below, leaving the last inch of the ends uncurled for a modern, relaxed finish.
5. Alternate the curl direction around the head, ensuring the front face-framing pieces are directed back and away from the cheekbones.
6. Once the curls have completely cooled, break them apart by gently raking through with your fingers or a wide-tooth comb.
7. Spray the dry texturizing spray listed below through the mid-lengths and ends, then finish with a couple drops of nourishing hair oil listed below to add shine and tame flyaways.
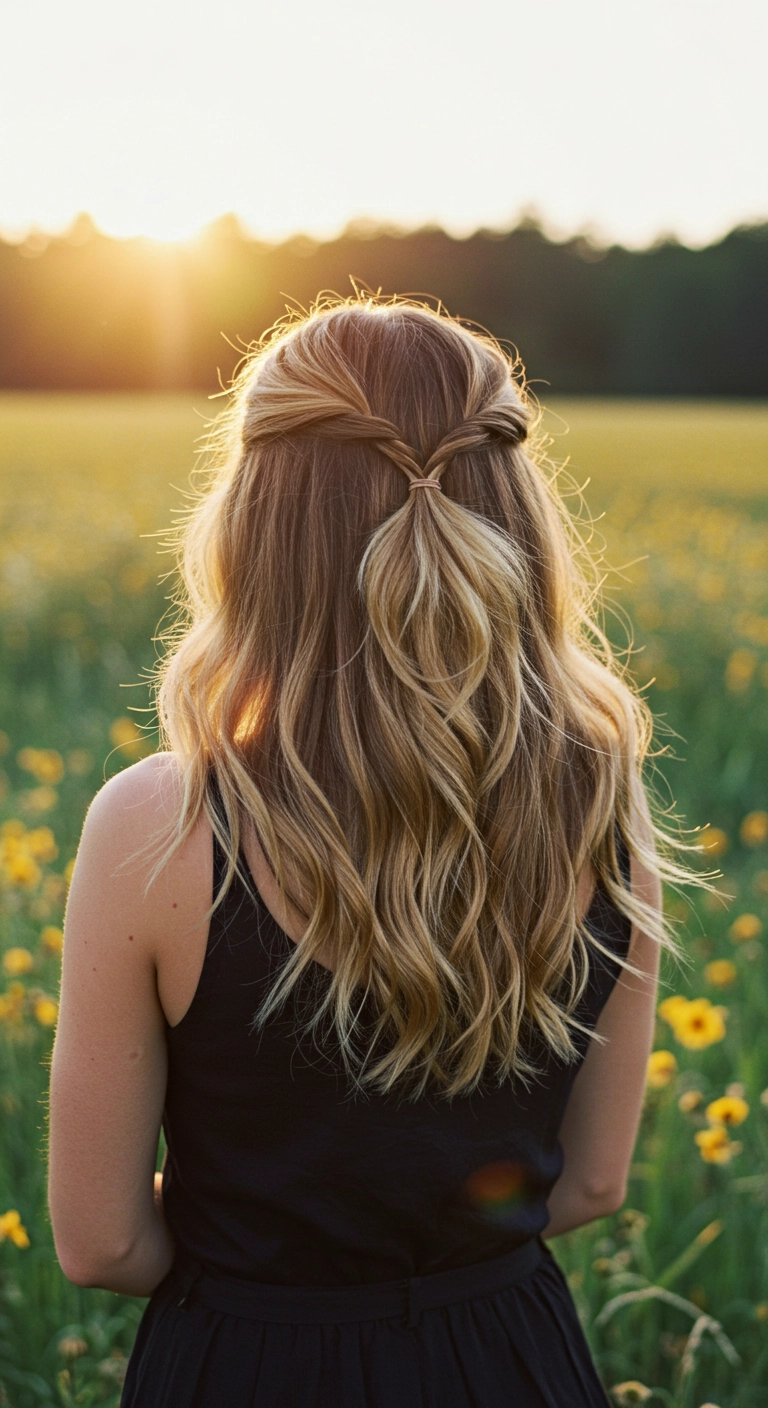
There’s nothing quite like a simple twisted half-up style to make your waves look straight out of a fairytale! I love how effortlessly this pulls your hair away from your face while showing off all those gorgeous blonde balayage dimensions.
How to do this
1. Prep dry, clean hair by misting with the heat protectant spray listed below to shield strands from hot styling tools.
2. Using a 1.25-inch curling iron, take 1 to 2-inch vertical sections and loosely wrap them away from the face, leaving the last inch of the ends straight for a relaxed, modern wave.
3. Once curls have cooled, gently run your fingers through your hair or use the wide-tooth comb listed below to soften them into flowing waves.
4. Spritz the mid-lengths and ends with the texturizing wave spray listed below to build effortless separation and body.
5. Section out a 1-inch piece of hair from each side right above your ears, gently twist each piece backwards toward the center of the crown.
6. Bring both twists together in the back and secure them in place using one of the small clear elastic hair ties listed below.
7. Create a topsy tail by flipping the little ponytail up and pulling it through the opening right above the hair tie to hide the band and add dimension.
8. Gently tug on the ridges of the twists to fan them out for a softer, lived-in bohemian look, then lock it all in using the flexible hold hairspray listed below.
OK, if you ever wanted a blonde that absolutely commands attention in every lighting, this is it! We kept the base a gorgeous golden blonde with a super subtle root tap to give it depth, then styled it out with a polished blowout and just a hint of a bend. It's bold, sleek, and gives off major futuristic chic energy!
How to do this
1. Prep freshly washed, damp hair by applying a heat protectant spray with argan oil listed below from roots to ends to shield against heat damage.
2. Blow-dry the hair smooth using a ceramic round blowout brush listed below, focusing on lifting at the roots for subtle body and smoothing down the cuticles.
3. Use a tail comb to carve a clean, precise center part down the middle of the scalp.
4. Take a 1.5-inch titanium curling iron listed below and wrap large vertical mid-length sections outward just once to create soft, flowing, elongated bends rather than tight curls.
5. Gently brush through the lengths with a cushioned boar bristle paddle brush listed below to relax the wave pattern into a seamless, flowing drape.
6. Finish the look by misting a lightweight smoothing hair shine serum listed below across the mid-lengths and ends for a sleek, reflective finish.
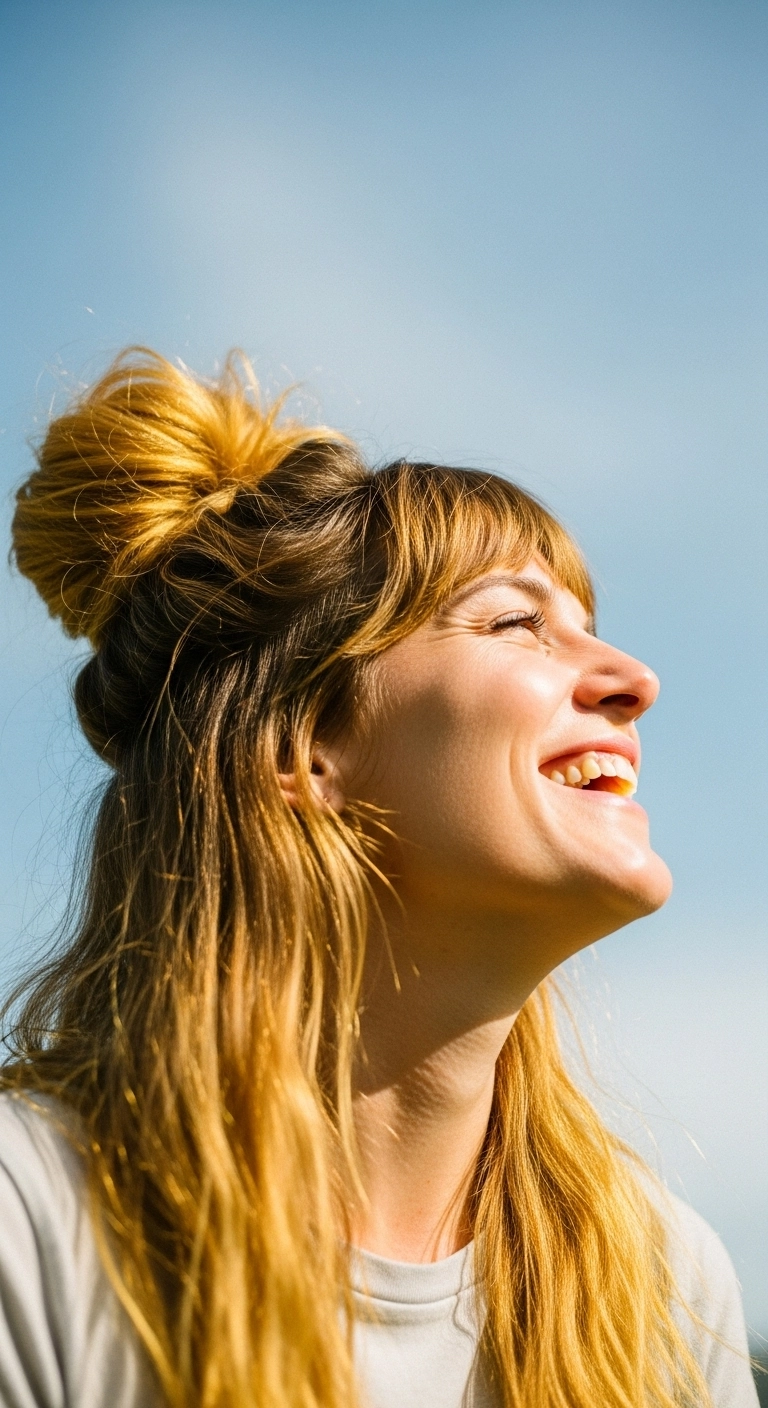
This look is the ultimate lazy-day secret weapon that still looks incredibly cute! Throwing the top half into a messy high knot keeps your hair off your face while showing off those gorgeous relaxed waves underneath. It takes about two minutes to whip up and gives off total effortless cool-girl energy!
How to do this
1. Start by prepping towel-dried hair with a lightweight leave-in conditioner to enhance your natural wave and keep strands hydrated.
2. Blow-dry your bangs forward with a round brush or simply rough dry them so they fall straight and softly over the forehead.
3. Apply a spritz of the texturizing sea salt spray listed below through the mid-lengths and ends, then air dry or lightly diffuse to encourage effortless, lived-in movement.
4. Section off the top crown portion of your hair from just above the ears up, leaving your bangs and the lower half flowing loose.
5. Gather this top section high on your crown and twist it loosely into a casual bun, securing it with the hair ties and bobby pins listed below.
6. Gently pull at the edges of the bun to pancake it and give it that perfectly imperfect, voluminous messy texture.
7. Finish the entire look with a light mist of the flexible hold hairspray listed below to keep flyaways happy without losing that breezy movement.
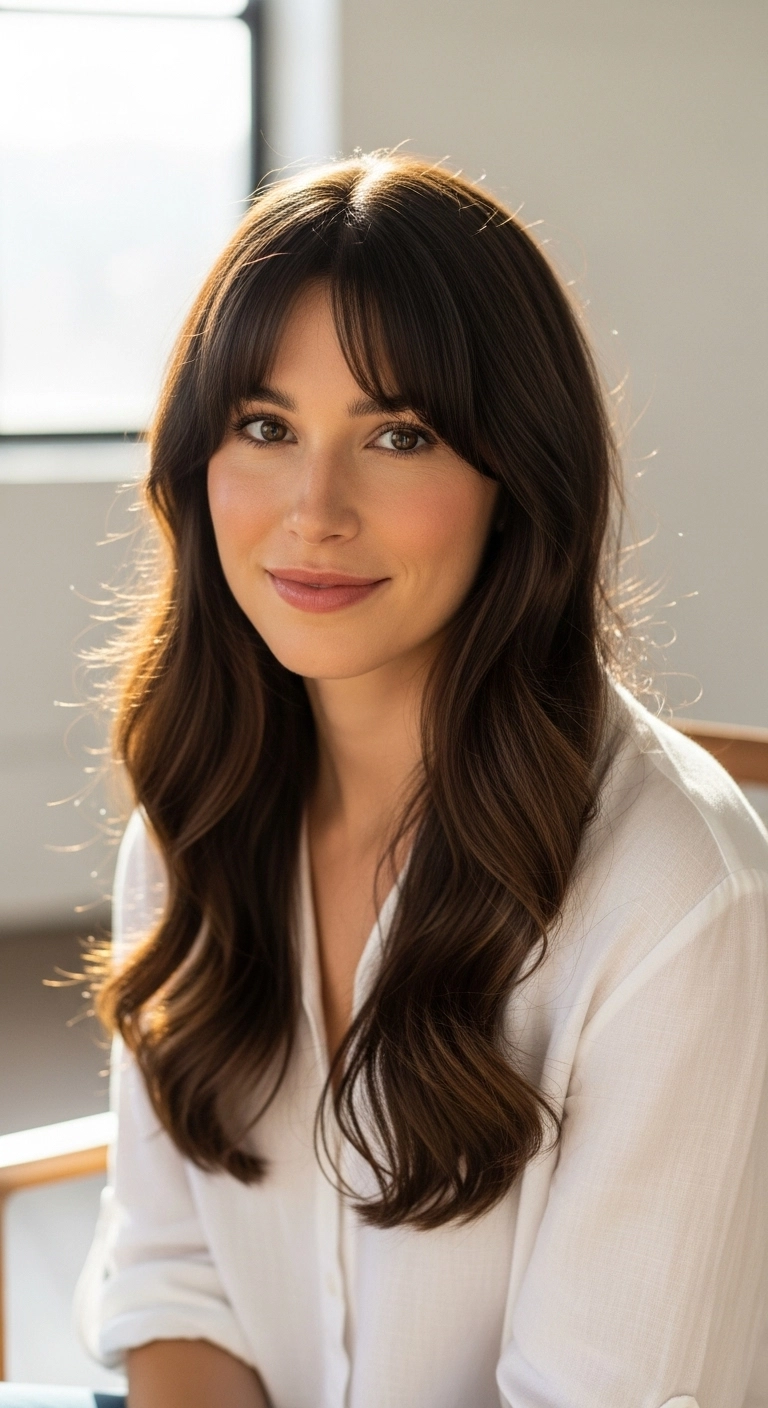
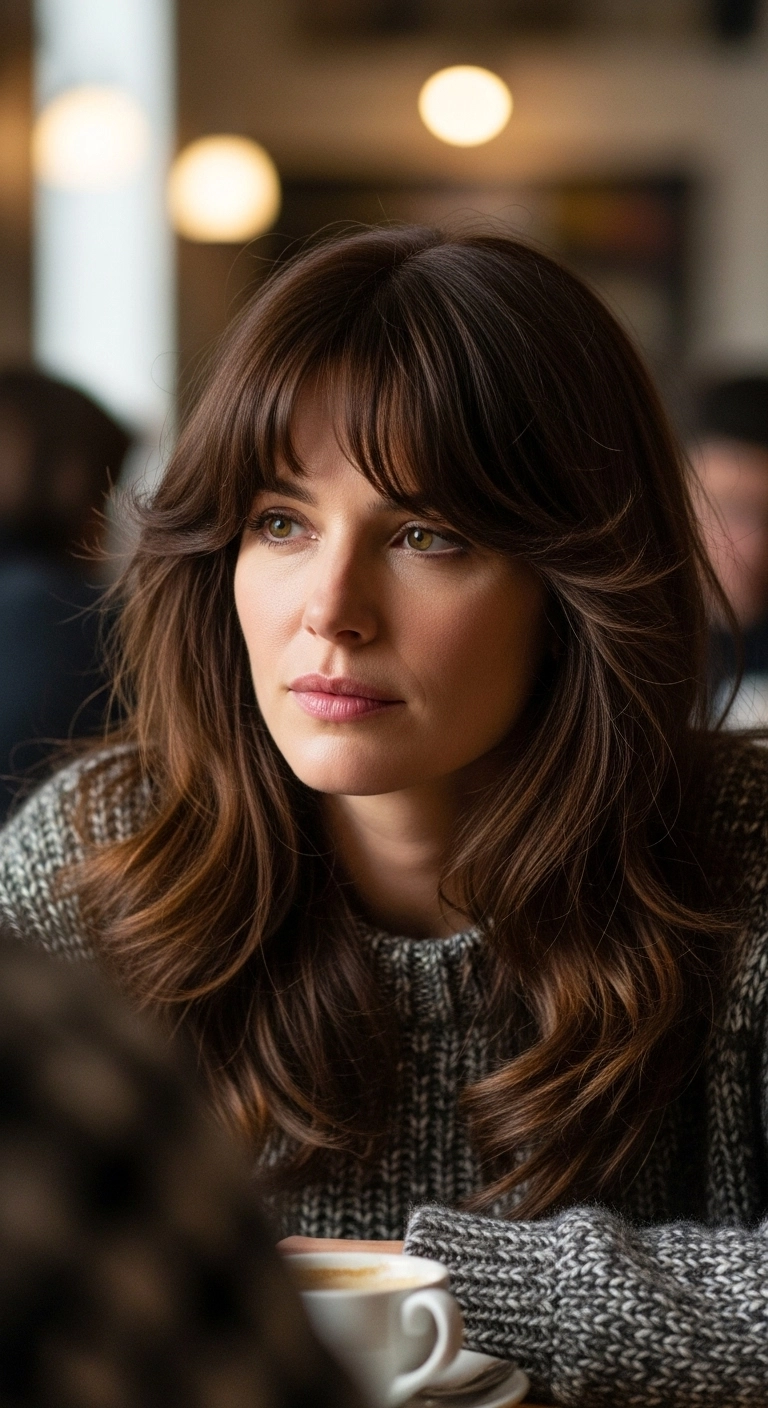
Are you completely obsessed with that effortless, Parisian 70s hair aesthetic too? I had to share this gorgeous layered chocolate blowout because it's the absolute definition of lived-in elegance! Those soft, eyebrow-grazing Birkin bangs blend right into winged, cheek-framing layers that flatter almost every single face shape. It gives your hair so much natural movement and body without feeling stiff or overly styled. Pair this with a cozy knit sweater for coffee dates or dress it up for an evening out—you really can't go wrong!
How to do this
1. Start by prepping damp, freshly washed hair with a lightweight blow-dry heat protectant cream listed below to protect the strands and add slip.
2. Section your bangs forward. Using a medium ceramic round brush and a blow dryer, roll the bangs under and forward, then immediately switch the airflow to cool to lock in that soft brow-skimming curve.
3. Work on the face-framing layers next by blowing them dry up and away from your face with the round brush, rolling back towards your ears to create that feathered 70s winged sweep.
4. Blow dry the rest of the lengths in 2-inch horizontal sections, using the round brush to bevel the ends softly inward and outward for effortless movement.
5. For extra staying power and bounce, pop 2-inch self-grip velcro rollers into the crown and cheek sections while the hair cools down.
6. Remove the rollers and gently rake through with your fingers or a wide-tooth comb, finishing with a light mist of the flexible hold hairspray listed below to keep everything looking airy and natural.
There’s nothing like a delicate braided crown to keep your front layers neatly pulled back while still showing off gorgeous, cascading waves! I love how effortlessly romantic this look feels whether you’re heading to an outdoor summer wedding or just spending an afternoon in the sunshine.
How to do this
1. Start by parting clean, dry hair neatly down the center using a tail comb.
2. Prep the hair with a thermal protectant using the heat protectant spray listed below, then create soft, relaxed waves throughout the mid-lengths and ends using the 1.25-inch ceramic curling iron listed below.
3. On one side of the middle part, section out a 1-to-2 inch strand along the front hairline and divide it into three equal sections.
4. Begin a delicate Dutch or French lace braid along the hairline, weaving it flat against the scalp back towards the crown while keeping it neat.
5. Secure the braid temporarily with a clear elastic using the clear hair elastics listed below, then repeat the exact same braid on the opposite side.
6. Bring both braids together at the back of the head, joining and securing them discreetly underneath the top layer of hair using the bobby pins listed below.
7. Gently pull apart the braid stitches slightly to soften the look, then mist with the flexible hold hairspray listed below for all-day hold.
If you want that effortless 90s blowout look that frames your face like a dream, this cut is honestly perfection!! It works so well on medium-to-long hair because the face-framing layers do all the heavy lifting, making everyday styling super quick and easy.
How to do this
1. Start with clean, damp hair and prep from roots to ends using the heat protectant blowout cream listed below to add slip and heat defense.
2. Section your hair into workable sections and rough-dry until it is roughly 80% dry, keeping roots lifted for natural volume.
3. Using the ceramic round hair brush listed below and your blow dryer, dry the lower sections by rolling under smoothly for soft, inward curve.
4. Clip and separate your curtain bangs and face-framing sections, then blow-dry them forward and roll the round brush back away from your face to create that signature feathered swoop.
5. Pin the warm fringe section up in the velcro hair rollers listed below for 10 minutes to let the shape set while cooling down.
6. Release the rollers, finger-comb through your hair, and spritz a light mist of the dry texturizing spray listed below at the crown and lengths for touchable body and separation.
7. Finish by smoothing a tiny drop of the lightweight hair styling oil listed below through the very ends to tame flyaways and enhance shine.
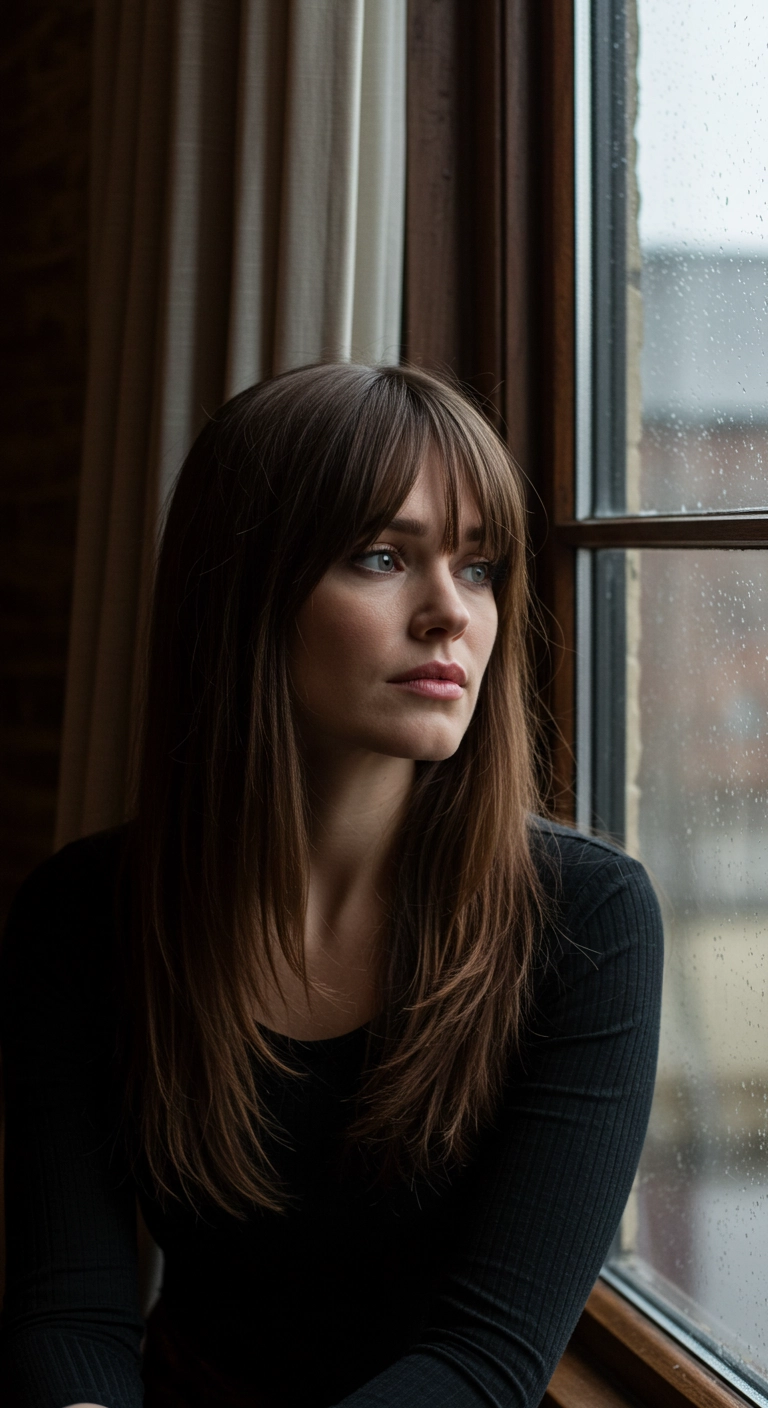
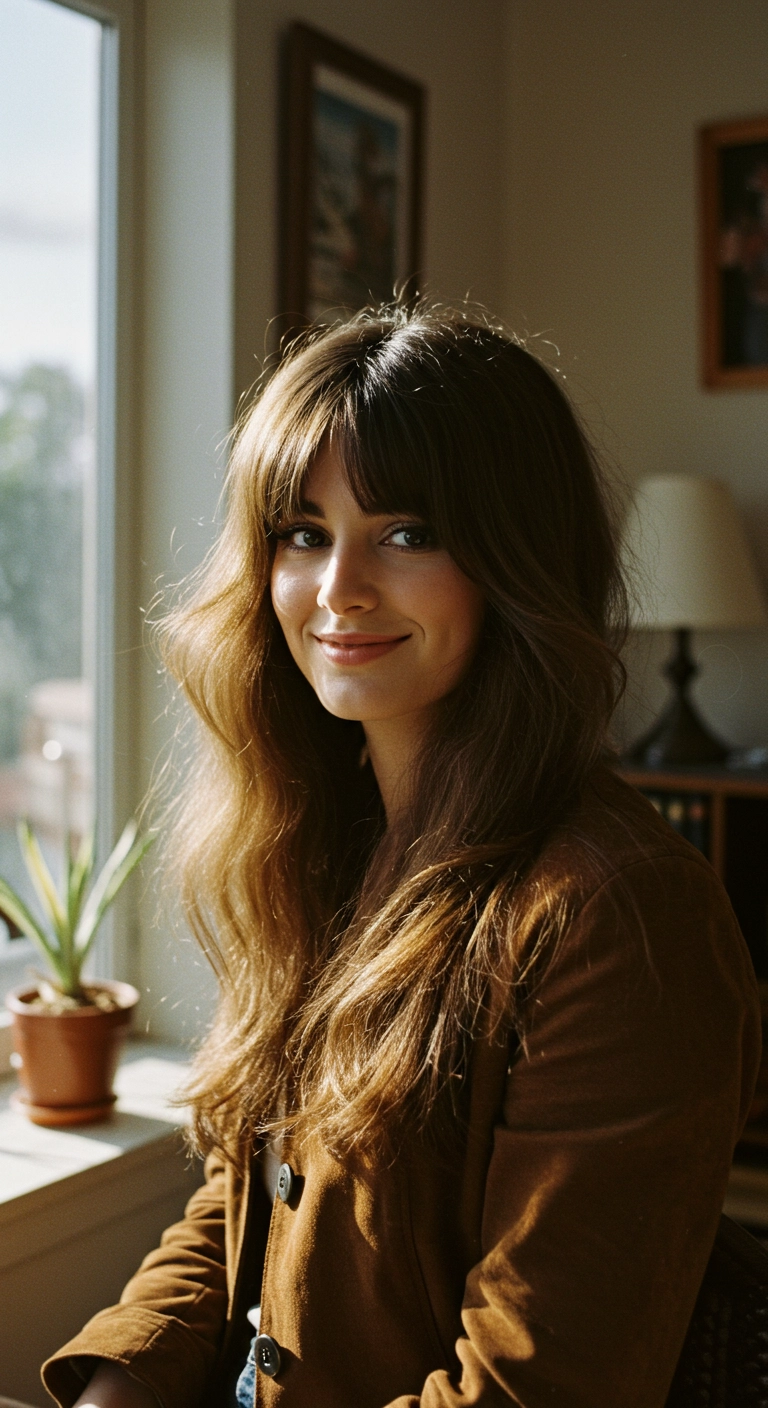
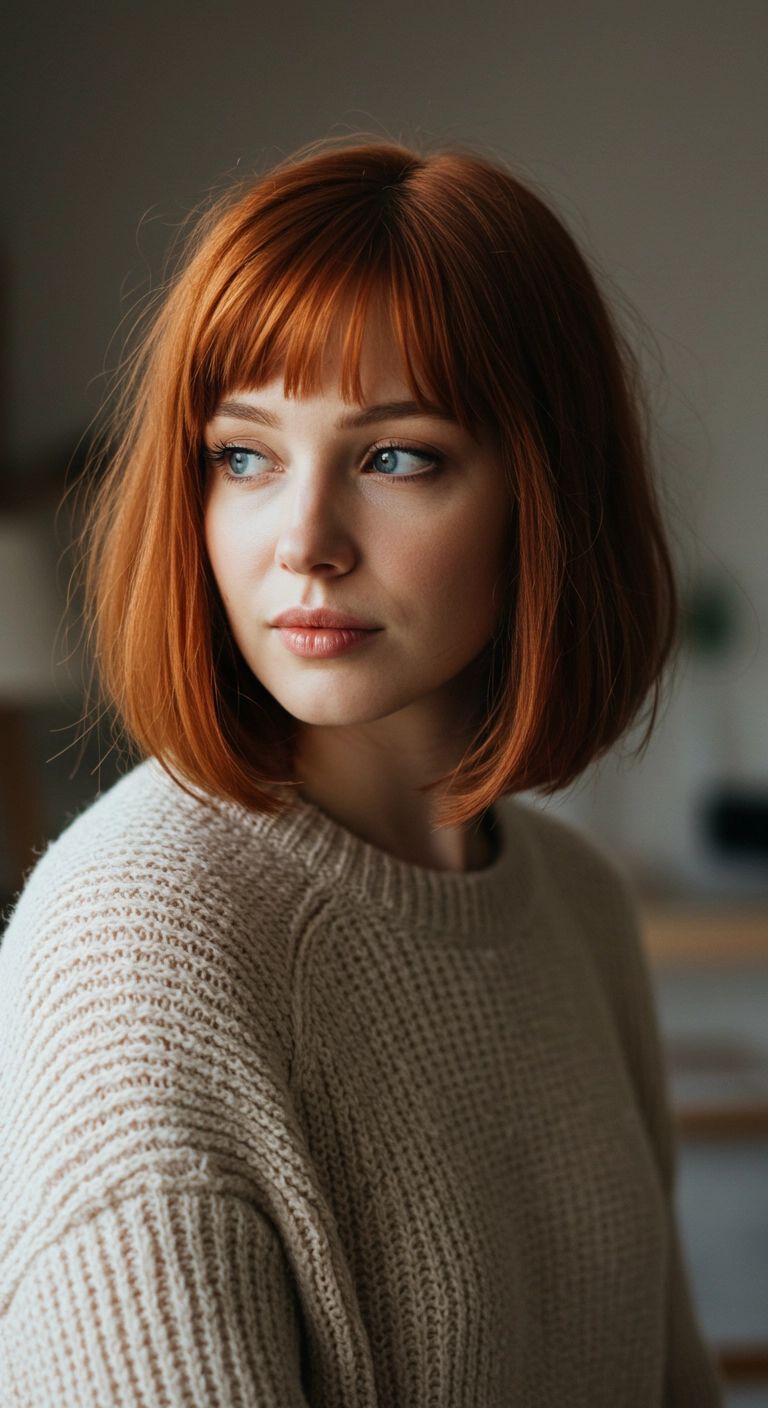
This is total Jane Birkin vibes with a modern update. The warm chestnut tone looks so rich in natural light, and pairing soft, piecey fringe with breezy retro layers gives it that effortless, I-woke-up-like-this French girl energy. It's cozy, chic, and looks amazing with corduroy or oversized knits.
How to do this
1. Start with clean, damp hair and apply a quarter-sized amount of the lightweight volumizing mousse listed below from roots to ends to prep for fullness.
2. Mist hair with the thermal heat protectant spray listed below to shield your strands while styling.
3. Section out the bangs and blow-dry them forward using the ceramic round brush listed below, gently rolling under and slightly to the sides to create that soft, separated French fringe.
4. Blow-dry the rest of the hair in 2-inch horizontal sections with the round brush, lifting at the roots for volume and beveling the ends away from the face for an effortless flick.
5. For extra movement, take random mid-shaft sections and wrap them loosely around the 1.5-inch curling iron listed below for just 3 to 5 seconds to set a relaxed wave.
6. Finish by misting the dry texturizing spray listed below through the mid-lengths and shake out with your fingers for a soft, lived-in retro texture.
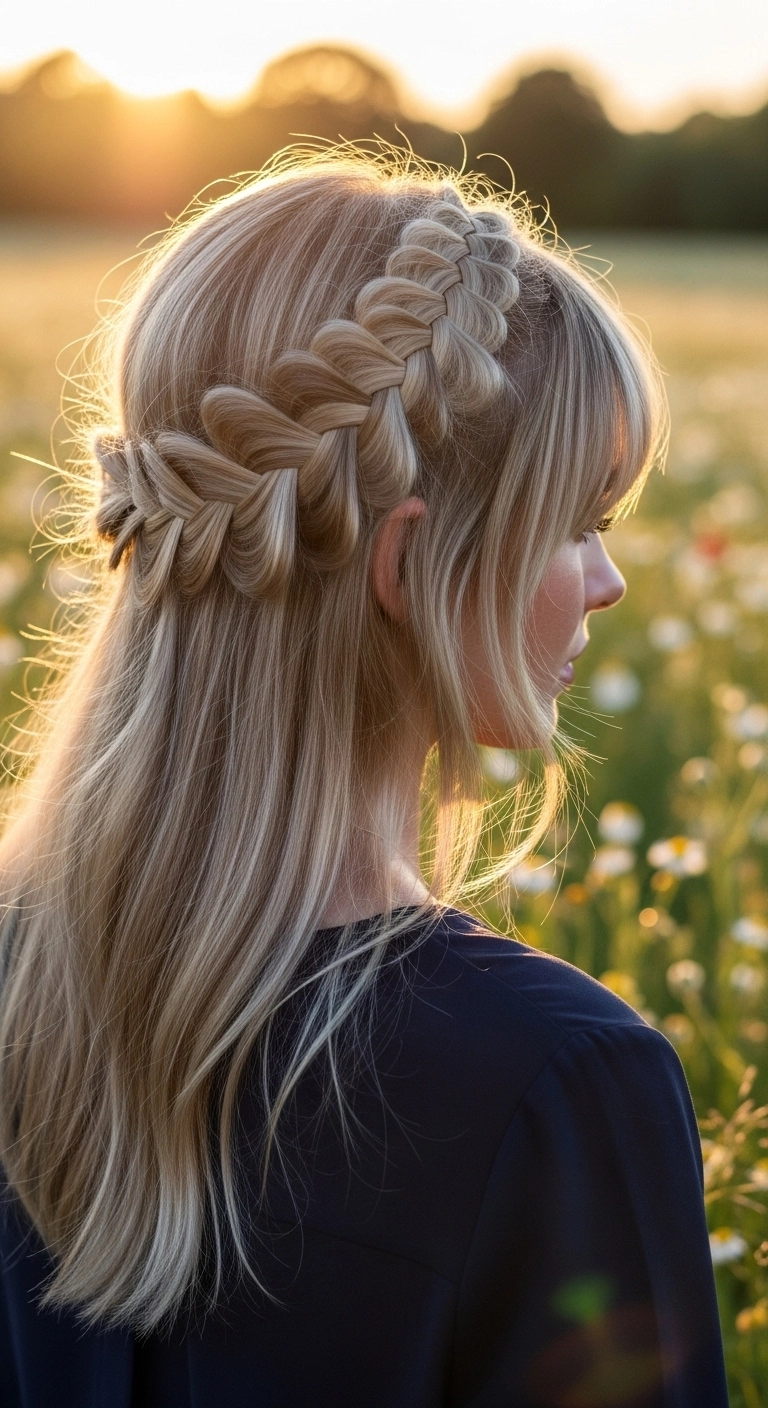
The half-up crown braid. Such a dreamy, romantic vibe! I love how the dimensional blonde highlights make each weave of the braid pop so effortlessly. It’s perfect for outdoor weddings, summer festivals, or whenever you want to feel like a woodland fairy without spending hours in a salon.
How to do this
1. Start by prepping clean, dry hair with a smoothing serum and blow dry smooth using the paddle hair brush listed below to keep the lengths sleek.
2. Separate out your front bangs and soft face-framing tendrils around the ears to leave them free.
3. Begin a deep side part or section behind the ear, gathering a generous section of hair and divide it into three equal pieces.
4. Create a Dutch lace braid across the crown, crossing outer strands under the middle while incorporating new sections only from the top crown area as you move around the back of the head.
5. Secure the braid end with one of the clear elastic hair ties listed below and pin it inconspicuously underneath the opposite side with bobby pins.
6. Gently pancake each loop of the braid by tugging lightly on the outer edges to create maximum volume and that gorgeous dimensional floral effect.
7. Finish the look by misting with the flexible hold hairspray listed below to lock the crown in place while keeping the loose lengths touchable.
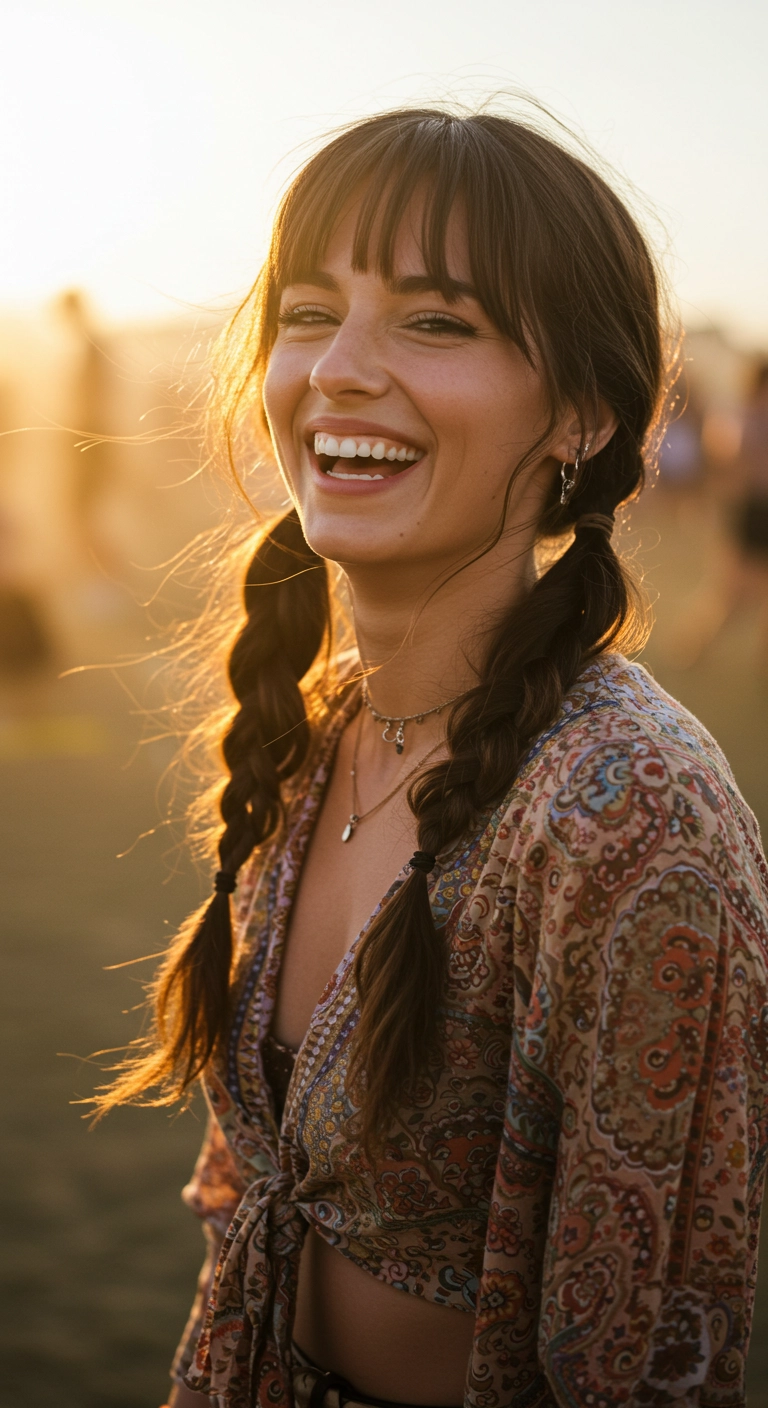
Nothing beats effortless twin braids for an all-day outdoor festival or sunny road trip! I love how the wispy fringe frames your face while keeping the rest of your hair cute, secure, and totally tangle-free.
How to do this
1. Start by gently blow-drying your fringe forward using the round thermal styling brush listed below to give your bangs that soft, rounded, wispy shape.
2. Spritz a little bit of the lightweight dry texturizing spray listed below through the lengths of your hair to add grip and keep flyaways under control.
3. Create a clean or casual center part down the back of your head, dividing your hair into two equal left and right sections.
4. Leave out your bangs and a few small face-framing wisps right in front of your ears for that breezy, effortless look.
5. Secure each side loosely just below the ears or behind the earlobes using a soft hair tie to anchor the base of the pigtails.
6. Divide one side into three equal sections and braid downwards in a classic three-strand braid, securing the bottom with the mini clear elastic hair bands listed below.
7. Repeat the same braiding step on the opposite side, matching the length and tension.
8. Gently pull or 'pancake' the outer loops of each braid to add a touch of fullness and texture, then finish with a quick mist of the flexible hold hairspray listed below.
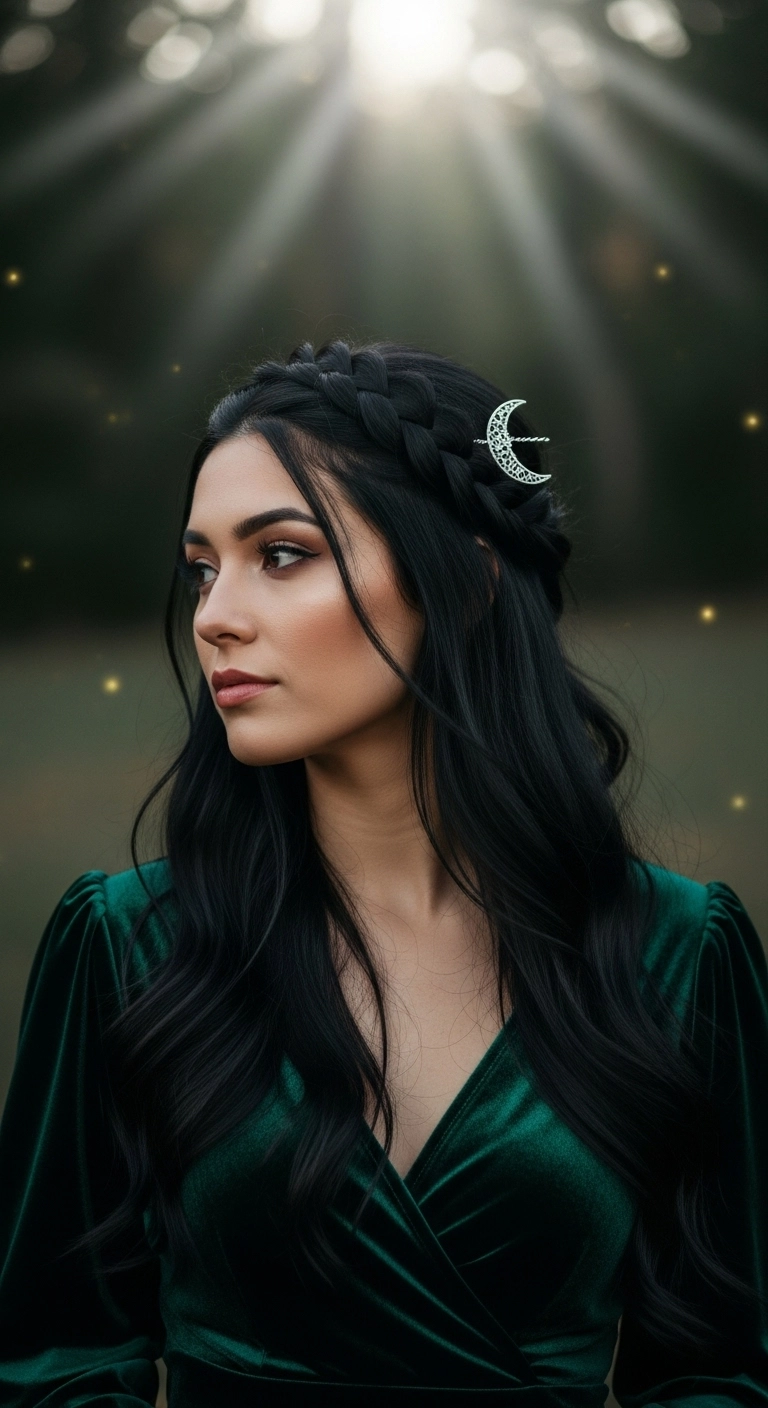
I am completely obsessed with this whimsical, fairytale-inspired look! Braid crowns can sometimes feel intimidating, but using a Dutch braid technique right across the top makes it so much easier to get that bold, raised texture without slipping. Tucking a celestial moon pin into the braid and leaving out those soft wisps around the cheekbones pulls the whole romantic dark-fantasy vibe together effortlessly.
How to do this
1. Start by prepping clean, dry hair with a lightweight smoothing serum and thermal protection using the heat protectant spray listed below.
2. Use a large 1.5-inch curling wand to create soft, cascading waves through the mid-lengths and ends, making sure to curl away from the face.
3. Leave out a few delicate face-framing strands around the temples and ears to soften the perimeter.
4. Take a generous 2-to-3-inch section of hair from behind one ear and weave a neat Dutch braid across the top of your head like a tiara, pinning it securely behind the opposite ear using the bobby pins listed below.
5. Gently pull apart and pancake the loops of your braid to give it a full, lush, regal appearance.
6. Slide a decorative crescent moon hairpin or celestial barrette directly into the side of the braided headband.
7. Mist all over with a touch of the flexible hold hairspray listed below to lock in the romantic waves and tame flyaways all day.
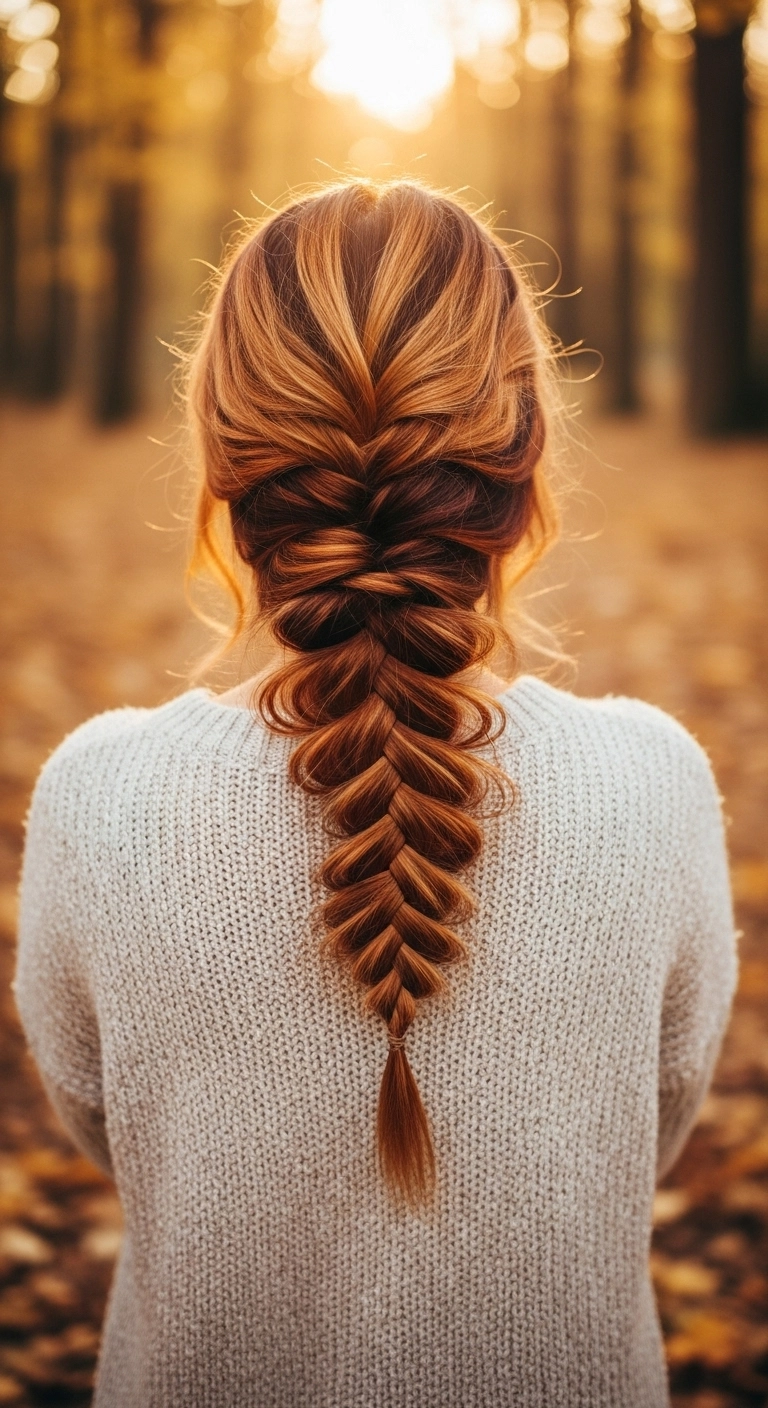
There’s nothing quite like a chunky, pancaked braid to show off rich autumn copper highlights! I love how effortlessly romantic this look feels while keeping your hair totally contained and out of the way for a cozy day out.
How to do this
1. Start by prepping dry hair with the texturizing volume spray listed below to give your strands extra grip and fullness.
2. Gently tease the crown section using the teasing comb listed below to create a bit of soft lift at the top of the head before braiding.
3. Gather a triangular section of hair at the crown and begin a classic French fishtail braid, dividing into two main sections and crossing small outer pieces over to the opposite side while incorporating new hair from along the hairline as you work down.
4. Continue feeding in sections all the way down to the nape of the neck, keeping the tension relatively consistent.
5. Once all loose hair is integrated at the nape, transition into a standard fishtail braid down the remaining length.
6. Secure the end tightly with a mini elastic hair tie from the pack listed below, leaving a small tail at the bottom.
7. Starting from the bottom and working your way up, gently pull and tug on the outer loops of each stitch (a technique called pancaking) using your fingertips to double the braid's width and create that fluffy, dimensional look.
8. Pull a few soft tendrils out around the ears and neck, then lock everything in place using the flexible hold hairspray listed below.