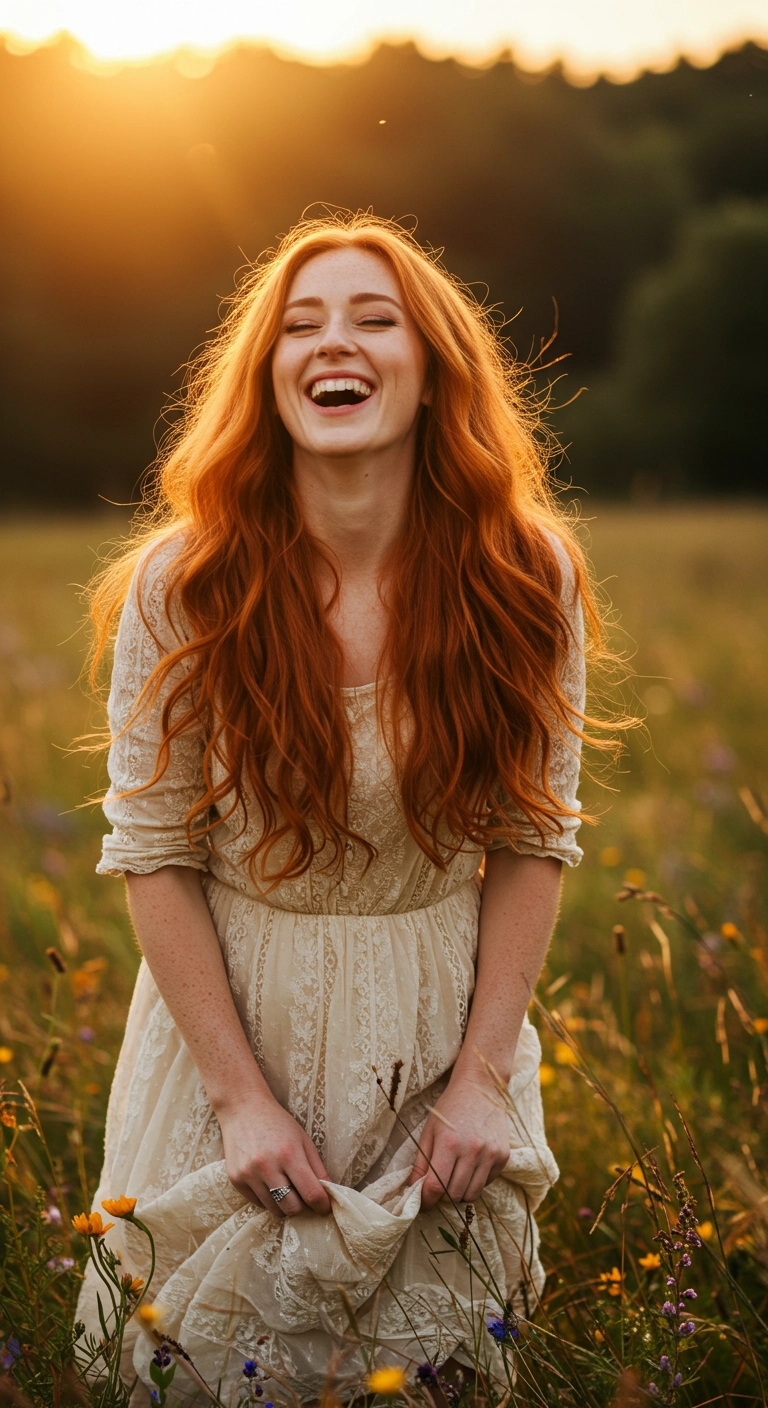
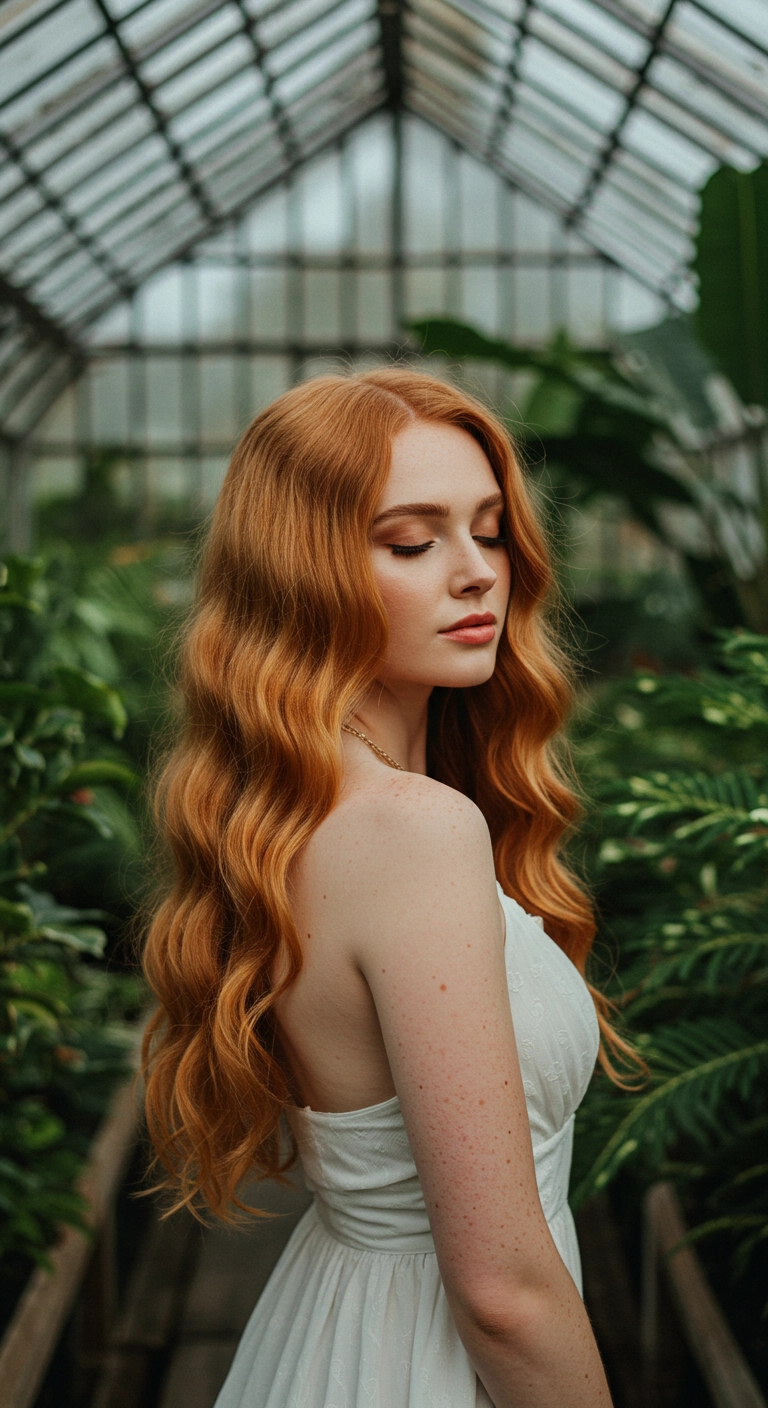
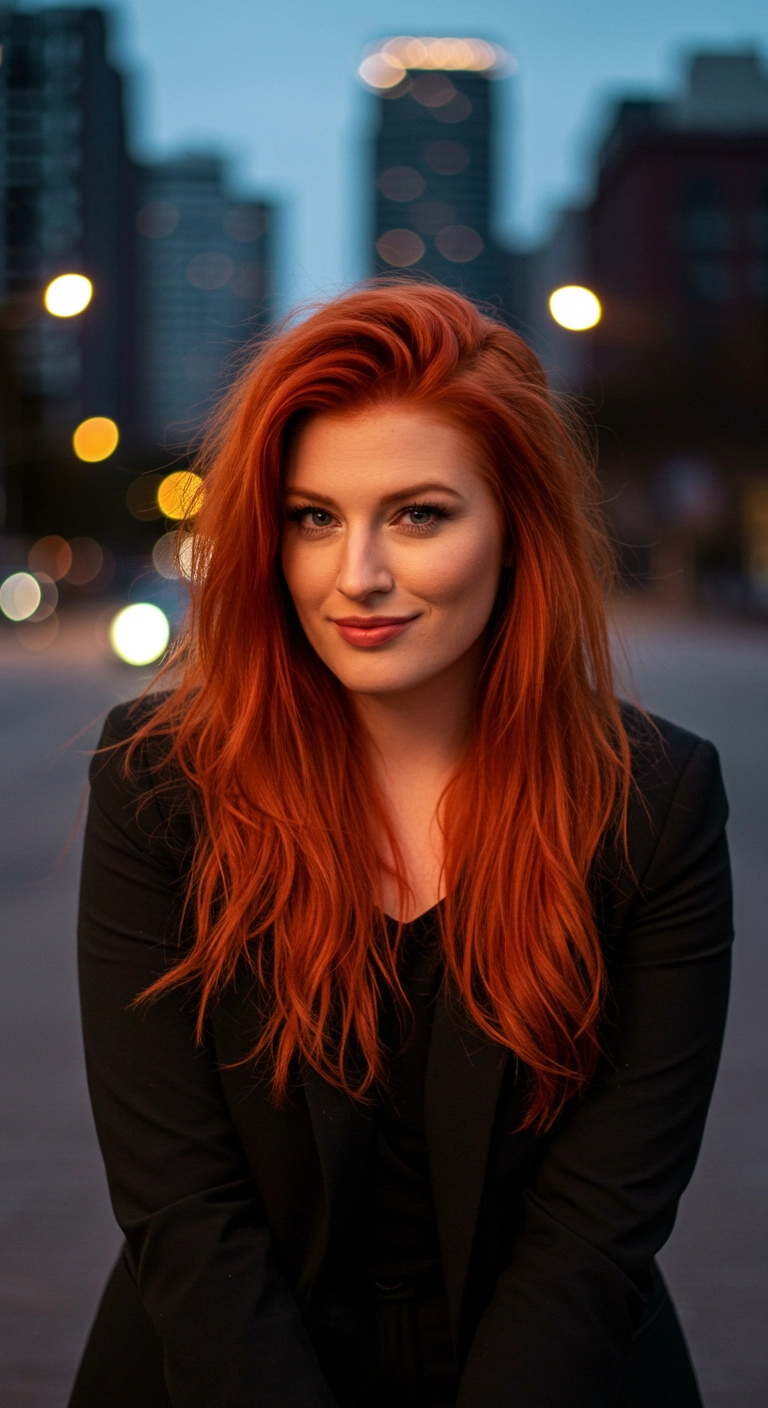
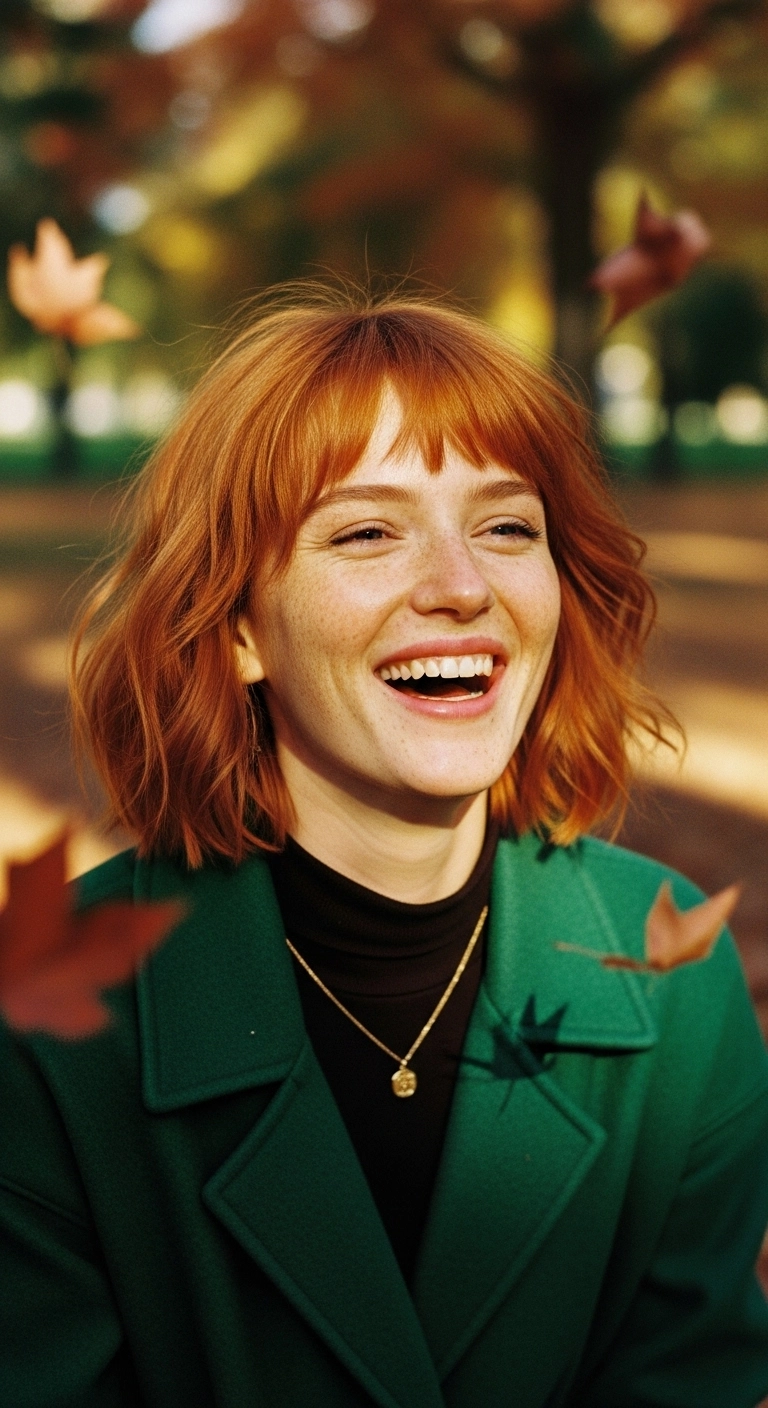
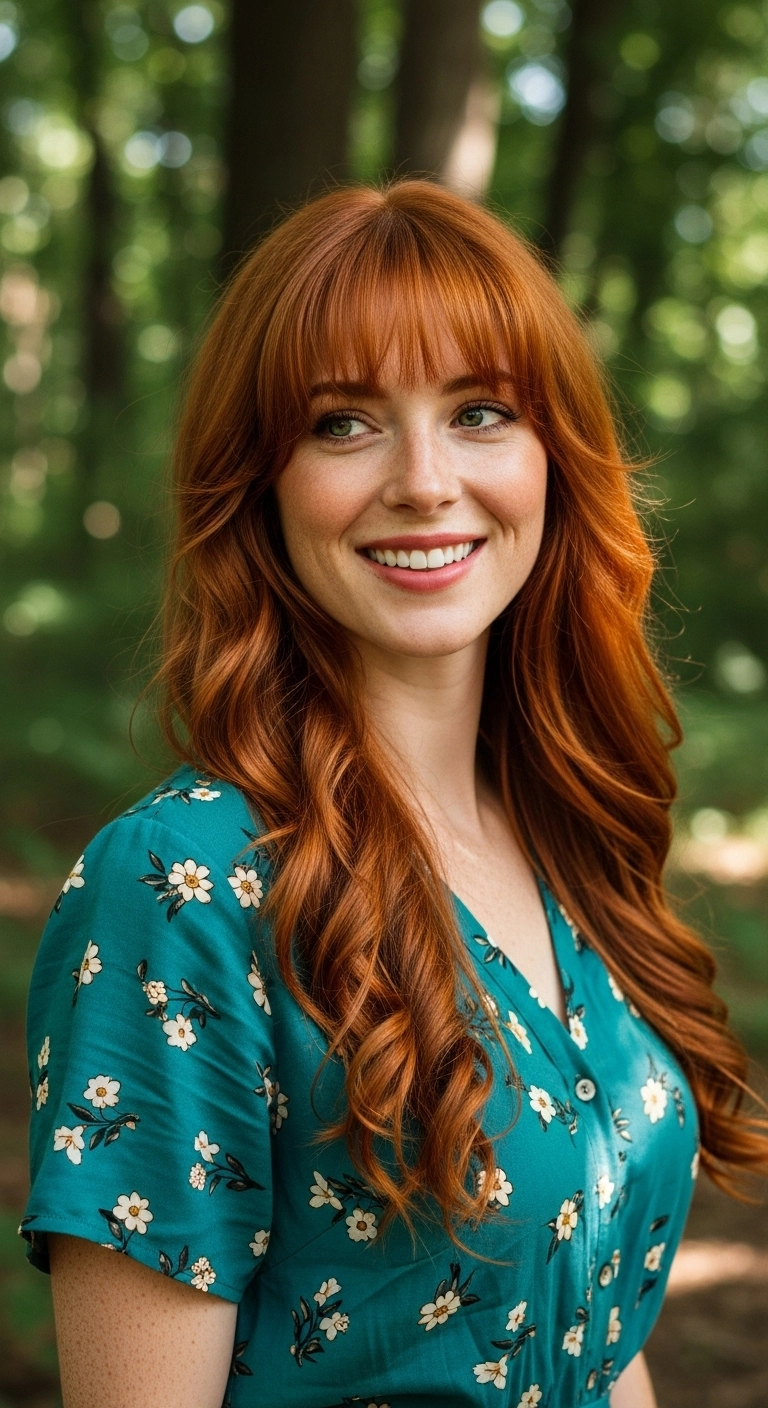
Pure cottagecore dream hair right here. I love leaving long wavy hair totally free and wind-tousled instead of overly curling it with hot tools. The rich warm copper tone catches the evening sun so beautifully, and these soft undone bends make you look like you just walked right out of a wildflower meadow. It's relaxed, effortless, and honestly so gorgeous.
How to do this
1. Prep clean, damp hair with a small amount of the leave-in conditioning cream listed below to add hydration and manage frizz.
2. Mist hair generously from mid-lengths to ends with the heat protectant spray listed below before blow-drying.
3. Rough-dry your hair upside down with a blow dryer until it is roughly 80% dry to create maximum lift and natural body at the roots.
4. Switch to a large ceramic round brush to smooth out sections while maintaining soft, rounded movement throughout the lengths.
5. Take random 1.5-inch to 2-inch vertical sections and wrap them loosely around a 1.25-inch curling wand, leaving the last two inches uncurled for an undone, lived-in wave.
6. Once all sections have cooled, gently shake out the curls with your fingers using the lightweight hair oil listed below to add separation and a gorgeous glossy sheen.
7. Finish by spraying the texturizing sea salt spray listed below throughout the mid-lengths for that airy, wind-blown, effortless cottagecore vibe.
Products Used
Nourishing Leave-In Conditioner
hydrating leave-in conditioning spray for long wavy hair
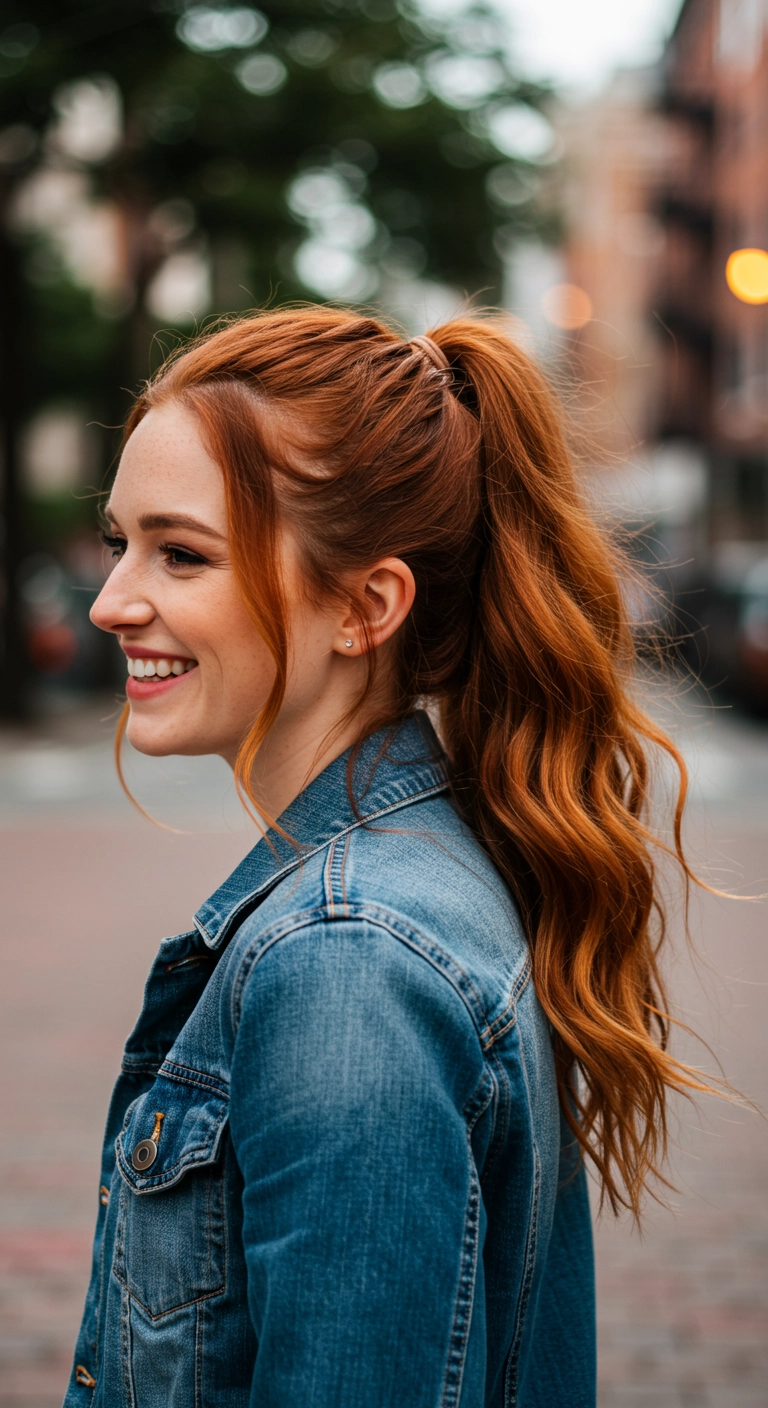
This high ponytail is seriously the ultimate go-to when you want something effortless but super elevated! I love how full and bouncy the waves look, especially with that vibrant copper tone catching the light. Leaving those face-framing pieces out in front softens the whole look and makes it so flattering for any casual day out!
How to do this
1. Start by prepping damp hair with a lightweight styling mousse and rough dry to enhance your natural body and texture.
2. Add loose, relaxed bends throughout the hair with a 1.25-inch curling iron, making sure to leave the ends slightly straight for a lived-in feel.
3. Mist all over using the texturizing spray listed below to add grit, lift, and volume before gathering.
4. Pull out a few soft, wispy tendrils around your face and temples to frame your features naturally.
5. Sweep the rest of your hair up toward the crown into a high ponytail and secure it tightly using the no-crease hair elastic listed below.
6. Take a small piece of hair from underneath the ponytail, wrap it around the hairband to conceal it, and pin it in place with a bobby pin.
7. Gently pinch and tease the base of the ponytail with a styling brush to boost maximum volume and fullness.
8. Finish the style by setting it with a flexible hold hairspray listed below to keep the flyaways in check while maintaining effortless movement.
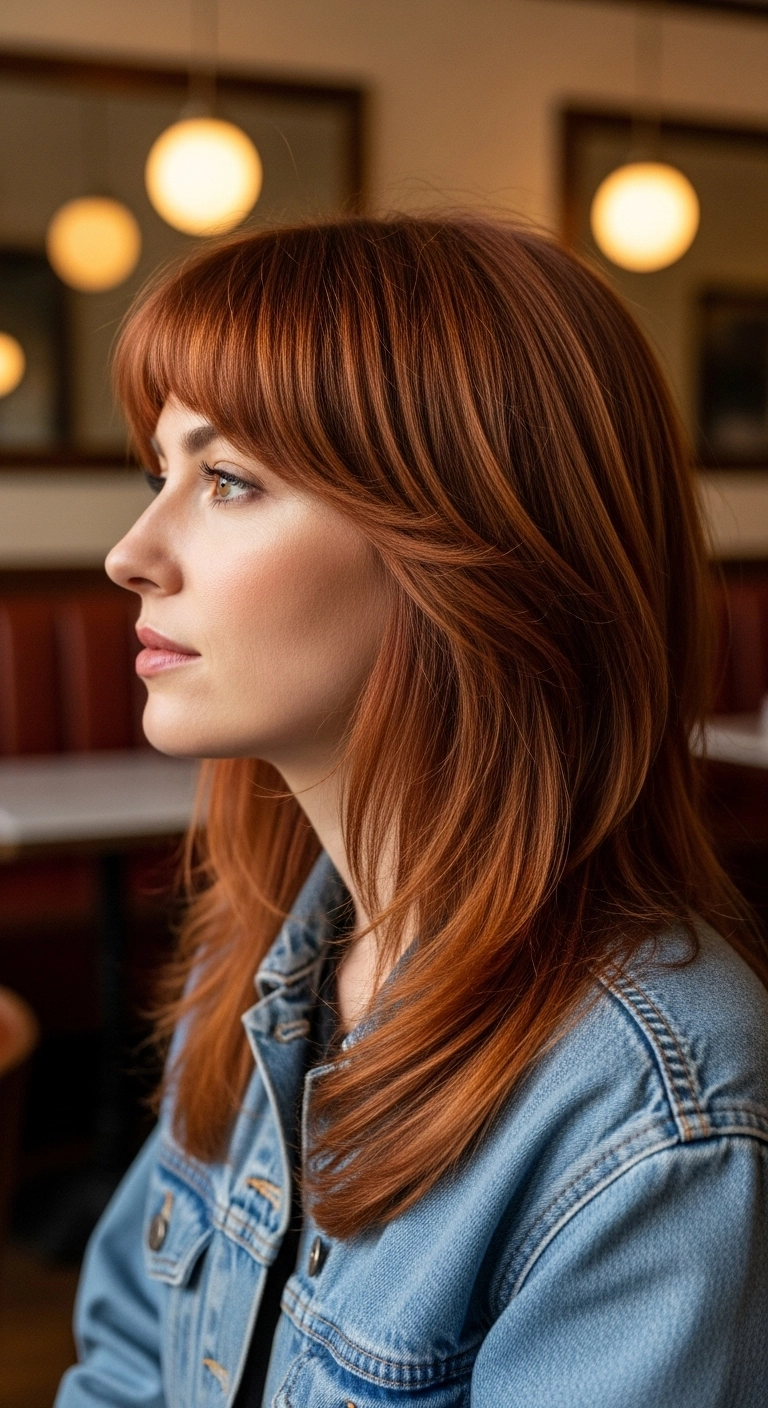
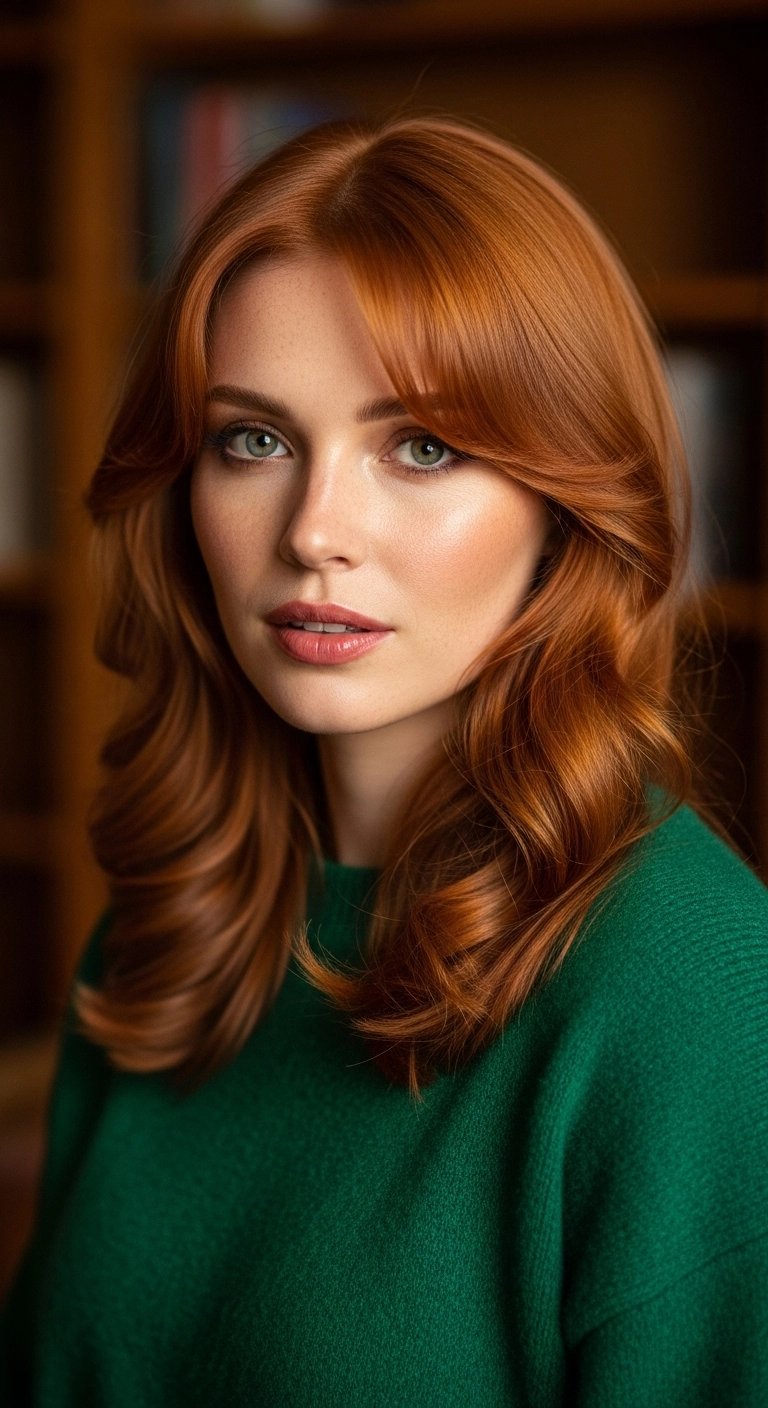
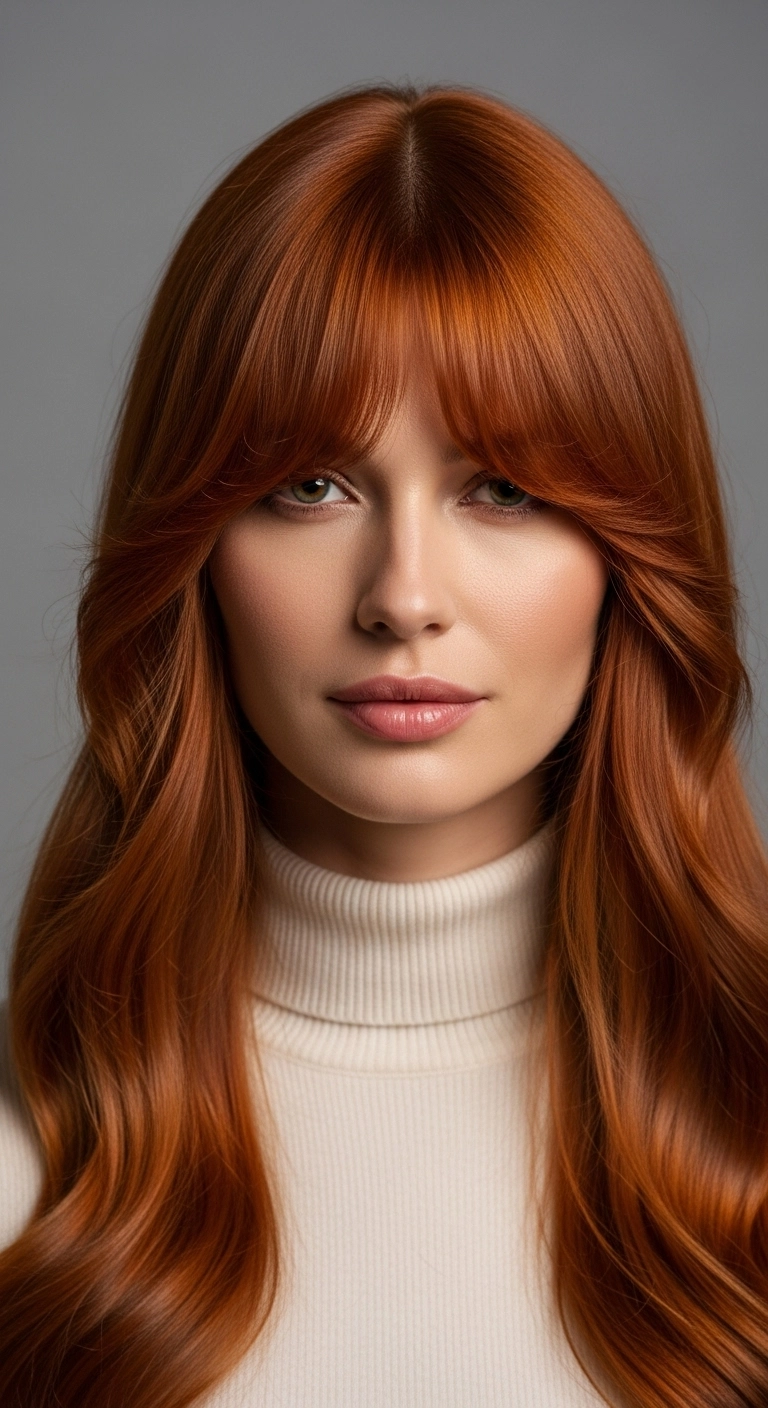
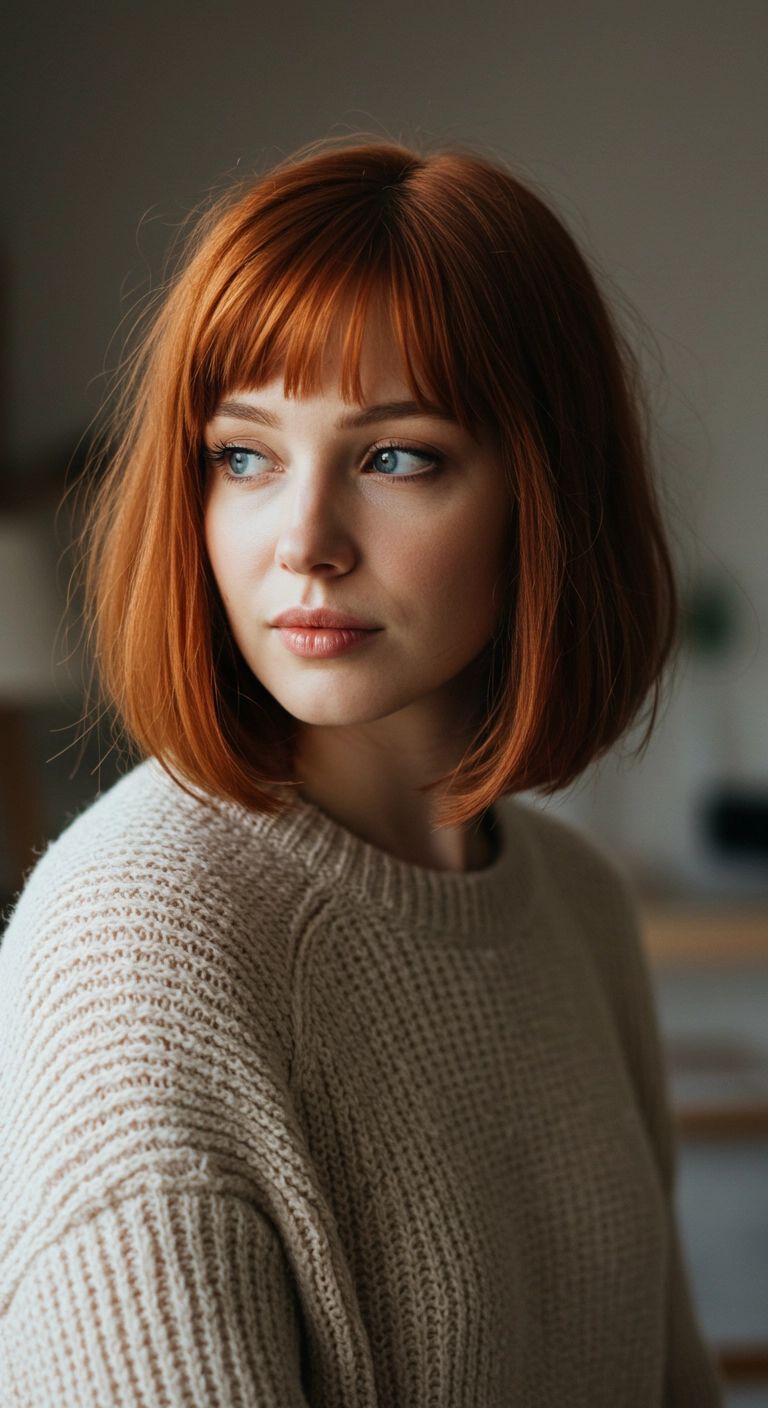
I am completely obsessed with this rich copper feathered cut! The way the face-framing layers curve effortlessly back around the cheekbones gives such an iconic, effortless 70s rock-chic vibe. It pairs so beautifully with those full, soft bangs that skim right across the eyebrows without overwhelming the face.
How to do this
1. Start with clean, damp hair and apply a generous mist of the heat protectant spray listed below from mid-lengths to ends.
2. Work a quarter-sized amount of the smoothing blowout cream listed below through your damp strands to ensure frizz-free shine and silky movement.
3. Section off your bangs and blow-dry them first using the round ceramic brush listed below, rolling forward and slightly under to give them a gentle rounded curve that hugs the brow.
4. Divide the rest of your hair into manageable horizontal layers. Using a medium barrel round brush and hair dryer, bevel the ends under and softly backwards to enhance the feathered face-framing layers.
5. Once fully dry, mist lightly with the dry texturizing spray listed below at the crown and layers, gently fluffing with your fingers to build lived-in volume.
6. Finish the look by applying a tiny drop of the lightweight hair serum listed below through the tips for high-gloss shine and smoothness.
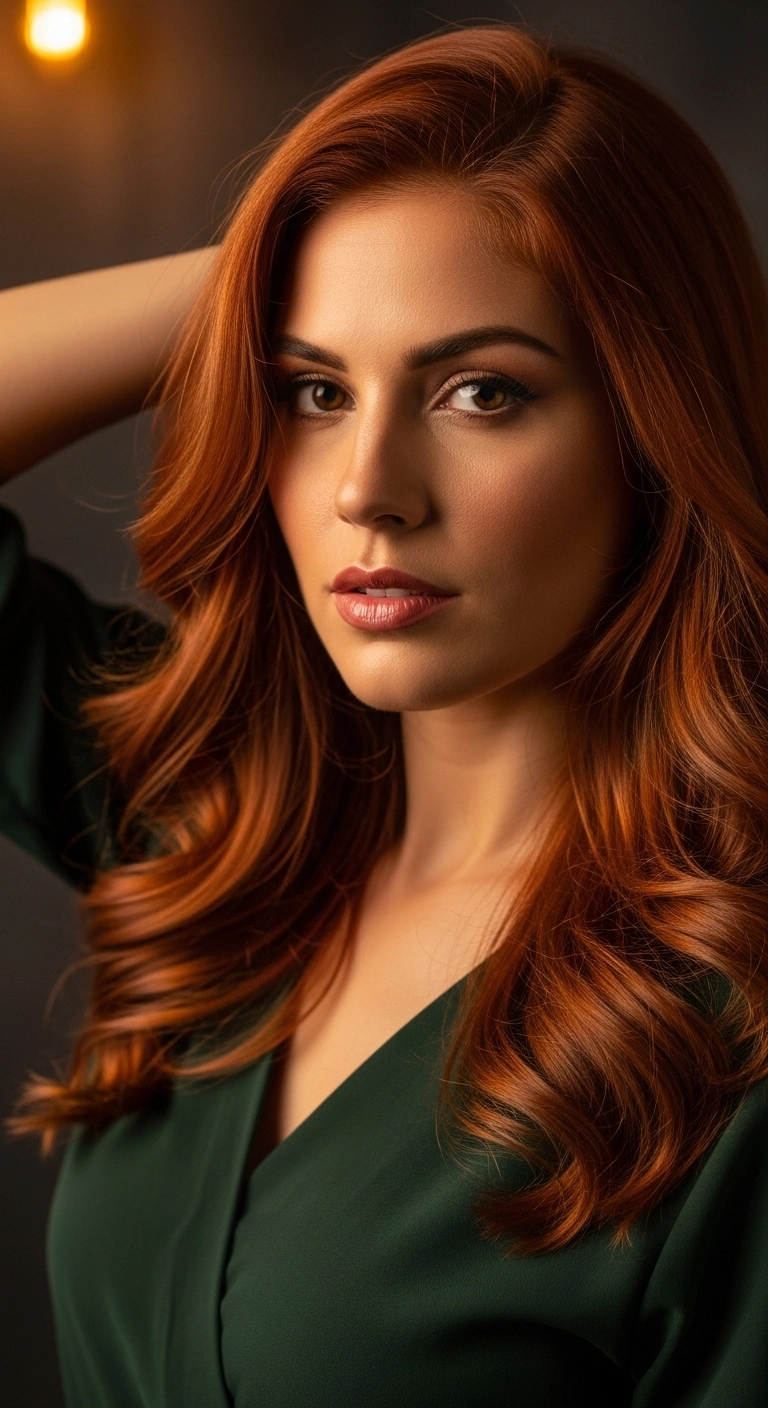
I’m seriously obsessed with this rich copper blowout! The color has so much warmth and vibrancy that completely illuminates the skin, and those soft, sweeping layers frame the face so effortlessly. It’s polished enough for a formal event or date night, but it also has that timeless, everyday elegance that makes you feel instantly put together without trying too hard.
How to do this
1. Start by prepping freshly washed, damp hair with a thermal protectant using the heat protectant spray listed below to shield your strands and enhance shine.
2. Apply a golf-ball sized dollop of the volumizing styling mousse listed below evenly through your mid-lengths and roots to ensure your blowout holds its shape all day.
3. Rough-dry hair until it is about 80% dry, then divide into manageable horizontal sections using hair sectioning clips.
4. Blow dry each section smoothly with tension using the ceramic round blowout brush listed below, curling the ends outward and away from the face to create soft, cascading waves.
5. For extra curl definition and bounce in the face-framing pieces, wrap sections around the 1.5-inch large barrel curling iron listed below for just 5-8 seconds.
6. Allow all curls to completely cool before gently brushing them out with your fingers to soften the wave pattern.
7. Finish off the style by smoothing flyaways and adding a glossy mirror-like finish using the lightweight hair shine oil listed below.
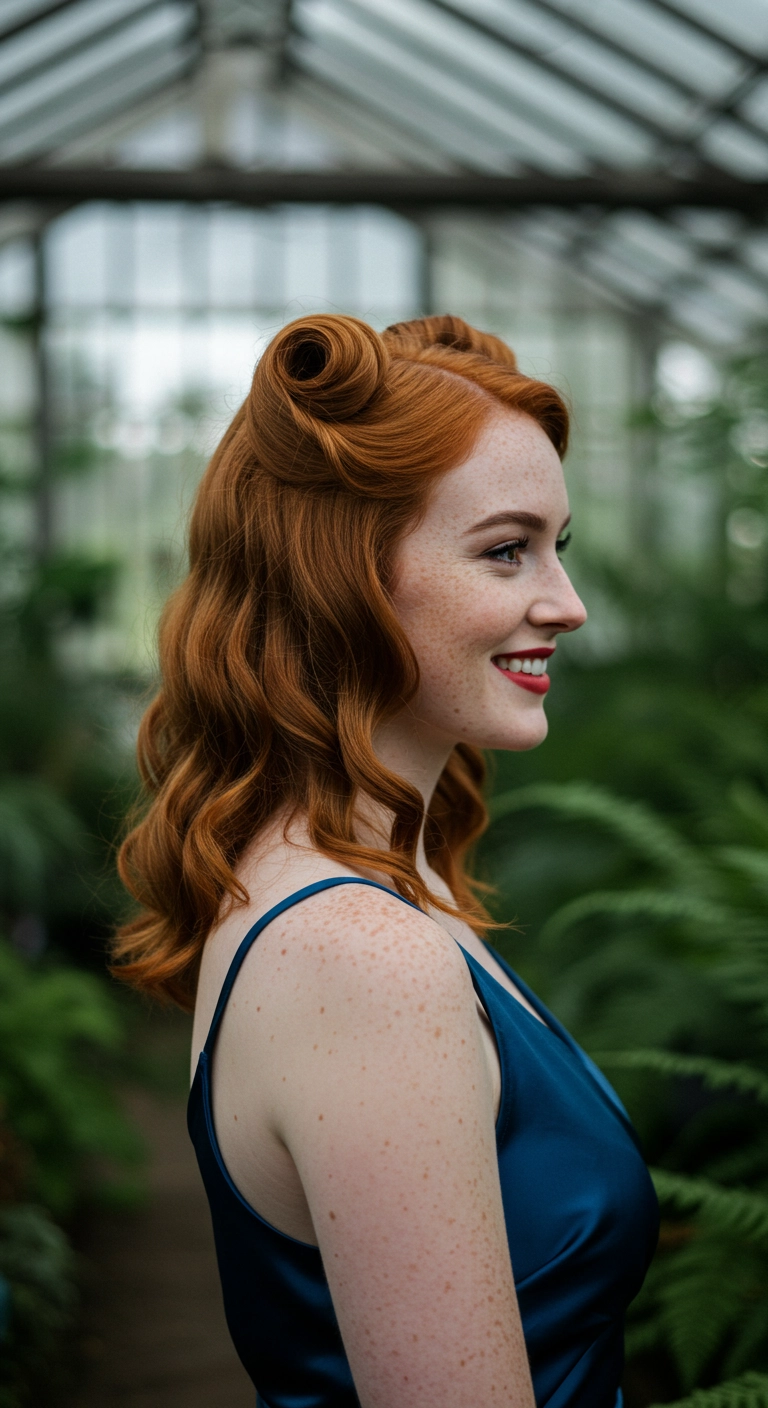
Obsessed with timeless 1940s glam? These beautifully sculpted copper victory rolls paired with soft, cascading waves give you that classic pin-up elegance with zero fuss. It’s the ultimate statement style when you want to feel utterly glamorous and stand out in any room!
How to do this
1. Start by prepping clean, dry hair with a generous mist of the heat protectant spray listed below to shield your strands and enhance shine.
2. Section out the top crown and front temple areas where you'll form your victory rolls, securing the back hair out of the way.
3. Using a 1-inch curling iron listed below, curl the lengths of the back hair in the same direction to set up vintage S-waves, then let them cool completely.
4. Gently backcomb the front sections at the roots using the fine-tooth rat tail comb listed below to create structural volume and hold.
5. Smooth the outside of the front section with a soft bristle brush, then roll the hair upward and inward around your fingers to create a hollow cylinder or roll right against the top of the head.
6. Pin the inside base of each victory roll discreetly against the scalp using the bobby pins listed below, ensuring the pins remain completely hidden.
7. Brush through the bottom curls with a boar bristle brush to form unified, glossy waves, and lock the entire vintage look into place with the strong-hold finishing hairspray listed below.
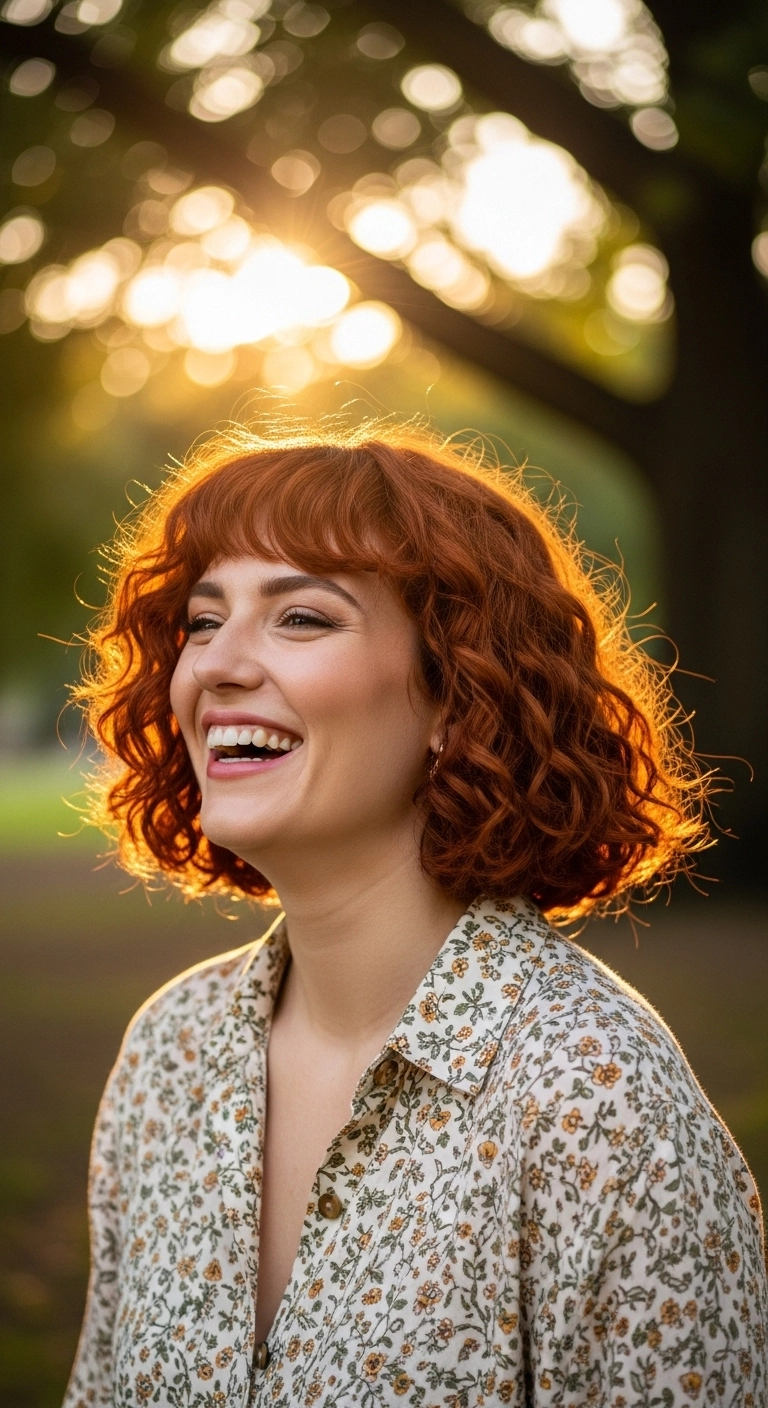
If you've been searching for a sign to finally chop your curls into a bob and go full copper, this is literally it! There is something so effortlessly chic and carefree about pairing bouncy, textured ringlets with a soft fringe. It frames the face in the dreamiest way possible, especially catching that golden hour glow!
How to do this
1. Start on freshly cleansed, damp hair and detangle gently from ends to roots using the wide-tooth detangling comb listed below.
2. Rake a nickel-sized amount of the curl defining cream listed below evenly through your mid-lengths and ends to lock in hydration and define the natural coil shape.
3. Apply a golf-ball-sized puff of the lightweight volumizing mousse listed below, focusing on the root and mid-shaft areas to build buoyant volume.
4. Style the front bangs forward with your fingers or a mini round brush to ensure they dry softly curved without separating too much.
5. Attach the universal hair diffuser nozzle listed below to your blow dryer, tilt your head slightly, and cup sections of your curls gently on low speed and medium heat until about 85% dry.
6. Allow the remaining dampness to air-dry naturally, then gently scrunch out any product crunch using a couple of drops of the lightweight shine hair oil listed below to reveal soft, bouncy ringlets.
Channeling pure 90s grunge nostalgia with these adorable space buns! It takes literally five minutes to twist up, and pulling out a couple of soft tendrils around the front instantly softens the whole vibe. Perfect for festivals, arcade nights, or days when you want something fun and effortless!
How to do this
1. Start by parting your hair straight down the middle from the forehead to the nape of the neck using the tail comb listed below.
2. Before securing, pull out two soft, face-framing sections around both sides of your face to frame your jawline.
3. Gather each half of your hair into a high ponytail near the crown and secure loosely using the clear elastic hair ties listed below.
4. Twist each ponytail gently and coil it loosely around its base into a cute, rounded bun shape, pinning it in place using the bobby pins listed below.
5. Gently tug at the outer edges of the buns to give them that effortless, full, lived-in texture.
6. Mist all over with the flexible hold texturizing hairspray listed below to keep everything locked in place while maintaining movement.
These lush, glossy copper waves are pure fairytale magic! I am obsessed with how smooth and structured each wave falls—it gives total romantic vintage glam without looking stiff. Have you ever tried classic brushed-out waves like this?
How to do this
1. Start by prepping clean, towel-dried hair with the heat protectant spray listed below to shield strands and add a silky base.
2. Blow dry hair smooth using a round ceramic brush to build body and eliminate frizz.
3. Create a clean, defined center part using a fine-tooth tail comb.
4. Section hair into horizontal tiers and curl 1- to 1.5-inch sections in the exact same direction around a large-barrel curling iron using the 1.25 inch curling iron listed below to ensure the waves marry together.
5. Clip each warm curl in place with setting clips and let them cool completely to lock the structural wave memory in place.
6. Remove clips and gently brush through the curls from scalp to ends using the boar bristle paddle brush listed below to transform individual curls into a cohesive, fluid S-wave pattern.
7. Apply a tiny drop of the lightweight hair shine serum listed below over the surface to tame any flyaways and boost that glossy copper sheen.
8. Mist the entire look with the flexible hold finishing hairspray listed below to keep every wave smooth and sculpted all day.
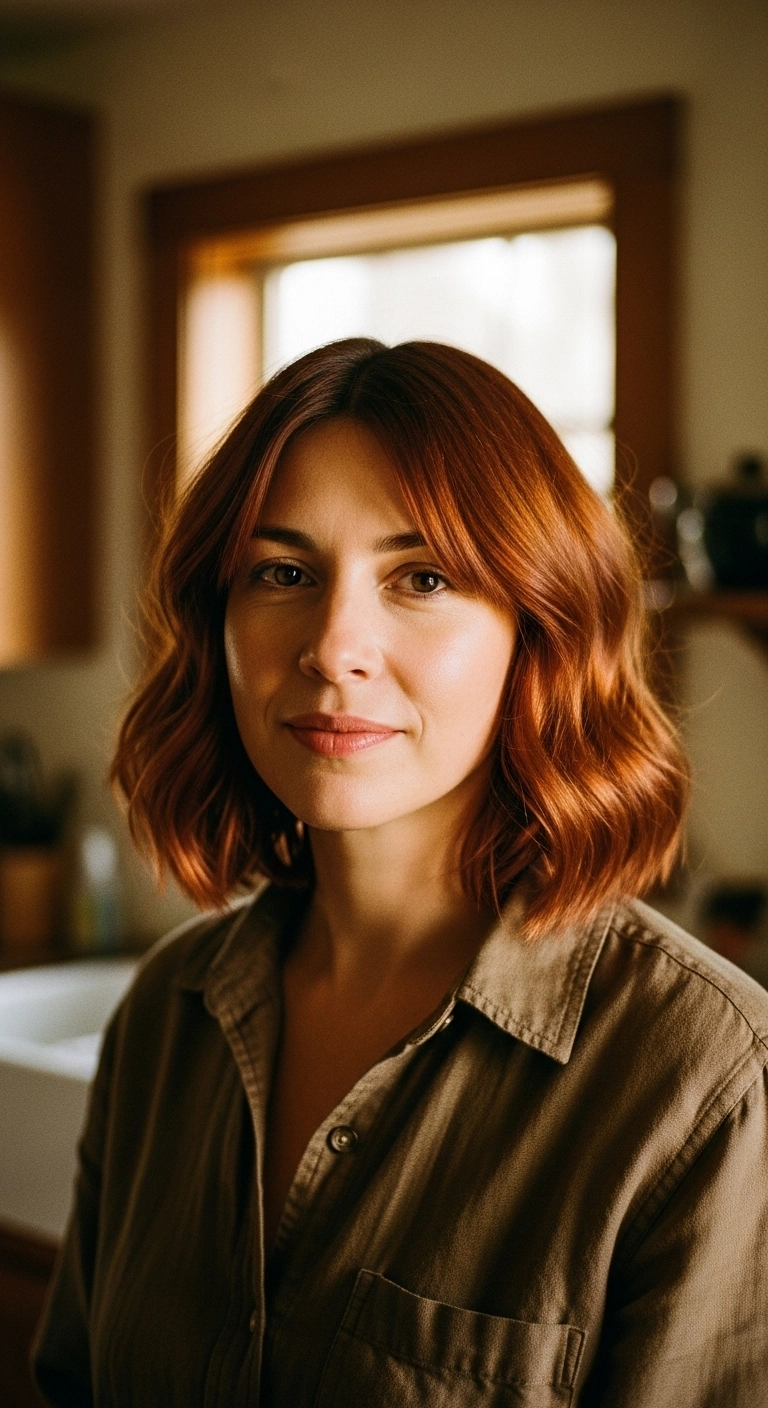
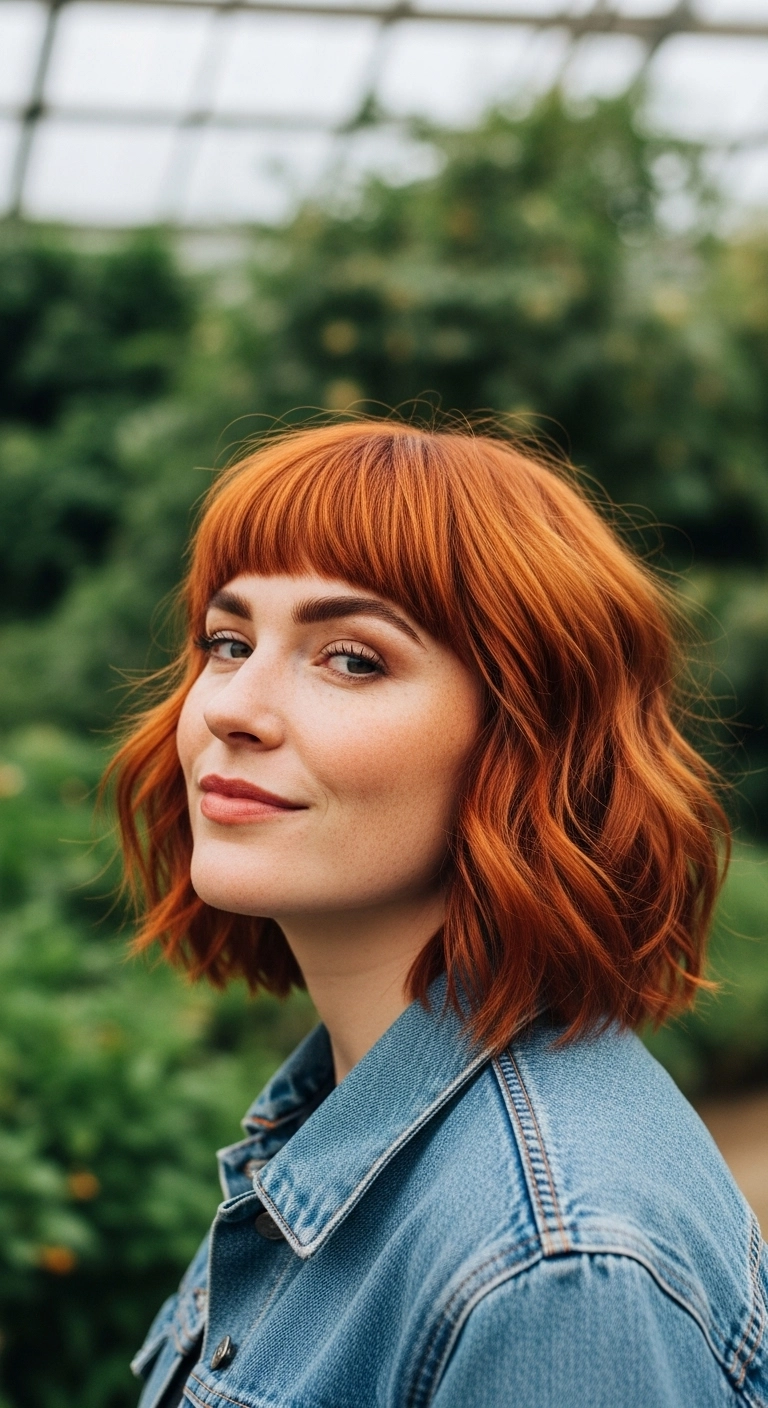
I'm totally obsessed with this rich copper collarbone cut! The wispy fringe is super flattering and gives off major cozy autumn vibes, especially paired with a textured lob. It’s so easy to style in the mornings with just a quick blowout, and you can tuck it behind your ears for an instant chic look!
How to do this
1. Start by prepping damp, freshly washed hair with a lightweight blow-dry heat protectant lotion to shield strands and add slip.
2. Blow-dry the bangs first using a small round boar bristle brush, directing the airflow downward and gently curving the ends under to achieve that soft, wispy look.
3. Section off the rest of your hair and blow-dry using a medium ceramic round brush, lifting at the roots for natural volume and smoothing down to the collarbone.
4. For a slight bevel and bend at the tips, roll the brush inward gently as each section cools to frame the jawline nicely.
5. Mist a light dry texturizing spray through the mid-lengths and shake out with your fingers to give it that effortless, lived-in texture.
6. Finish off with a tiny drop of lightweight hair oil rubbed between your palms and smoothed over the ends to lock in that vibrant copper shine.
I am completely obsessed with this rich copper lob. There is something about a collarbone-grazing cut paired with soft, bent waves and curtain bangs that just instantly makes your hair look full, healthy, and styled without trying too hard. If you've been on the fence about going warm or cutting a few inches off, this is your sign to do it!
How to do this
1. Prep clean, towel-dried damp hair by applying a generous pump of the volumizing styling mousse listed below throughout the roots and mid-lengths for lightweight lift and hold.
2. Mist hair with the heat protectant spray with argan oil listed below to shield strands from hot styling tools and retain moisture.
3. Blow dry using a round ceramic brush, lifting at the roots and directing your curtain bangs forward and slightly back around your cheekbones to frame your face.
4. Take vertical 1.5-inch sections of dry hair and wrap them loosely around the 1.25-inch ceramic curling iron listed below, leaving the very ends out to create effortless, modern S-waves.
5. Allow the curls to cool completely, then gently rake through with your fingers or a wide-tooth comb to soften them into relaxed waves.
6. Spritz the dry texturizing spray listed below through the roots and mid-lengths to build lived-in volume and separation.
7. Finish by smoothing a pea-sized drop of the lightweight hair shine oil listed below over the ends to add rich copper gloss and eliminate any flyaways.
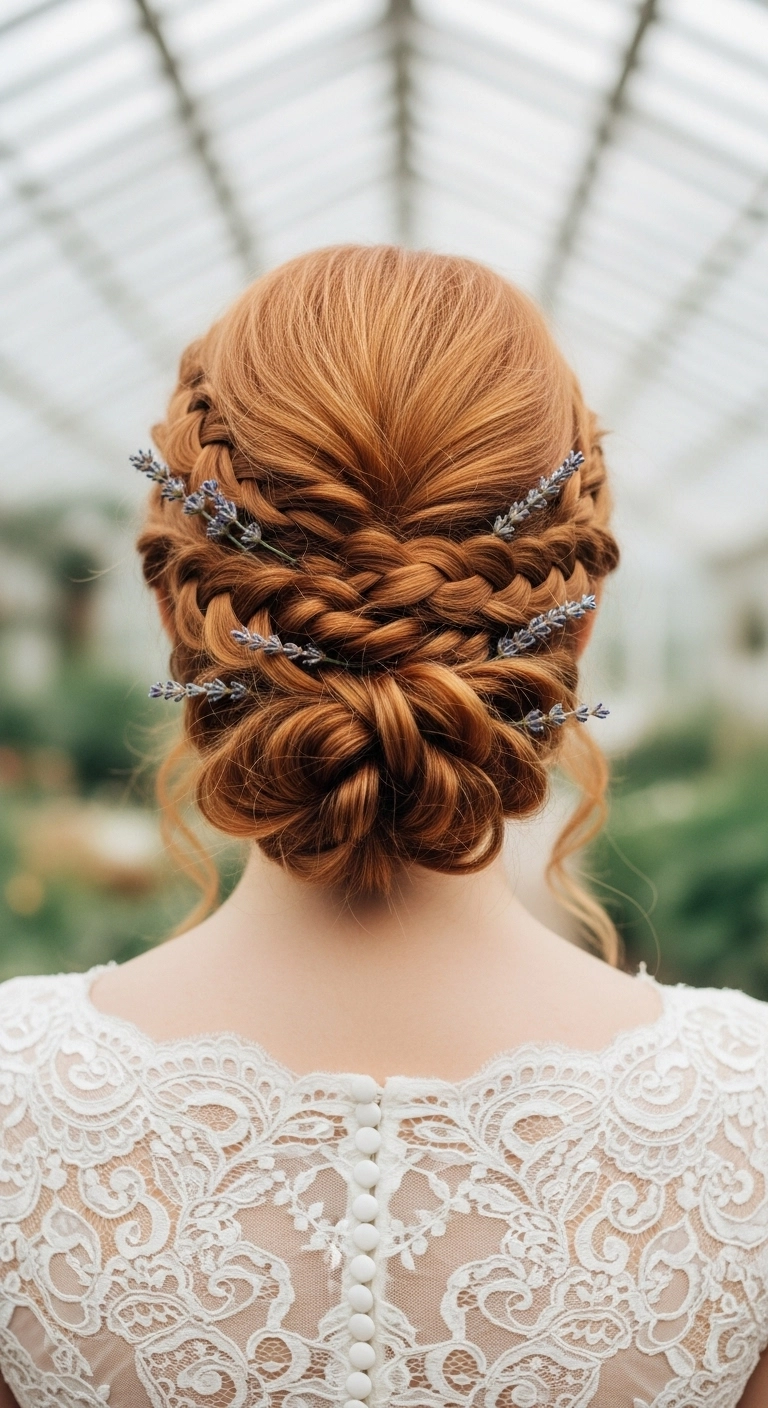
There is nothing quite like a dreamy braided low bun for a fairytale wedding! I love how the woven Dutch braids show off the gorgeous copper tones while the delicate lavender stems add that perfect touch of countryside romance.
How to do this
1. Prep dry, clean hair with a light spritz of the texturizing spray listed below to give your strands grip and hold.
2. Leave out a few soft, fine tendrils around both ears and the temples to softly frame the face later.
3. Section the hair into three main parts: two side sections running from behind the ears forward, and a central back section.
4. Gather the back section at the nape of your neck and create a loose, textured chignon or looped bun, securing firmly with the strong grip bobby pins listed below.
5. Moving to one side, create a soft Dutch or lace braid starting along the hairline and directing it backwards toward the crown of your bun. Gently pancake each stitch to make the braid look thick and full.
6. Repeat the exact braiding process on the opposite side so both braided strands meet at the back.
7. Cross the braids over each other above the low bun, tucking and pinning the ends neatly underneath the base using bobby pins.
8. Lightly curl the loose front tendrils using a curling wand, and tuck sprigs of dried lavender or fresh florals into the braid stitches.
9. Finish the entire style with a generous veil of the flexible hold hairspray listed below to lock every braid in place throughout your event.
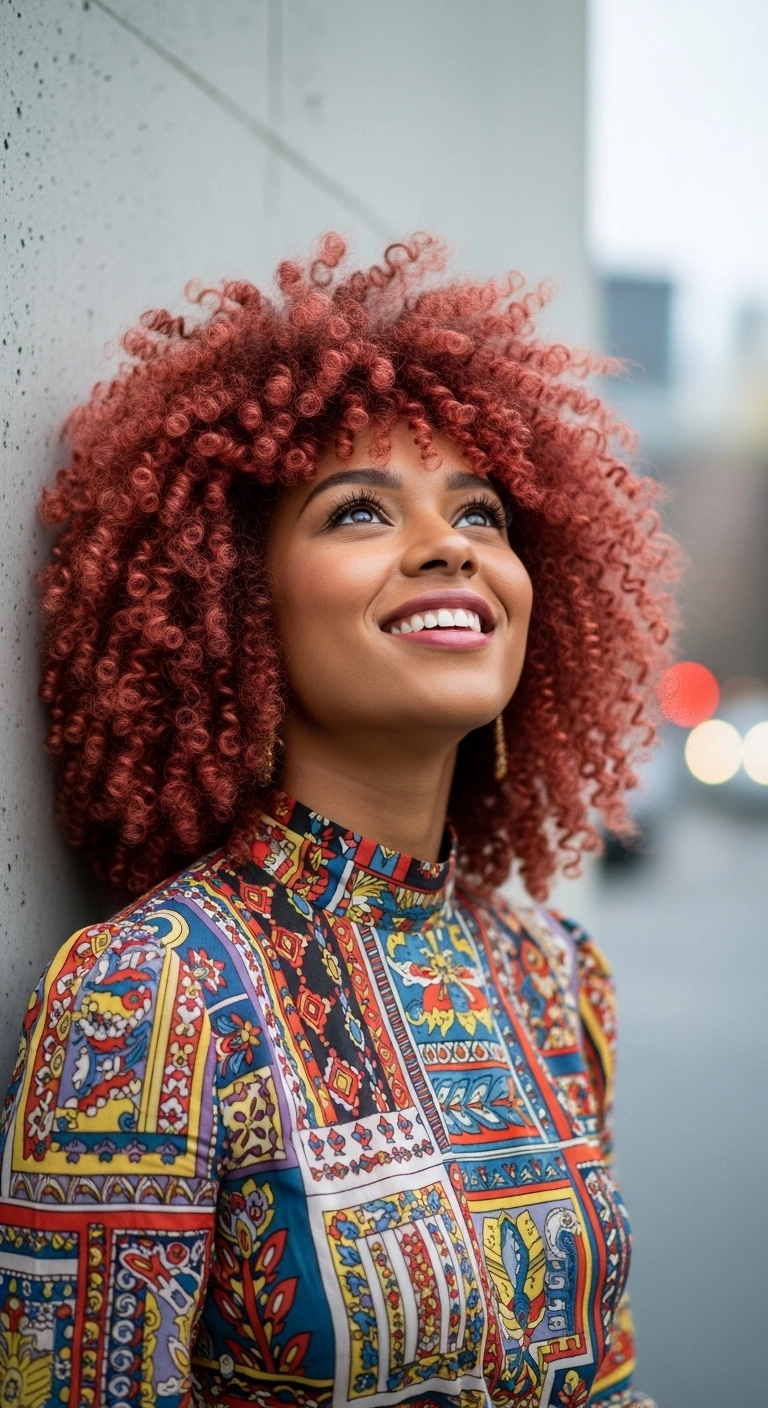
The fiery copper curly shag with bangs. Such a showstopper! I love how the warm terracotta red makes every single ringlet pop, and the full rounded shape frames the face so beautifully. It's totally bold, vibrant, and effortlessly cool for anyone wanting to embrace their natural volume.
How to do this
1. Start on freshly cleansed, soaking wet hair that has been conditioned using the curl defining leave-in conditioner listed below to lock in initial moisture.
2. Section your curls into four manageable quadrants and apply a generous amount of curl defining styling custard or gel listed below, smoothing and raking it from roots to ends.
3. Use a defined curl styling brush listed below to curl-train small vertical ribbons of hair, gently shaking each section at the end to encourage your natural corkscrew ringlets to bounce back.
4. For the curly bangs, style forward and coil individual ringlets around your finger to give the front fringe an intentional, rounded frame around the eyes and forehead.
5. Attach a diffuser bowl onto your blow dryer and dry your curls gently on low heat and medium airflow, hovering the diffuser around your head without touching the curls until they are about 80% dry.
6. Once fully dry, apply a few drops of lightweight hair oil listed below to your hands to break the gel cast, and gently use a wide-tooth hair pick listed below at the roots to fluff and maximize volume.
Oh, this warm copper textured bob has my whole heart! The effortless, undone waves paired with that rich ginger tone are absolute perfection. Have you ever gone bold with a copper color like this?
How to do this
1. Start on freshly washed, damp hair and prep with a lightweight heat protectant spray listed below to shield strands and add slip.
2. Apply a dollop of volumizing mousse through the roots and mid-lengths, then rough blow-dry using a paddle brush until completely dry.
3. Section off the hair and create a relaxed, slightly off-center part.
4. Take a 1.25-inch curling wand listed below and wrap vertical 1-to-2-inch sections away from the face, leaving the last inch of the ends out for a modern, relaxed finish.
5. Alternate curl direction around the sides and back to build natural, tousled dimension.
6. Once the hair has completely cooled, gently rake through the waves with your fingers or a wide-tooth comb to soften them into loose S-bends.
7. Spray the roots and mid-lengths with the texturizing finishing spray listed below to achieve that effortless, lived-in bounce.
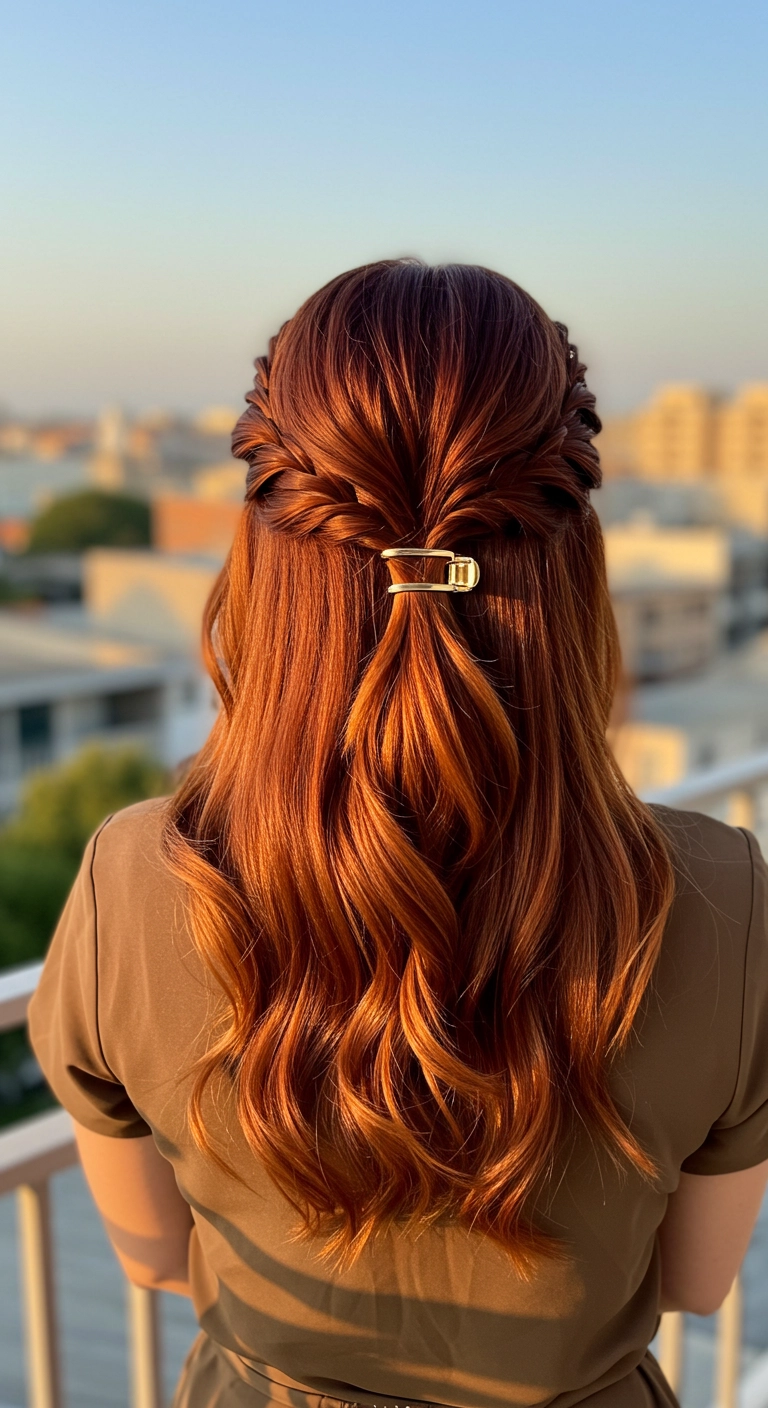
I am completely obsessed with this romantic half-up look! The rich, fiery copper color catches the sunlight so beautifully, and pulling the sides back into soft twists keeps everything out of your face while letting those gorgeous cascading waves shine. Plus, swapping a plain elastic for a chic gold claw clip instantly elevates the entire vibe with zero extra effort.
How to do this
1. Start by prepping clean, damp hair with the lightweight heat protectant spray listed below to shield your strands and enhance shine.
2. Blow dry using a large ceramic round brush to build volume at the roots and a smooth, polished finish along the lengths.
3. Take a 1.25-inch curling iron and curl large sections away from the face to create loose, flowing S-waves throughout the hair.
4. Starting above the left temple, gather a small section of hair and begin a loose French twist or waterfall twist, picking up hair along the hairline as you work backwards toward the center of your head.
5. Repeat the exact same twisting technique along the right side so both sides meet evenly at the center back.
6. Bring both twisted sections together at the back of your crown and secure them firmly using the mini gold metal claw clip listed below.
7. Gently pinch and pull at the twists to add dimension and fullness, then finish with a mist of the flexible hold hairspray listed below to keep everything locked in place.
This hairstyle is what I like to call the classic copper salon blowout. You start by blow drying the hair with a big round brush to get tons of volume at the roots. Sweep the curtain bangs back away from your face so they frame your cheekbones nicely, and curl the ends under into soft, bouncy waves that rest right on the shoulders.
How to do this
1. Start by washing hair and applying a volumizing mousse and the heat protectant spray listed below to damp hair.
2. Blow dry using the ceramic round brush listed below, lifting at the roots to build volume through the crown.
3. Focus on the curtain fringe by rolling them forward and slightly upward with the round brush, then sweeping them back away from the face to create that signature swoop.
4. Use the large barrel curling iron listed below to wrap 2-inch vertical sections away from your face to create soft, structured curls.
5. Allow the curls to completely cool before gently brushing through them using the wide-tooth detangling comb listed below.
6. Finish the look by misting with the lightweight shine and flexible hold hairspray listed below to lock in the bounce and glossy finish.
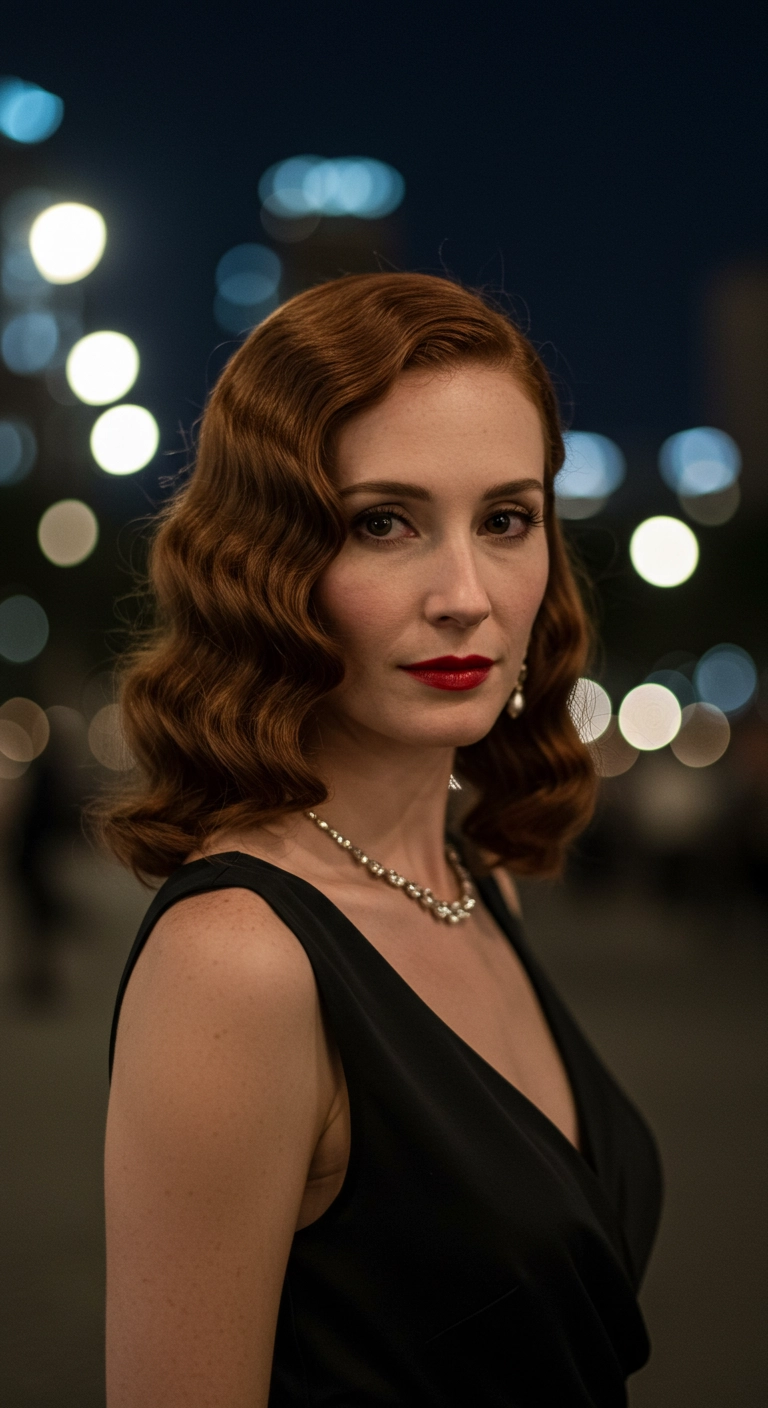
This is a go-to hairstyle if you want to turn heads at a black-tie event or formal dinner. The secret to getting these retro waves to sit together like a single flowing ribbon is curling everything in the exact same direction and letting the sections cool completely before brushing them out gently.
How to do this
1. Start by prepping freshly washed, dry hair with the heat protectant spray listed below to ensure a smooth, protected base.
2. Create a clean, exaggerated deep side part using a fine-tooth tail comb, aligning it with the arch of your eyebrow.
3. Section the hair horizontally into 1-inch rows and curl each section in the exact same direction toward your face using the 1-inch curling iron listed below.
4. Clip each hot curl against your scalp using the metal setting clips listed below and allow them to fully cool to lock in the wave structure.
5. Remove all the clips and gently brush through the curls using the natural boar bristle brush listed below until they merge into seamless, connected S-wave ridges.
6. Place flat setting clips in the dips of the waves and mist with the strong hold finishing hairspray listed below, then mist with the high-gloss shine spray listed below before removing the clips.
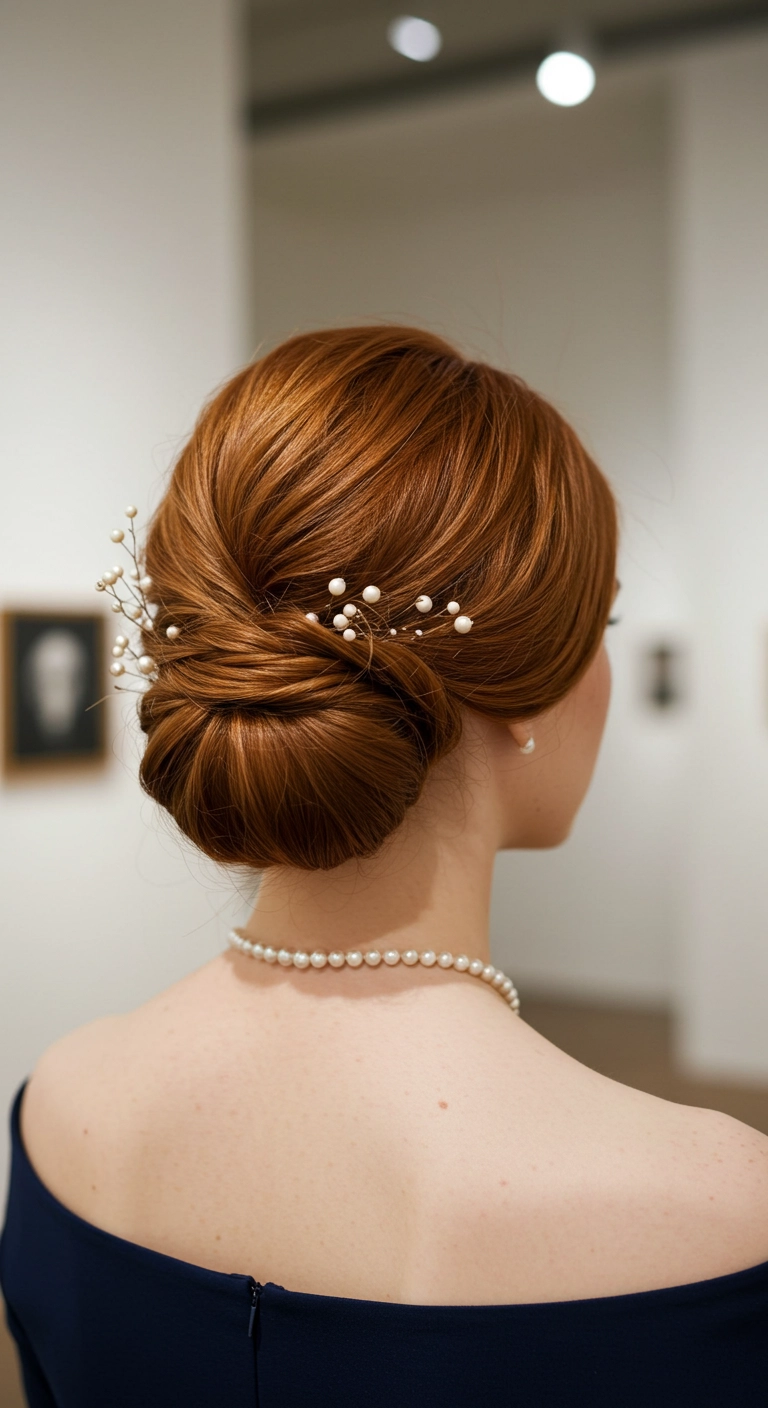
A polished low chignon never goes out of style, especially when you have a stunning warm copper shade to show off! The smooth crossover tuck keeps things sophisticated and secure, while the delicate sprigs of pearls add just the right amount of bridal romance. If you're heading to a formal event or walking down the aisle, this classic updo lets your neckline and jewelry shine beautifully.
How to do this
1. Start by prepping clean, dry hair with a generous mist of the heat protectant spray listed below, then blow-dry smooth with a round ceramic brush for maximum shine and volume.
2. Gently tease the crown area with a fine-tooth tail comb to build subtle height, then smooth over the top layer using a boar bristle smoothing brush.
3. Separate the front side sections above each ear and clip them away for later.
4. Gather the remaining back hair into a low, loose ponytail at the nape of the neck using a clear elastic band.
5. Create a hollow space above the ponytail elastic, flip the tail up and tuck it inward to roll it into a neat, smooth horizontal chignon bun, anchoring it securely against the scalp with the strong grip bobby pins listed below.
6. Take the side sections you set aside earlier, lightly twist or sweep them backward across the top of the rolled bun, crossing them over to conceal the base of the roll and securing with pins underneath.
7. Carefully tuck the delicate pearl hair pins listed below into the top and sides of the chignon for an ethereal, romantic accent.
8. Lock the entire updo into place and tame any flyaways using the flexible hold finishing hairspray listed below.
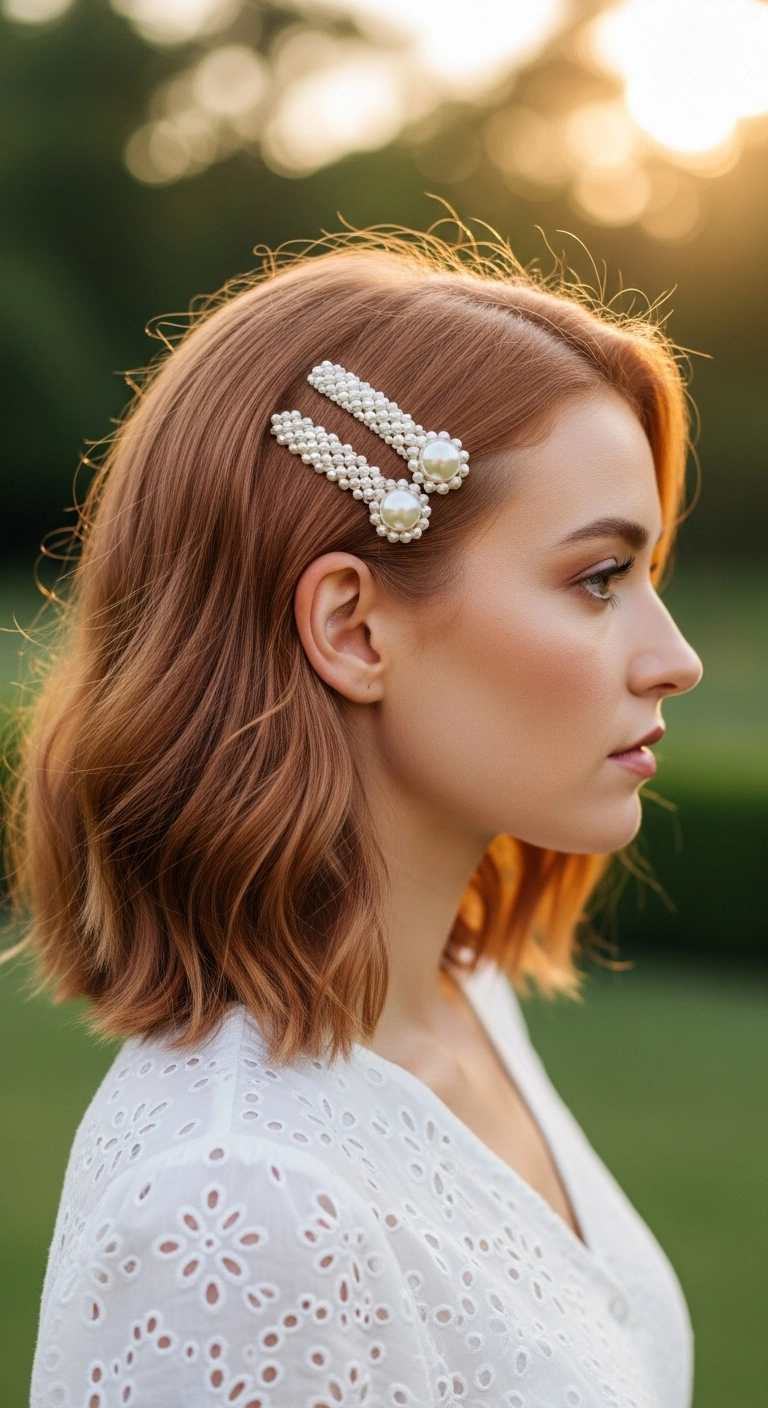
Oh, a dreamy copper lob with oversized pearl clips, how I love thee. Adding hair accessories to soft, effortless waves makes any everyday cut feel instantly romantic. This is sooo pretty!! Have you ever tried pearl barrettes with a side-parted bob?
How to do this
1. Start by prepping clean, damp hair with a lightweight smoothing blow dry cream using the styling cream listed below to add heat protection and smooth flyaways.
2. Blow dry hair with a medium round brush, lifting at the roots to maintain natural body and movement.
3. Create a deep, clean side part using the fine-tooth rat tail comb listed below, aligning the part with the arch of your eyebrow.
4. Take 1 to 2-inch vertical sections of hair and wrap them around a 1.25-inch curling iron using the curling wand listed below for just a few seconds to create soft, relaxed, lived-in S-waves, leaving the ends slightly undone.
5. Mist a light spray of texture spray all over and gently finger-comb through the waves to break them up for a soft finish.
6. Smooth down the hair on the parted side above the ear and secure two pearl-embellished barrettes parallel to each other using the pearl hair clip set listed below.
7. Finish with a gentle mist of flexible hold hairspray using the flexible hold hairspray listed below to lock everything in place without stiffness.
This copper wavy bob is seriously so cute and has the best effortless French-girl vibe! I'm completely obsessed with this rich ginger tone paired with the soft fringe—it frames the face in the most flattering way. If you have fine to medium hair and want instant style without tons of fuss, this cut will look gorgeous on you!
How to do this
1. Start by prepping damp, towel-dried hair with a lightweight styling mousse and the heat protectant spray listed below to shield strands and build airy volume.
2. Blow-dry the bangs first using a small ceramic round brush listed below, sweeping downward and slightly curved under to keep them soft and rounded.
3. Rough-dry the remaining hair with a blow dryer until it's about 90% dry, then smooth over loosely with a medium round brush.
4. Take alternating 1-inch sections and wrap them loosely around a 1.25-inch curling wand or iron, leaving the ends out to create effortless, relaxed S-waves.
5. Once curls cool, gently shake out the waves with your fingers or a wide-tooth comb to break up the pattern.
6. Mist with the dry texturizing spray listed below at the roots and mid-lengths, scrunching gently for that perfectly undone, lived-in body.
7. Finish by applying a tiny drop of the lightweight hair serum listed below to tame any unwanted flyaways while keeping the copper shine popping!
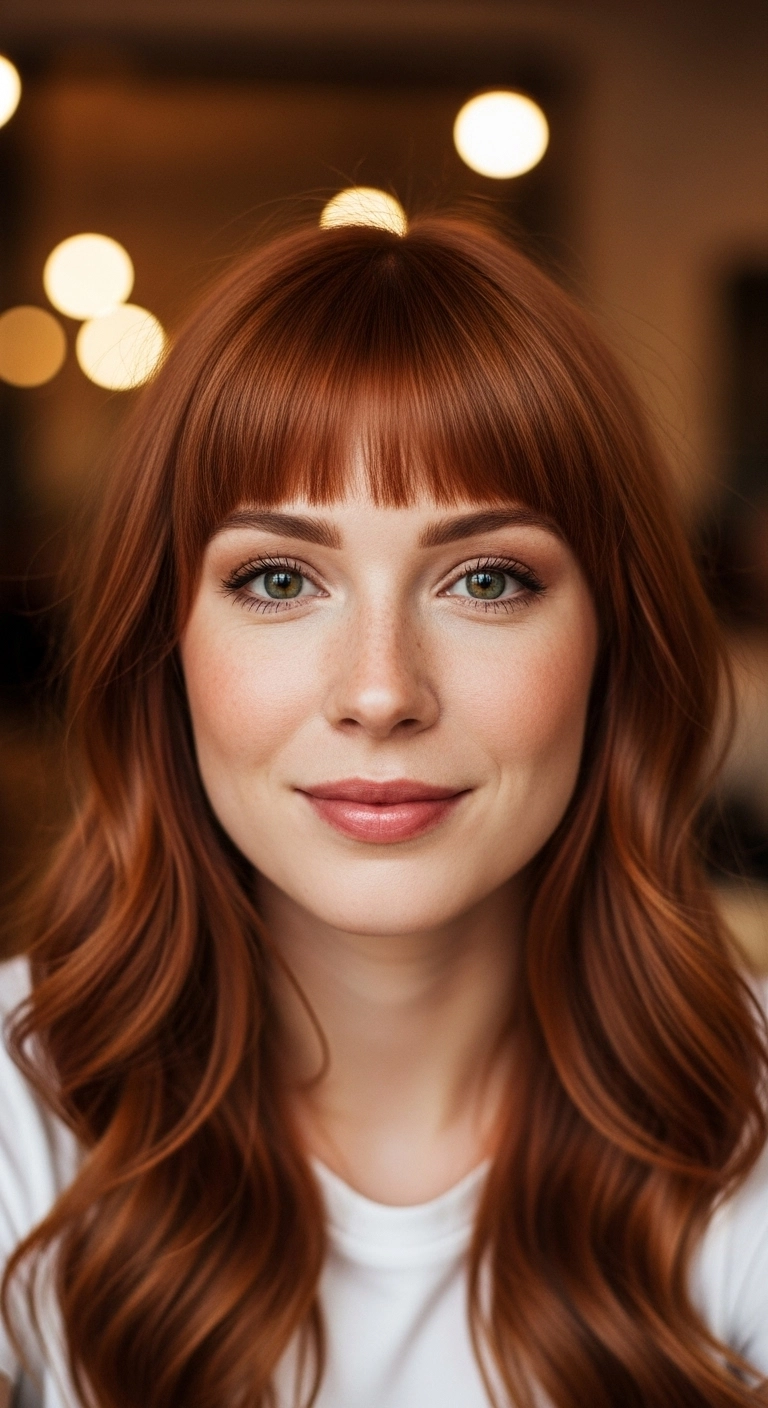
I am completely obsessed with this rich copper color paired with soft wispy bangs!! It brings out the eyes so beautifully and frames the face in the most flattering way. The loose waves keep it feeling effortless and modern, making it such a dreamy everyday look that you can easily dress up for a night out.
How to do this
1. Start by prepping freshly washed, damp hair with a small amount of the lightweight heat protectant smoothing cream listed below to protect your strands and keep frizz away.
2. Blow dry your fringe first using a mini round brush listed below, rolling it downwards and slightly under with gentle tension to create that smooth, rounded shape right above the brow line.
3. Blow dry the rest of your hair until completely dry, lifting at the roots for natural volume.
4. Take medium vertical sections of hair and wrap them around a 1.25-inch curling iron listed below, curling away from your face and leaving the very ends slightly loose for a relaxed, lived-in wave.
5. Let the curls cool completely, then gently rake through them with your fingers or a wide-tooth comb to break them into soft, effortless waves.
6. Finish by misting with the flexible hold hairspray listed below and lightly spraying dry texturizing spray through the lengths to keep the style bouncy all day.
Rich copper layers with sweeping curtain bangs. Such a stunning, timeless look! I love how the warm reddish tones instantly brighten up the face, and those retro-curved bangs frame the eyes so perfectly. It’s polished enough for an evening out but effortless enough for everyday wear.
How to do this
1. Start on freshly washed, damp hair and prep with a blowout thermal primer using the heat protectant spray with argan oil listed below to safeguard your color and add shine.
2. Apply a dollop of volumizing mousse through your mid-lengths and roots, then rough-dry until your hair is about 80% dry.
3. Section off your curtain bangs at the front. Using the ceramic round blow dry brush listed below, blow-dry the bangs forward and then roll them back away from the face to create that soft, winged curve around the eyes.
4. Clip the bangs in place using a velcro roller to set the volume while you dry the remaining hair in horizontal sections, rolling the brush outward at the ends for soft bends.
5. For extra wave and definition through the mid-lengths, take 2-inch vertical sections and quickly glide through them using the 1.5 inch large barrel curling iron listed below, curling away from your face.
6. Once all curls have cooled completely, gently rake through them using the wide-tooth detangling comb listed below to marry the waves seamlessly.
7. Finish by smoothing down any flyaways and misting with the flexible hold hairspray listed below for all-day bounce and touchable hold.
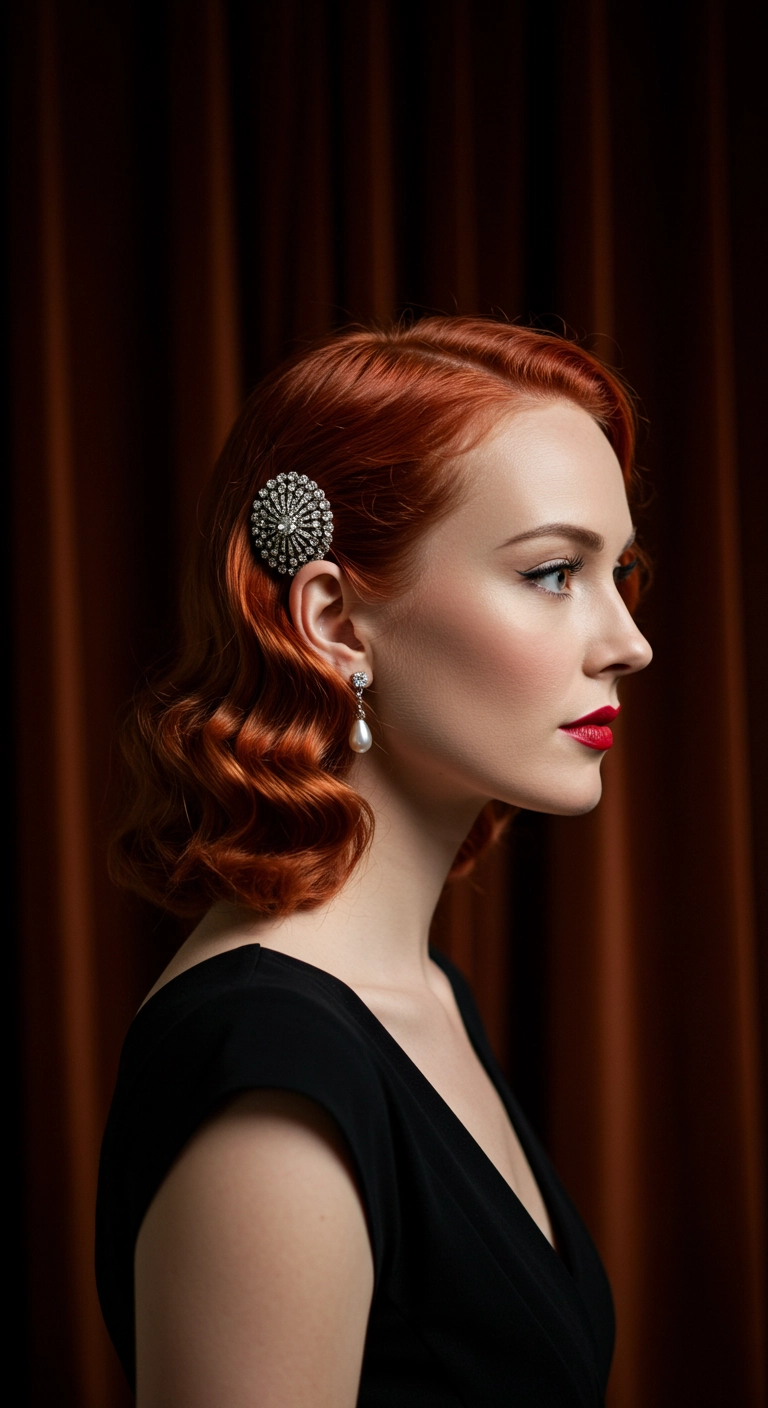
This hairstyle is pure Old Hollywood glamour with a rich copper twist. You curl all your sections in the exact same direction, let them cool, and brush them out into uniform, silky S-waves. Finish by tucking one side behind your ear and popping in a sparkling vintage brooch or clip for instant red-carpet elegance.
How to do this
1. Start by prepping freshly washed, damp hair with a golf ball-sized amount of the volumizing styling mousse listed below from roots to ends.
2. Blow dry hair smoothly in sections using a round boar bristle brush, creating a deep side part aligned with the arch of your eyebrow.
3. Mist a light coat of the thermal heat protectant spray listed below over all sections to shield from heat and lock in shape.
4. Using a 1-inch curling iron, curl horizontal sections all in the exact same downward direction toward the face to ensure the waves align seamlessly.
5. Secure each warm curl against your scalp using the metal setting clips listed below and allow them to cool down completely for at least 15 minutes.
6. Remove the clips and gently brush through the curls using the cushion paddle brush listed below until the individual curls merge into one sculpted, uniform S-wave pattern.
7. Smooth the shallow side neatly behind the ear, secure it firmly with bobby pins, and slide the vintage rhinestone hair comb listed below just above the ear.
8. Finish the entire style with a generous veil of the high-shine flexible hairspray listed below to control flyaways and seal in maximum gloss.
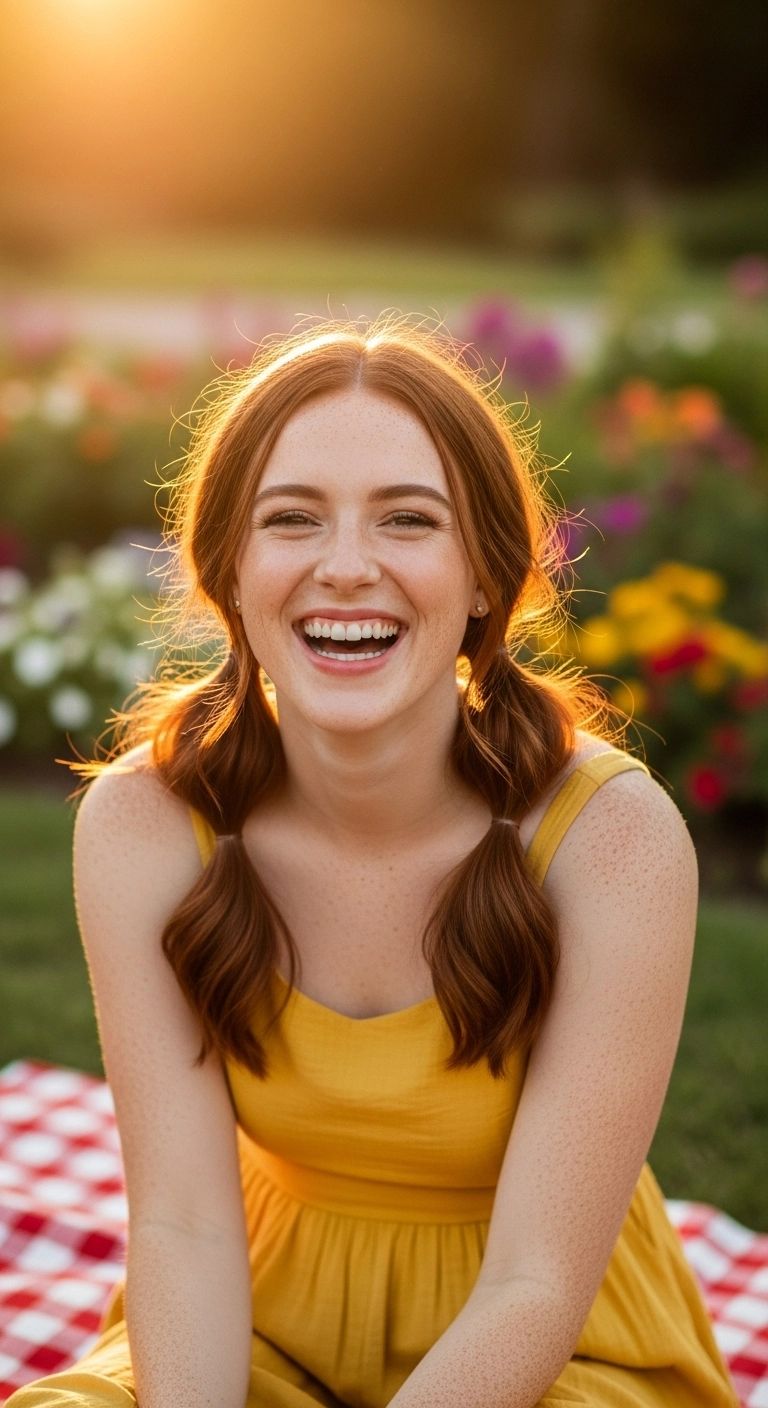
These casual low pigtails are so ridiculously cute and effortless for sunny picnic days or everyday errands! I love how sweet and playful it looks from the front, especially with warm copper tones catching the sun. It takes literally two minutes to throw together and looks amazing on medium or shoulder-length hair!
How to do this
1. Start by parting clean, dry hair neatly straight down the center from your forehead all the way to the nape of your neck using the tail comb listed below.
2. Apply a dime-sized amount of the lightweight hair smoothing serum listed below to tame flyaways and give your lengths a soft, glossy finish.
3. Separate the hair into two even sections on either side of your head.
4. Gather the first side low behind your ear, allowing the front pieces to softly sweep across your temples and drape naturally around the face.
5. Secure the section just below the base of your ear or collarbone area with one of the clear elastic hair ties listed below.
6. Repeat on the other side, checking to ensure both low pigtails sit symmetrically.
7. Gently tug slightly on the gathered hair above and below the elastics with your fingers to add a little lived-in fluff and volume.
8. Mist lightly with the flexible hold hairspray listed below to keep everything effortlessly in place all day.
The fiery copper blowout. What a showstopper! I love how the bold, vibrant tone instantly elevates a relaxed, layered cut without needing hours of intricate styling. It's chic, full of natural body, and completely turns heads whether you're heading to the office or out for the evening.
How to do this
1. Start by prepping freshly washed, damp hair with a lightweight heat protectant spray to protect your vibrant copper color and seal the cuticle.
2. Apply a dollop of volumizing root mousse directly onto the roots and crown using the volumizing root lift mousse listed below to get that airy, lifted shape.
3. Blow dry your hair upside down until it is about 80% dry, then flip over and use a large ceramic round brush to smooth out the lengths while lifting upward at the scalp.
4. Create a deep side part and roll the front top section backward with the round brush, letting it cool in a large roller to establish that gorgeous cascading swoop.
5. Once cooled, release the roller and use your fingers to gently shake out the hair and break up any stiffness.
6. Mist a light coat of texturizing spray through the mid-lengths and ends using the dry texturizing spray listed below to give it that effortless, piecey definition.
7. Finish by rubbing a single drop of hair smoothing serum between your palms and smoothing over any stray flyaways around the hairline.
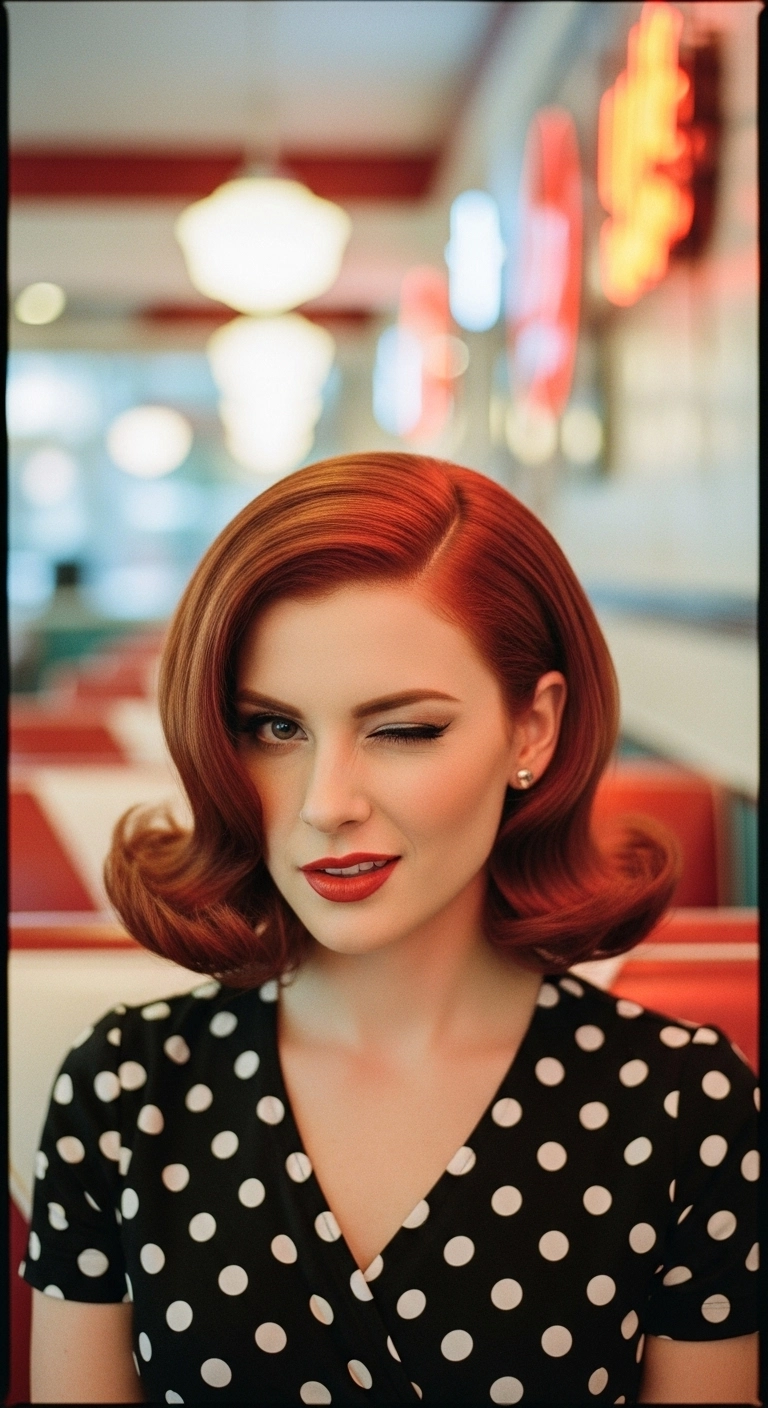
There’s nothing like rockin’ a vibrant copper retro flip while heading out to the diner! I love how this clean vintage curl bounces right at the collarbone and frames your face without having to worry about messy layers.
How to do this
1. Start by prepping damp, freshly washed hair with the smoothing blowout cream listed below to lock in a sleek texture and eliminate frizz.
2. Create a clean, precise deep side part using the tail comb listed below, lining it up nicely with the arch of your eyebrow.
3. Blow dry your hair smooth using a round boar bristle brush, making sure to lift at the root on the heavier side for that gentle vintage swoop.
4. Once completely dry, mist each section with the thermal heat protectant spray listed below to shield your strands before heat styling.
5. Take medium sections of hair and use the 1.25-inch curling iron listed below to curl the ends upwards and outwards into structured, exaggerated wing-like flips.
6. Roll the flipped ends onto the large jumbo hot rollers listed below while they cool to lock in that bouncy, curved pageboy silhouette.
7. Gently brush through the flips with a paddle brush, then finish off with a generous spritz of the extra-firm vintage hold hairspray listed below to keep everything frozen in retro perfection.
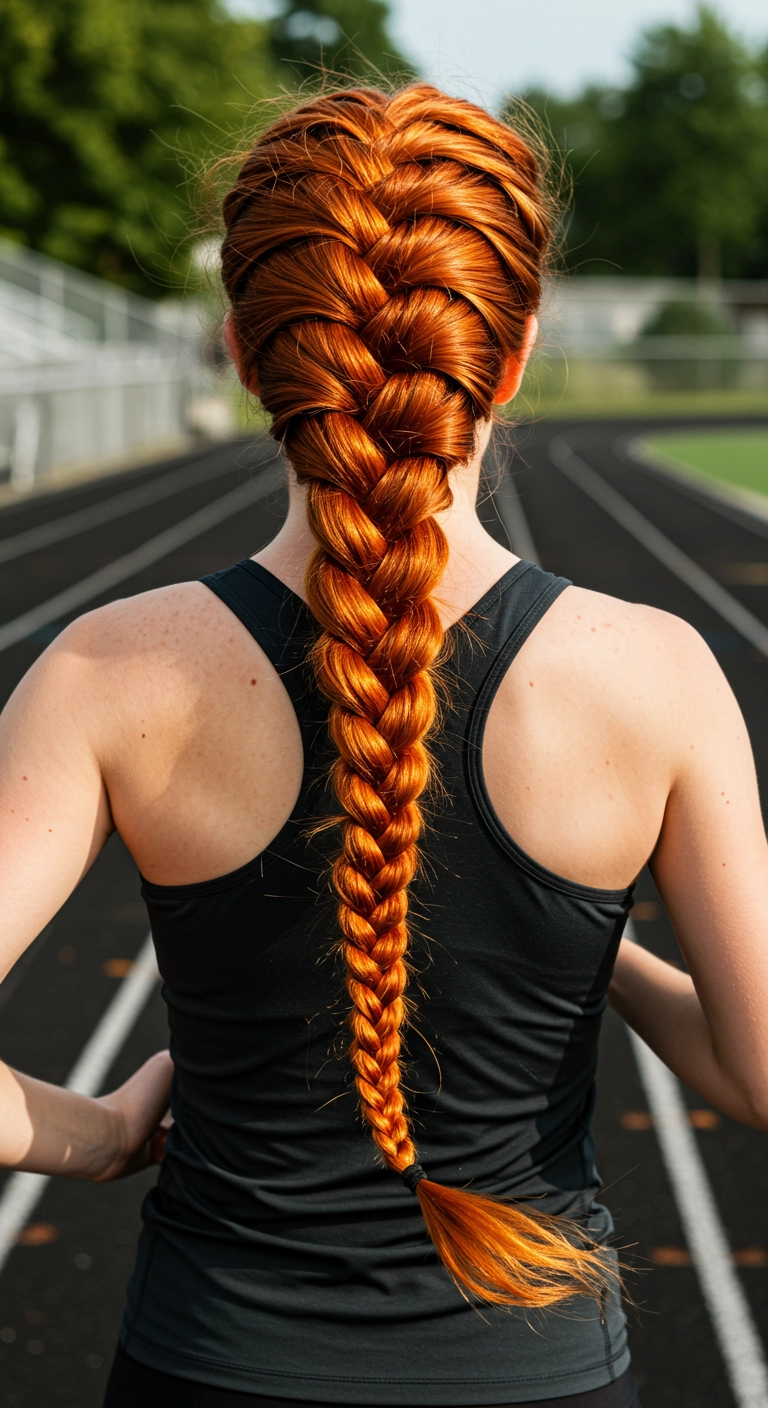
I love wearing a classic French braid when I'm working out or running around outside because it keeps all my hair totally secure and off my face! The way this neat braid highlights vibrant copper hair is just stunning. It's super practical for athletic days but still looks effortlessly put together.
How to do this
1. Start by brushing thoroughly through clean, dry hair to remove all tangles using the detangling paddle brush listed below.
2. Smooth a small amount of the anti-frizz hair serum listed below through your mid-lengths and ends to tame flyaways and enhance shine.
3. Gather a triangular section of hair right at the crown of your head and divide it evenly into three strands.
4. Begin a standard French braid: cross the right strand over the middle, then cross the left strand over the middle.
5. Before the next cross, gather a thin, smooth slice of hair from the outer side using the rat tail comb listed below and add it into the outer strand, then cross it over the center.
6. Repeat this process down the entire back of the head, pulling evenly and firmly to keep the tension balanced and clean.
7. Once all side hair has been incorporated at the nape of the neck, continue braiding the length as a classic three-strand braid all the way down towards the ends.
8. Secure the bottom firmly with one of the snag-free elastic hair bands listed below, leaving a small tassel at the tip.
9. Finish by lightly misting all over with the flexible hold finishing hairspray listed below to lock in the braid and resist humidity during workouts.
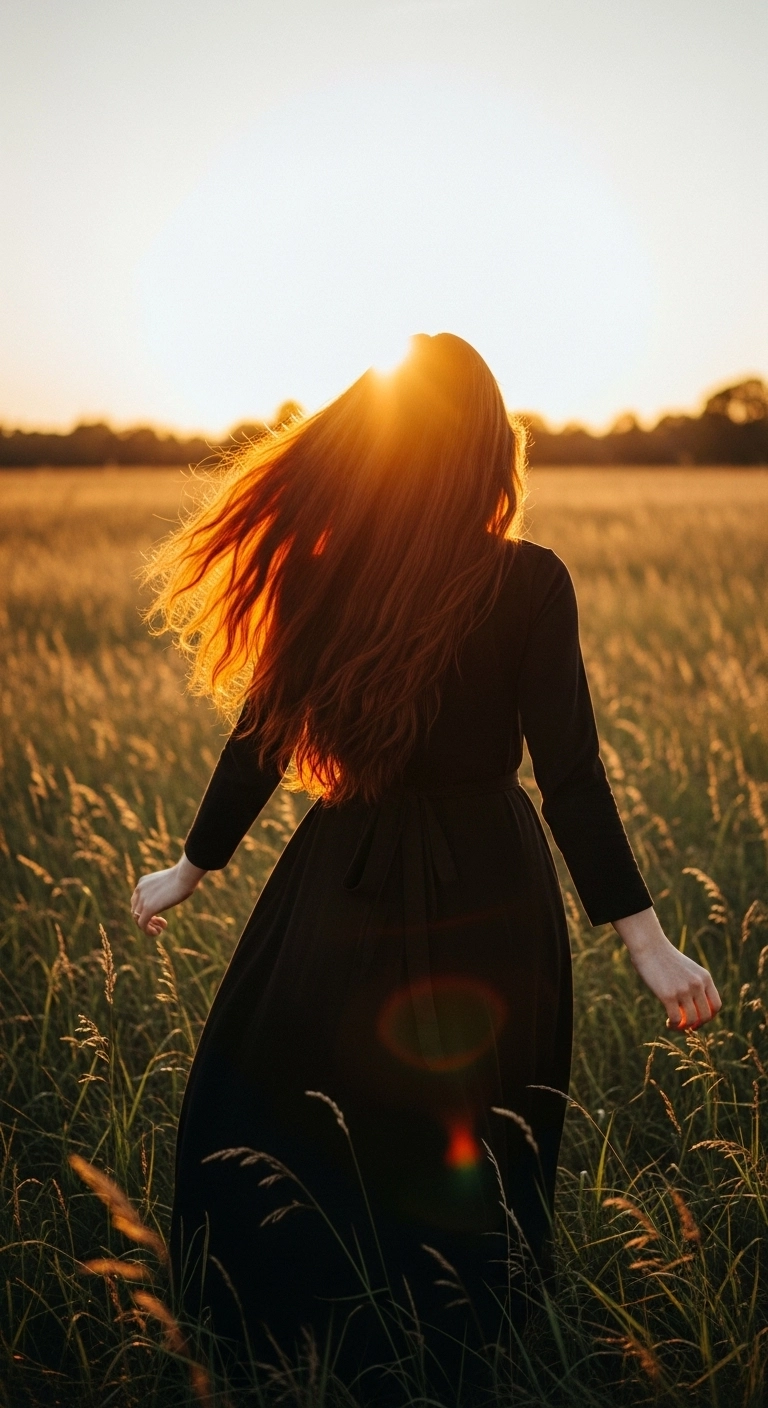
Natural red and copper hair will truly never go out of style, especially when it catches the golden hour light like this! The key here is keeping the length healthy and hydrated with subtle long layers so it moves freely without feeling heavy. It's that quintessential effortless, windswept cottagecore vibe that looks stunning in photos and even better in real life.
How to do this
1. Start by washing hair with a color-protecting, sulfate-free shampoo to maintain vibrant copper tones.
2. Apply a leave-in detangling and smoothing conditioner to damp strands, combing through with a wide-tooth comb listed below.
3. Mist mid-lengths and ends with the heat protectant spray listed below to shield hair from blow-drying.
4. Blow dry using a large round ceramic brush, lifting at the roots for natural volume and smoothing the hair shaft downward.
5. For effortless, airy movement, take large random sections and wrap them loosely around a wide-barrel curling wand for just 3 to 5 seconds.
6. Rake through the hair with your fingers to break up the shape and finish with a light spritz of the hair-nourishing shine oil listed below to enhance that fiery, reflective glow.
Products Used
Sulfate-Free Color Protecting Shampoo for Red and Copper Hair
The copper textured lob with fringe. Honestly, could there be a more perfect fall hairstyle? I love how the vibrant ginger tone pairs with soft, lived-in waves to feel effortless rather than overdone. It instantly frames the face and gives so much personality with minimal morning styling required.
How to do this
1. Start on freshly washed, damp hair and prep with the heat protectant spray listed below to shield your copper color from heat damage.
2. Blow-dry the bangs first using a small round brush, directing them straight down and slightly inward to create that soft, separated wispy finish.
3. Apply a small amount of the lightweight volumizing mousse listed below to mid-lengths and ends, then rough dry or diffuse the rest of your hair to encourage natural movement.
4. Using the 1.25-inch curling iron listed below, take random 1- to 2-inch sections and wrap them loosely around the barrel for just a few seconds, leaving the ends straight for that relaxed, undone bend.
5. Alternate curl directions away from and toward the face to build natural volume and depth.
6. Once cooled, spray generously with the dry texturizing spray listed below and gently shake out the waves with your fingers.
7. Finish by pinching a tiny dab of the lightweight matte styling pomade listed below through the tips of your bangs and ends to lock in piecy separation.
This hairstyle is what I like to call the effortless French-girl lob. You start with a blunt collarbone cut that has just enough soft interior layering to give you plenty of bounce and movement. Blend in some wispy bottleneck bangs that frame your eyes and cheeks, wrap loose sections around a curling wand for easy undone waves, and finish with a hit of texture spray for that perfectly lived-in copper look.
How to do this
1. Prep damp, towel-dried hair with a lightweight styling mousse and a heat protectant spray using the heat protectant spray listed below to shield strands and add initial volume.
2. Blow dry using a round ceramic brush, lifting at the roots to maximize natural body while directing your bangs forward and outward to establish a soft curtain bend.
3. Once completely dry, divide hair into manageable horizontal sections and use a 1.25-inch curling iron using the curling iron listed below to create effortless, loose S-waves, leaving about an inch of the ends straight for that relaxed, modern texture.
4. Lightly curl the curtain bangs away from the face just at the mid-lengths so they sweep gently across the cheekbones.
5. Allow curls to cool completely, then use a wide-tooth comb or your fingers to gently break up the waves into a lived-in pattern.
6. Mist generously with a dry texturizing spray using the dry texturizing spray listed below at the roots and mid-lengths to boost separation and create airy fullness.
7. Finish by locking the style in place with a flexible hold hairspray using the flexible hold hairspray listed below so the movement stays soft and bouncy all day.
This look is all about romantic, vibrant energy. You start with rich copper layered lengths paired with soft, wispy bangs that dust right across the eyebrows. Give the ends a loose, bouncy curl while keeping the fringe smooth and light, and you have an effortless cottagecore-inspired vibe that feels completely timeless.
How to do this
1. Start with clean, damp hair and apply a generous mist of the heat protectant spray listed below to shield your strands and keep your vibrant copper color looking fresh.
2. Blow dry your bangs forward using a small round brush, rolling them slightly under and gently shaking them side-to-side to create that soft, eyebrow-skimming wispy fringe.
3. Rough-dry the rest of your hair until it is about 80% dry, then work through section by section with a large barrel round ceramic brush to build maximum volume and smooth out the cuticle.
4. Take 1.5-inch sections from mid-lengths to ends and wrap them around a large-barrel curling wand listed below, curling away from your face to form loose, bouncy waves.
5. Allow the curls to cool completely, then gently rake through them with your fingers or a wide-tooth comb to soften the curls into cascading romantic waves.
6. Finish the look by smoothing a couple of drops of lightweight hair shine serum listed below through the ends to combat frizz, and set with a light-hold flexible hairspray.