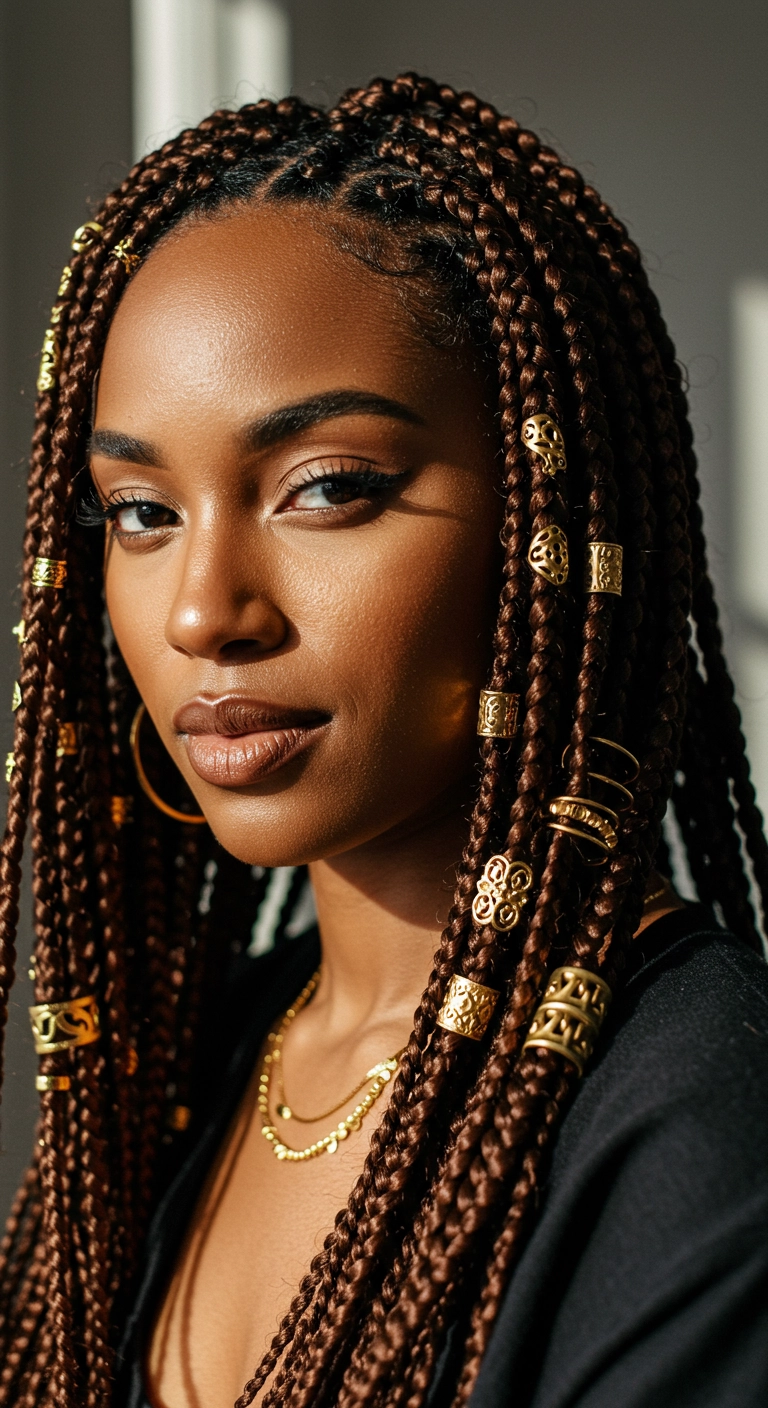
I absolutely love how rich and radiant warm chocolate box braids look, especially when you dress them up with chunky gold cuffs and filigree rings!! Scattering the gold jewelry along the front face-framing pieces instantly turns an everyday protective style into something so chic and stunning.
How to do this
1. Start by thoroughly washing, deep conditioning, and blow-drying the natural hair straight using a heat protectant spray.
2. Section the hair into clean, uniform square or rectangular grids using a rat tail comb and apply a strong-hold braiding gel to the roots for clean lines.
3. Incorporate warm chocolate brown braiding hair extensions at each base, braiding firmly and smoothly all the way down to the ends.
4. Dip the braid ends carefully in boiling hot water to seal them and give them a sleek, flexible finish.
5. Apply a lightweight scalp oil or mousse over the braids to lock in moisture and tame flyaways.
6. Finish the look by sliding intricate gold hair cuffs and wire coils onto selected face-framing braids at varied heights for an accessorized, regal vibe.
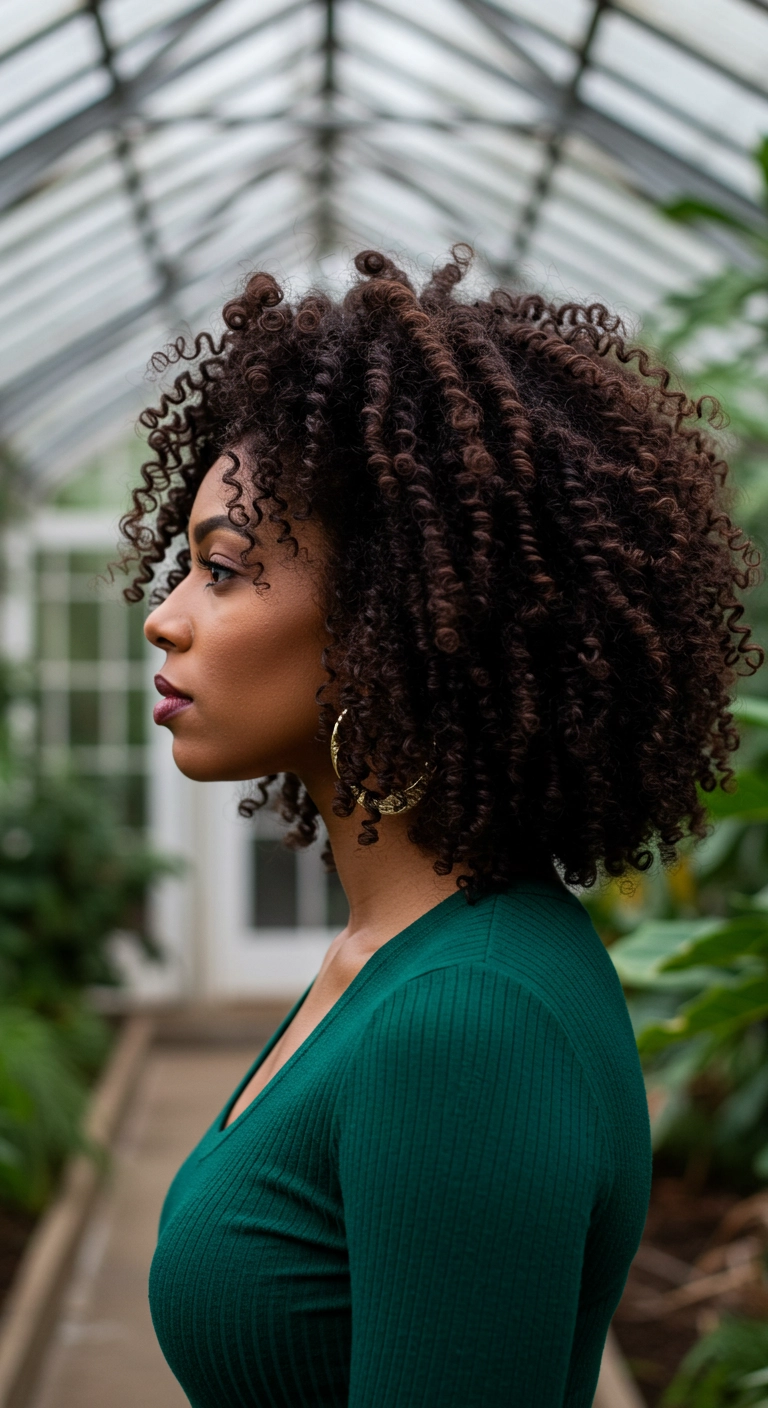
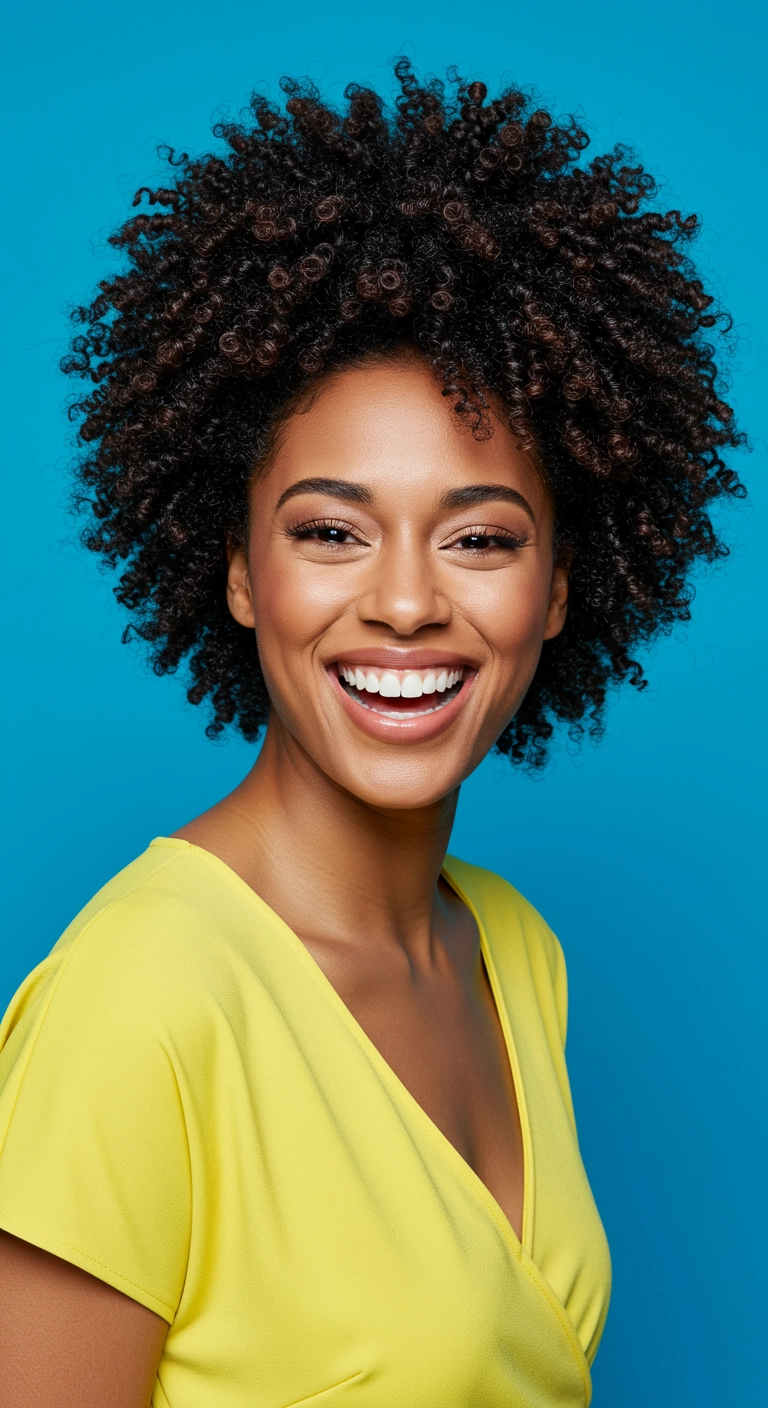
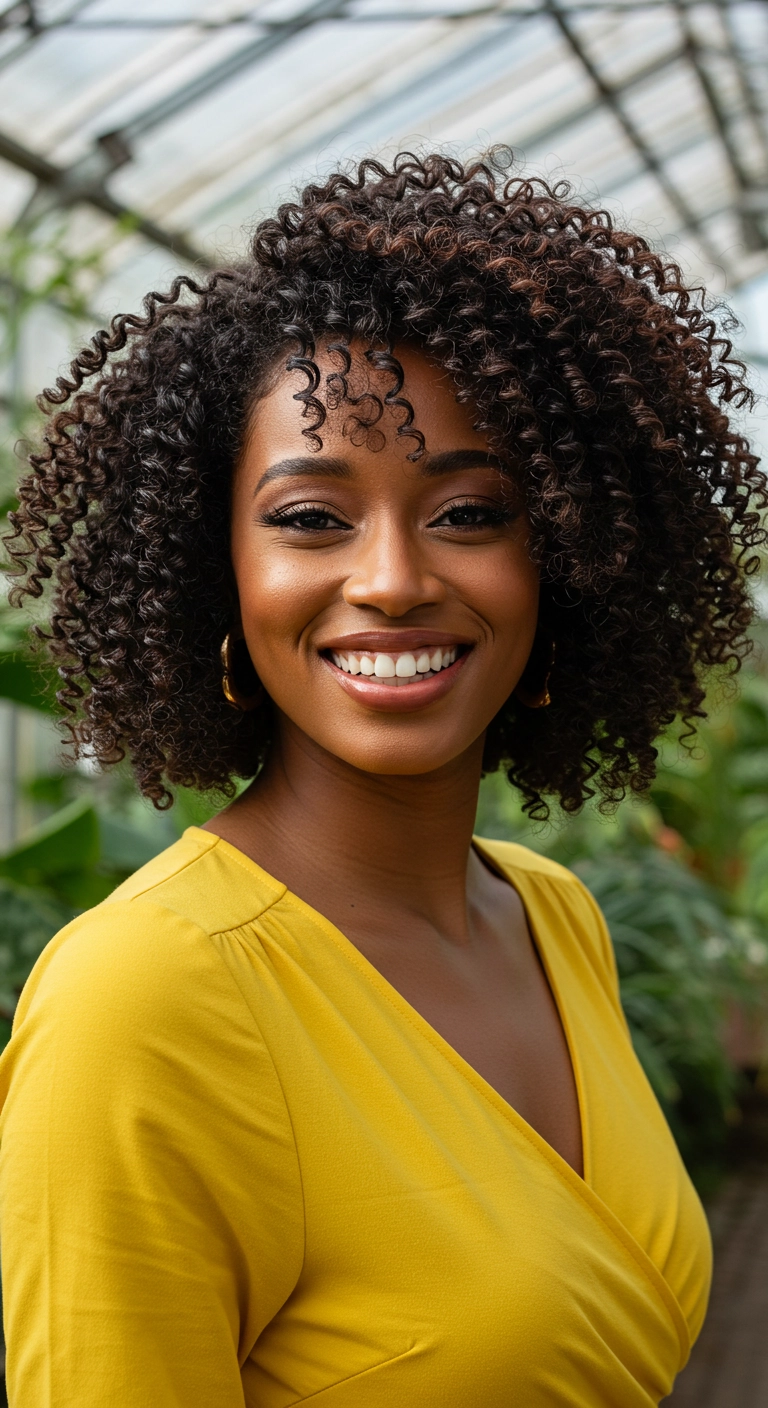
Isn’t the volume and bounce on these spiral coils absolutely breathtaking?? This layered curly cut is pure magic for bringing out the natural spring of type 3C and 4A curls while keeping wonderful shape around the face. One thing I love about this hairstyle is how full and healthy it looks without weighing the curls down! It gives that perfect effortless, goddess-level texture that turns heads everywhere you go.
How to do this
1. Start on freshly cleansed, thoroughly conditioned, and soaking wet hair using the hydrating leave-in conditioner listed below to ensure optimal moisture retention.
2. Section your curls into manageable quadrants and work in small rows from the nape of your neck upwards.
3. Apply a generous amount of the curl defining cream listed below from roots to ends, using the praying hands method to evenly distribute and lock in definition.
4. For ultra-defined springy corkscrews, use the finger-coiling technique or distribute small sections through the defined curl styling brush listed below to clump curls together seamlessly.
5. Gently scrunch with a microfiber towel to remove excess water without creating frizz.
6. Hover-diffuse using the collapsible blow dryer diffuser listed below on low heat and medium speed until your hair is roughly 85% to 90% dry, then allow it to air-dry completely.
7. Once fully dry, break the gel cast and add maximum body by rubbing a few drops of the nourishing hair oil listed below between your palms, flipping your head forward, and gently fluffing at the roots with your fingers or a hair pick.
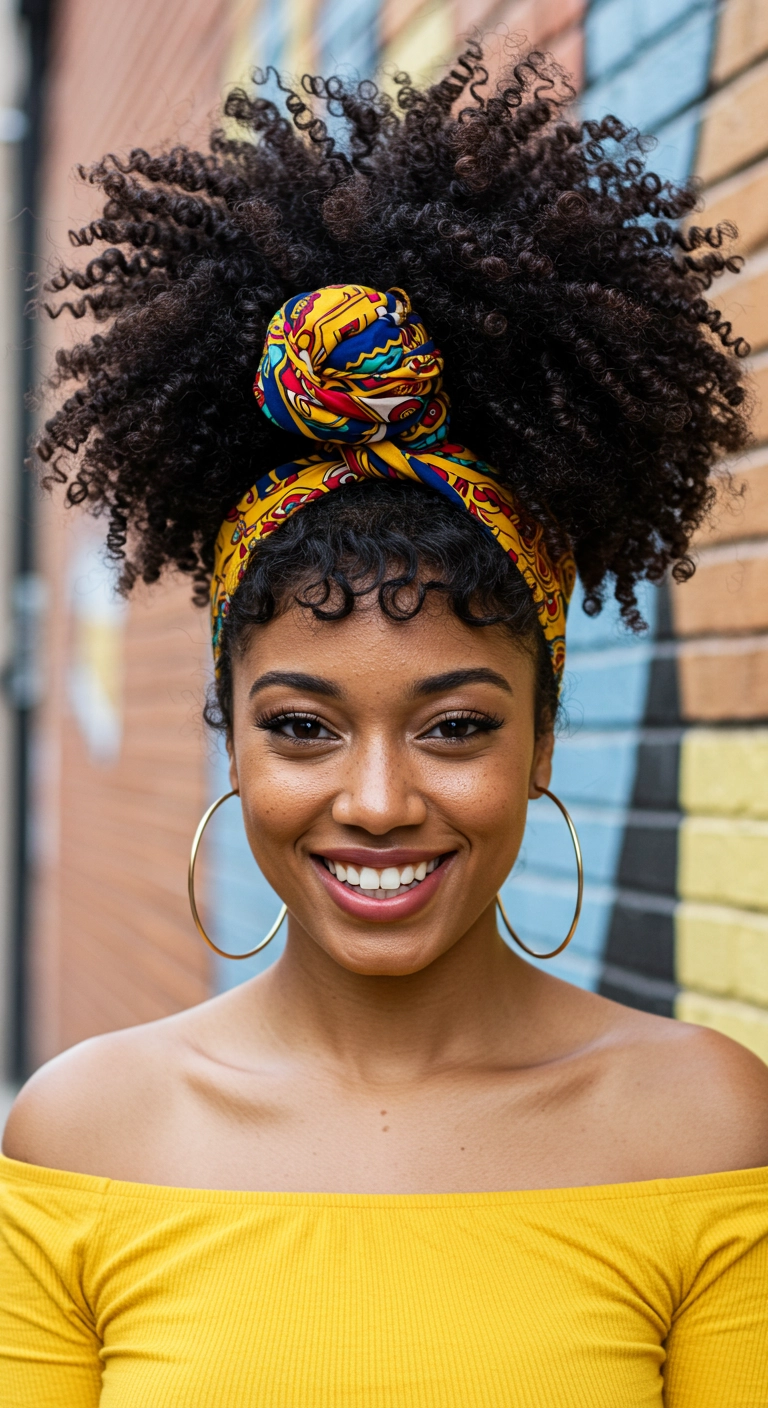
This look is the ultimate cute, quick, and protective high puff style. You simply gather all your gorgeous coils up to the crown, tie on a bright printed scarf to frame your face, and leave a few delicate curly tendrils loose on your forehead. It is colorful, full of personality, and keeps your curls bouncy and protected all day long.
How to do this
1. Start on freshly washed, conditioned curls that are damp or fully dry and defined using the curl defining cream listed below.
2. Section out a small front portion of curls across your forehead to serve as your fringe.
3. Gather the remaining bulk of your curls upwards toward the top of your head, keeping tension gentle to avoid flattening your natural volume, and secure loosely with a stretchy satin hair band.
4. Take a vibrant patterned African fabric headwrap or scarf, fold it into a wide band, and wrap it around the perimeter of your head from the nape to the front, tying a knot or rosette right above your forehead.
5. Define and shape the leave-out curly bangs across your forehead using the lightweight edge control gel and styling brush listed below.
6. Fluff out the high puff curls with your fingers or an afro pick, and mist with the curl refresher spray listed below for all-day moisture and shine.
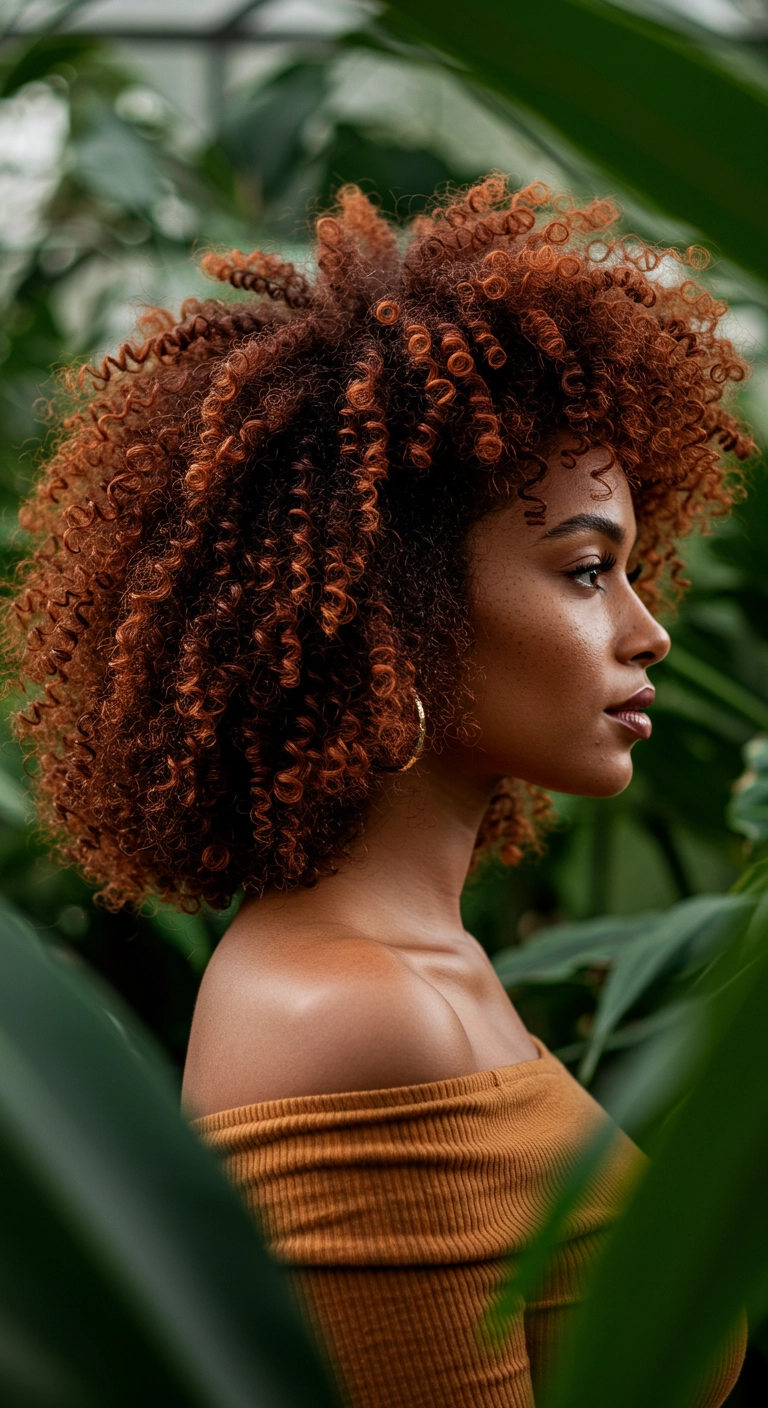
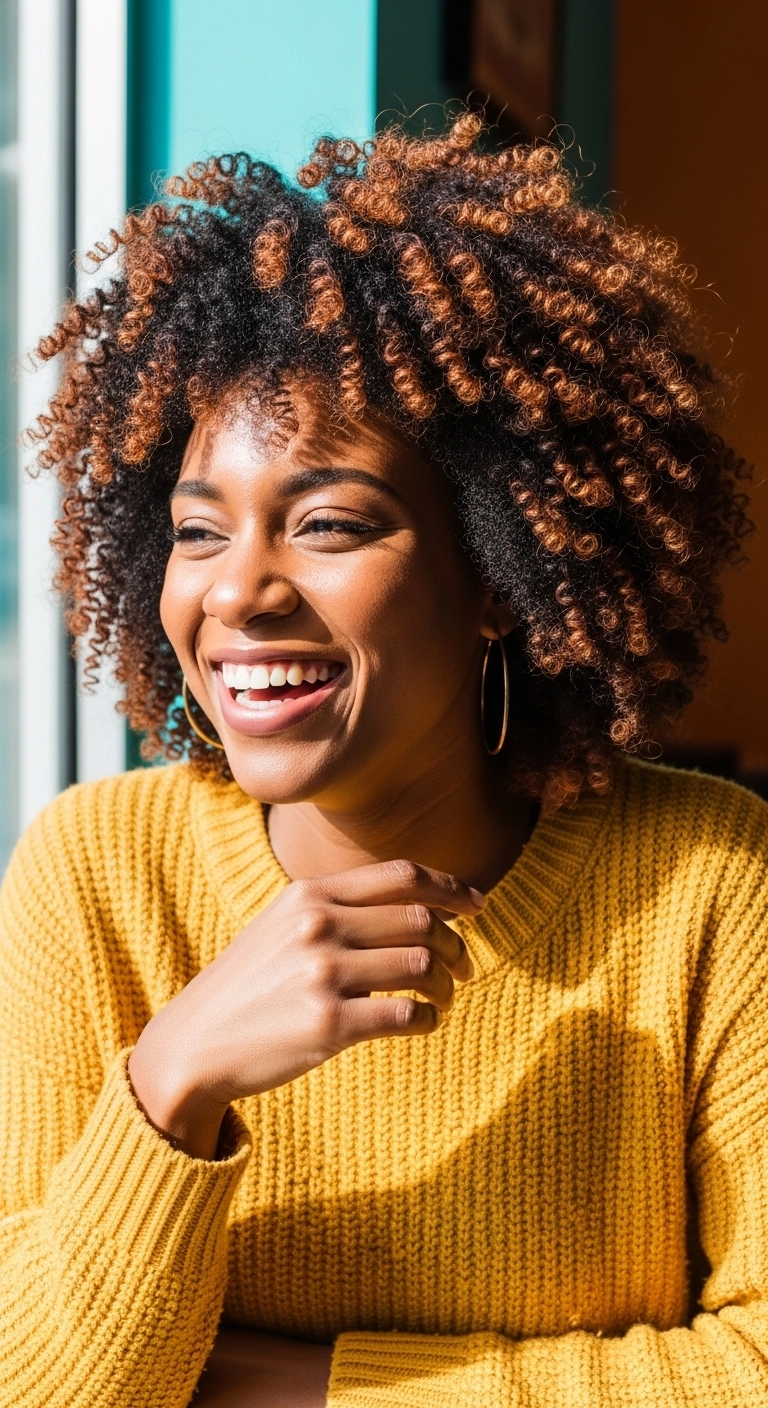
These lush, bouncy copper coils are giving absolutely everything! The rich warmth paired with that gorgeous rounded volume and fringe is pure perfection. Have you ever tried a warm ginger or copper tone on your natural curls?
How to do this
1. Start on freshly cleansed, dripping-wet curls after conditioning with a hydrating treatment.
2. Section your curls and apply a generous amount of the curl defining cream listed below from roots to ends to lock in essential moisture.
3. Work in sections with a lightweight styling gel listed below using the praying hands technique, followed by gentle raking to clump the spiral pattern together.
4. Carefully shape your face-framing coils and fringe over your forehead using a curl defining brush listed below to encourage maximum spring and ringlet formation.
5. Flip your head upside down and gently cup the curls using the universal diffuser attachment listed below on low heat and low speed until hair is 90% dry.
6. Once fully dry, dispense 2-3 drops of the nourishing hair oil listed below between your palms and gently scrunch out the gel cast to fluff and create that jaw-dropping volume.
Can we take a second to appreciate the gorgeous bounce and definition of these natural curls?! I added this defined volumetric coily bob to the list because it's such an incredible celebration of natural 3C/4A texture and shape, don't you think?! You can keep it super tight and glossy with a wash-and-go routine as shown here, or fluff it out with an afro pick for even bigger retro-inspired drama. There are so many fun ways to style healthy natural curls, which I absolutely adore! Rock this joyful, full-bodied look with confidence wherever you go.
How to do this
1. Start on freshly cleansed and conditioned soaking-wet hair to maximize moisture retention and natural ringlet definition.
2. Apply a generous amount of the hydrating leave-in conditioner listed below evenly from roots to ends using praying hands.
3. Section the hair into four manageable quadrants and rake through the curl defining styling cream listed below, ensuring every coil is saturated.
4. Working in small sub-sections, use the curl defining styling brush listed below or finger-coil individual strands to encourage ultra-springy, uniform curl clumps.
5. Gently scrunch excess water out with a microfiber hair towel wrap listed below, being careful not to disrupt the curl formation or cause frizz.
6. Dry the hair thoroughly using a blow dryer fitted with the large diffuser bowl attachment listed below on medium heat and low speed, flipping your head gently to encourage maximum root lift and volume.
7. Once 100% dry, lightly coat your palms with a couple drops of the lightweight nourishing hair oil listed below and gently pick at the roots using a wide hair pick to fluff and achieve this stunning, rounded crown shape.
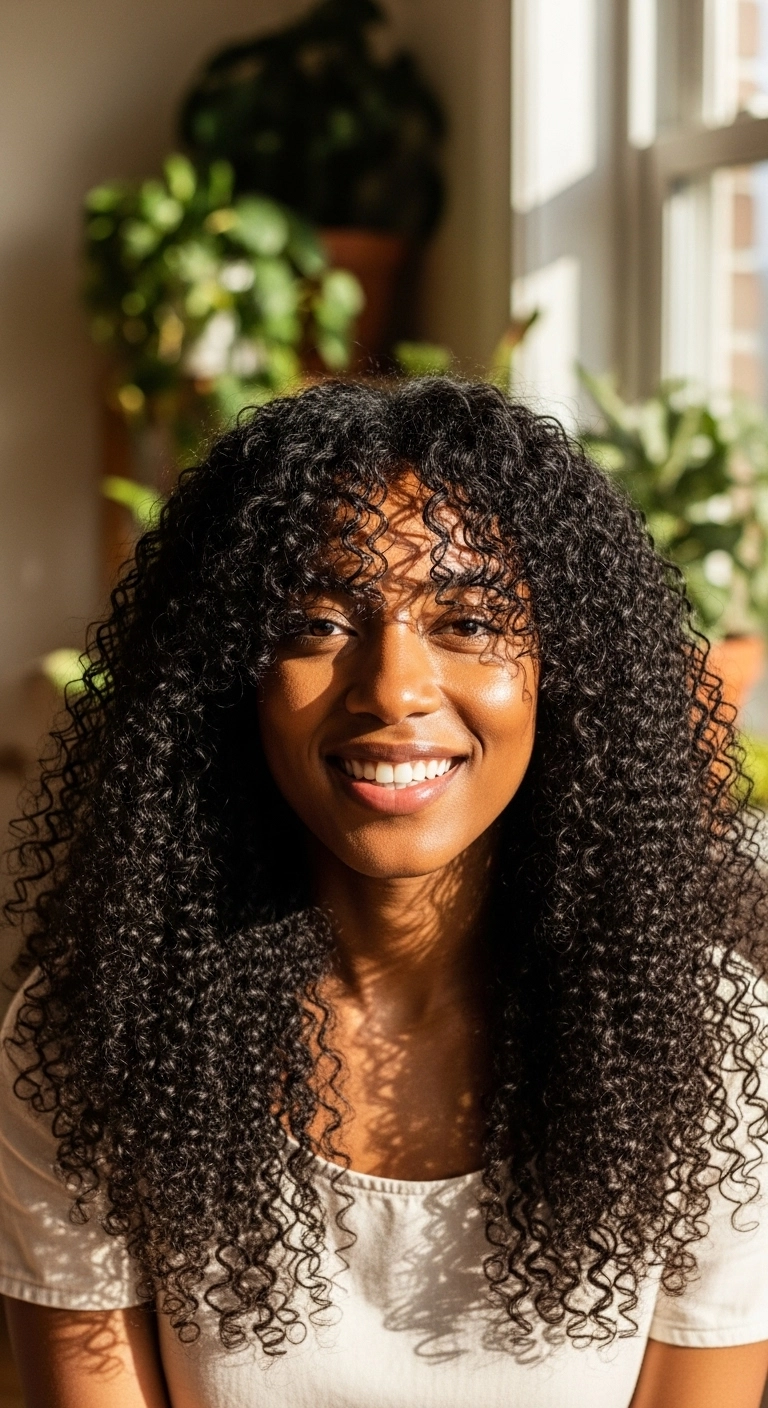
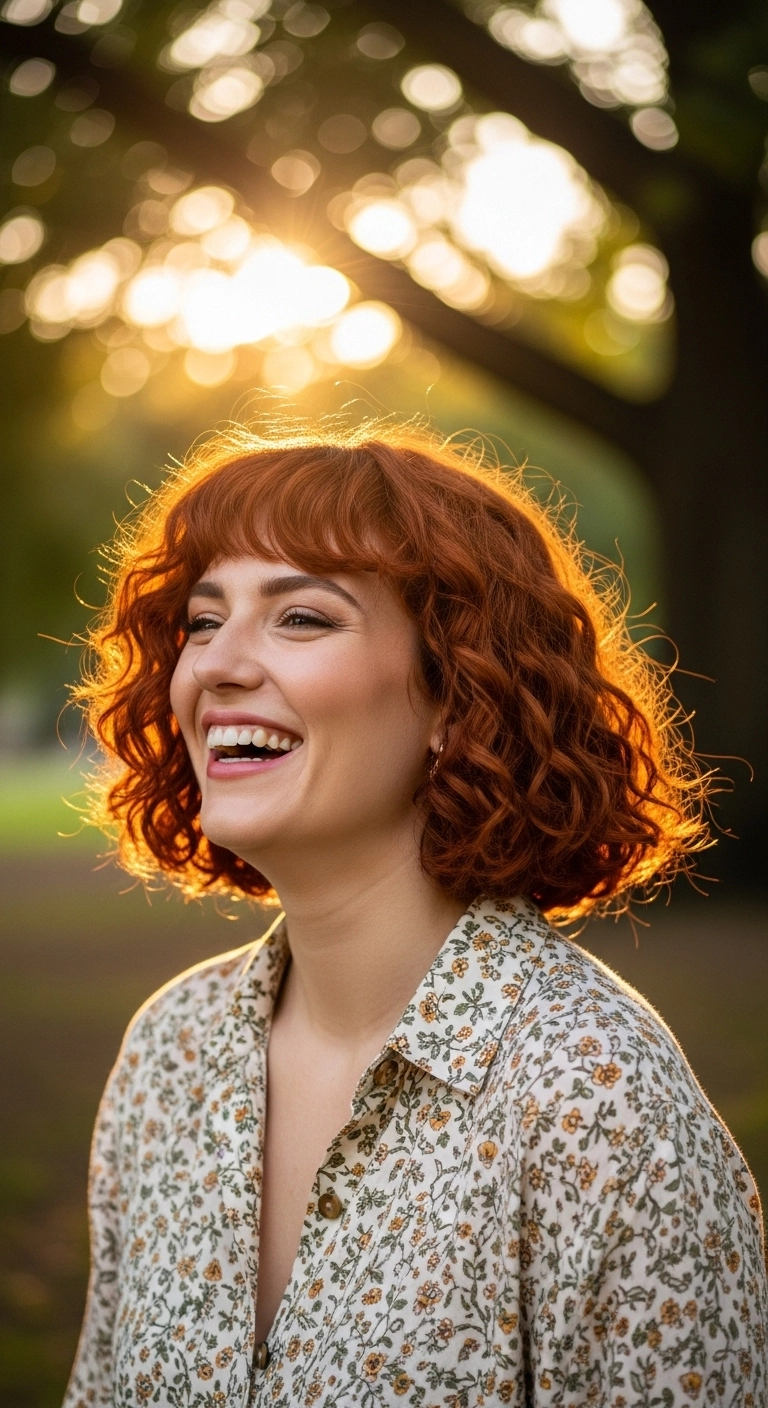
Are you loving these effortless, bouncy curls as much as I am? I had to feature this long layered curly shag cut because there is truly nothing prettier than ringlets with tons of natural body and movement! Adding soft, wispy curly bangs totally frames the eyes in the most flattering way without weighing down your face. Whether you're running weekend errands or dressing up for a golden-hour date night, this style lets your natural texture completely shine!
How to do this
1. Start on freshly cleansed, dripping wet hair after washing with a hydrating curl shampoo and conditioner.
2. Gently rake a generous amount of curl leave-in conditioner through your hair using the wide-tooth detangling comb listed below to thoroughly detangle and distribute moisture evenly.
3. Section off your bangs and crown area, then apply a defining curl cream from roots to tips to encourage your natural spiral formation.
4. For extra hold and frizz control in humid weather, glaze a lightweight curl defining gel over your mid-lengths and ends using the 'praying hands' technique, then scrunch upward gently.
5. Use your fingers to twirl individual coils in the fringe and face-framing sections to give them that effortless, defined ringlet shape.
6. Attach the universal collapsible diffuser nozzle listed below to your blow dryer, flip your head slightly forward, and dry your curls on low heat and low airflow until 85-90% dry.
7. Once fully dry, break the light gel cast by scrunching in a few drops of lightweight hair oil listed below to add brilliant shine, softness, and natural movement.
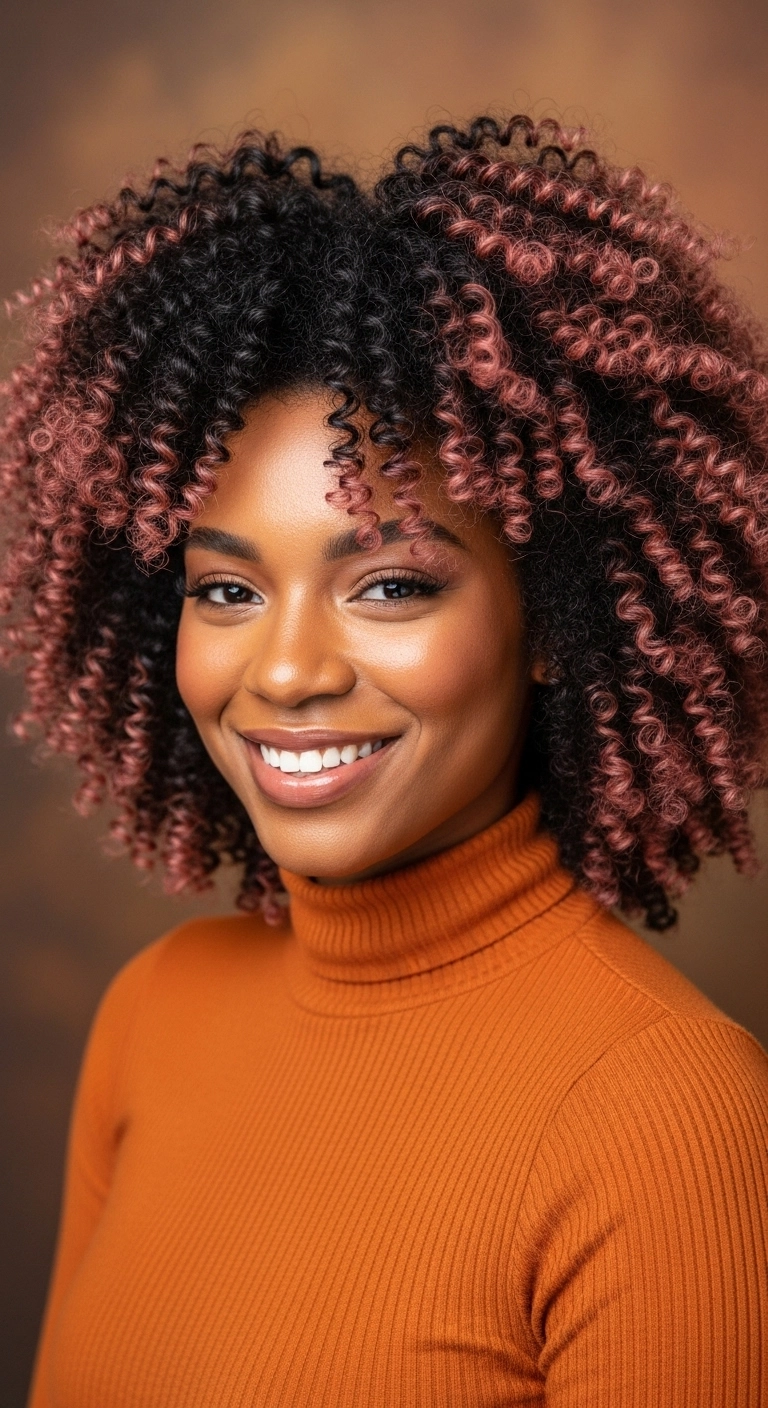
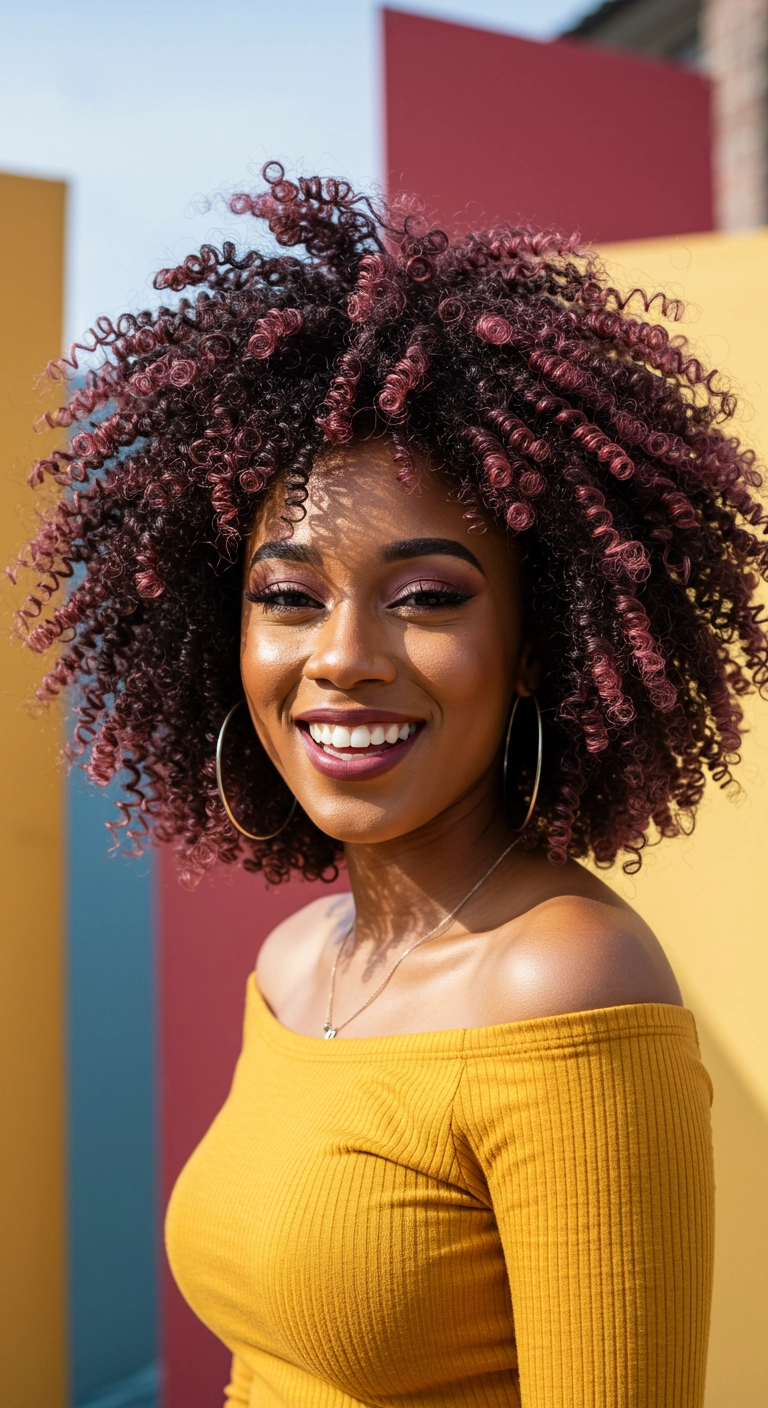
The rounded curly cut with dusty rose tips. Such a stunning vibe! I love how the soft pink ombre highlights every single coil while keeping the roots deep and natural. It gives your curls so much dimension and bounce without feeling over the top.
How to do this
1. Start on freshly washed, thoroughly detangled, damp curls using the microfiber hair towel listed below to gently remove excess water without causing frizz.
2. Section your curls into manageable quadrants and apply a generous amount of leave-in conditioning cream followed by the curl defining cream listed below to coat each strand evenly.
3. Work in small subsections, using your fingers or a specialized defining brush to coil each curl smoothly, ensuring consistent ringlet formation throughout.
4. Attach the universal hair diffuser listed below to your blow dryer, tipping your head forward and side to side while drying on low-to-medium heat to set the curls with maximum volume and zero disruption.
5. Once 100% dry, gently scrunch out any cast using a few drops of the lightweight nourishing hair oil listed below to add glossy shine and soft bounce.
6. Use the wide-tooth afro pick listed below at the roots underneath to gently fluff and lift the canopy, achieving that stunning rounded, full-bodied silhouette.
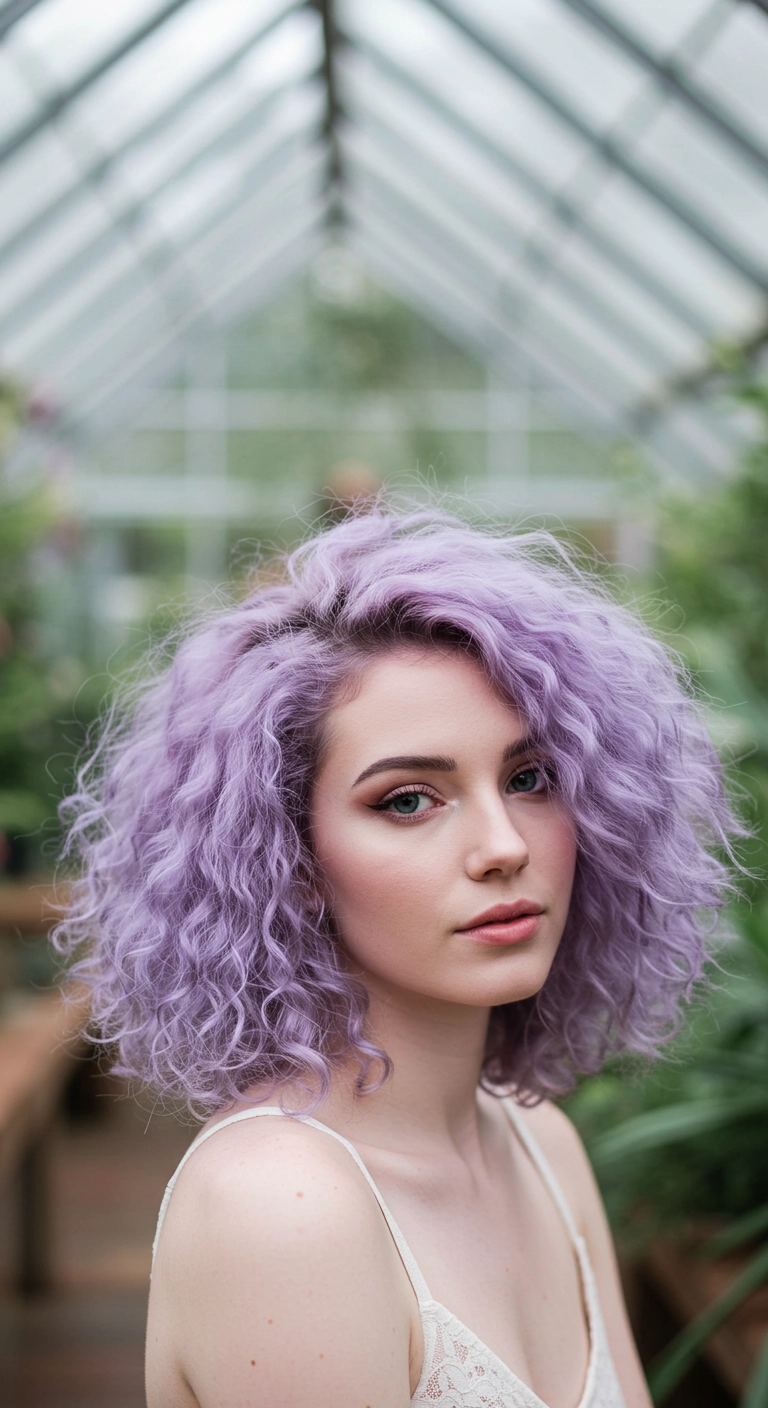
I know going pastel can feel like a total commitment, but honestly, looking at these dreamy lavender curls makes every single salon hour completely worth it! The deep side sweep gives so much natural body, and if you’ve been looking for a sign to lean into fairytale hair, this is it!
How to do this
1. Start by prepping your freshly washed, damp curls using the leave-in curl defining cream listed below to lock in hydration and fight frizz.
2. Gently rake a quarter-sized amount of the lightweight styling gel listed below from mid-lengths to ends, using prayer hands to distribute evenly.
3. Flip your head upside down and scrunch upward towards the scalp using a microfiber towel to encourage natural ringlets and curl clumping.
4. Attach the universal hair diffuser nozzle listed below to your blow dryer, setting it to low speed and medium heat, gently cupping sections until your curls are 80-90% dry.
5. Flip hair upright, create a deep dramatic side part with your fingers to build maximum crown volume, and let it fully air-dry.
6. Once totally dry, break the gel cast by scrunching a couple of drops of the lightweight shine hair oil listed below through the mid-lengths and ends for soft, touchable bounce.
7. Mist with the color-depositing purple toning spray listed below whenever your pastel lilac tone needs a fresh, vibrant boost between salon visits.
If you've been searching for a sign to finally chop your curls into a bob and go full copper, this is literally it! There is something so effortlessly chic and carefree about pairing bouncy, textured ringlets with a soft fringe. It frames the face in the dreamiest way possible, especially catching that golden hour glow!
How to do this
1. Start on freshly cleansed, damp hair and detangle gently from ends to roots using the wide-tooth detangling comb listed below.
2. Rake a nickel-sized amount of the curl defining cream listed below evenly through your mid-lengths and ends to lock in hydration and define the natural coil shape.
3. Apply a golf-ball-sized puff of the lightweight volumizing mousse listed below, focusing on the root and mid-shaft areas to build buoyant volume.
4. Style the front bangs forward with your fingers or a mini round brush to ensure they dry softly curved without separating too much.
5. Attach the universal hair diffuser nozzle listed below to your blow dryer, tilt your head slightly, and cup sections of your curls gently on low speed and medium heat until about 85% dry.
6. Allow the remaining dampness to air-dry naturally, then gently scrunch out any product crunch using a couple of drops of the lightweight shine hair oil listed below to reveal soft, bouncy ringlets.
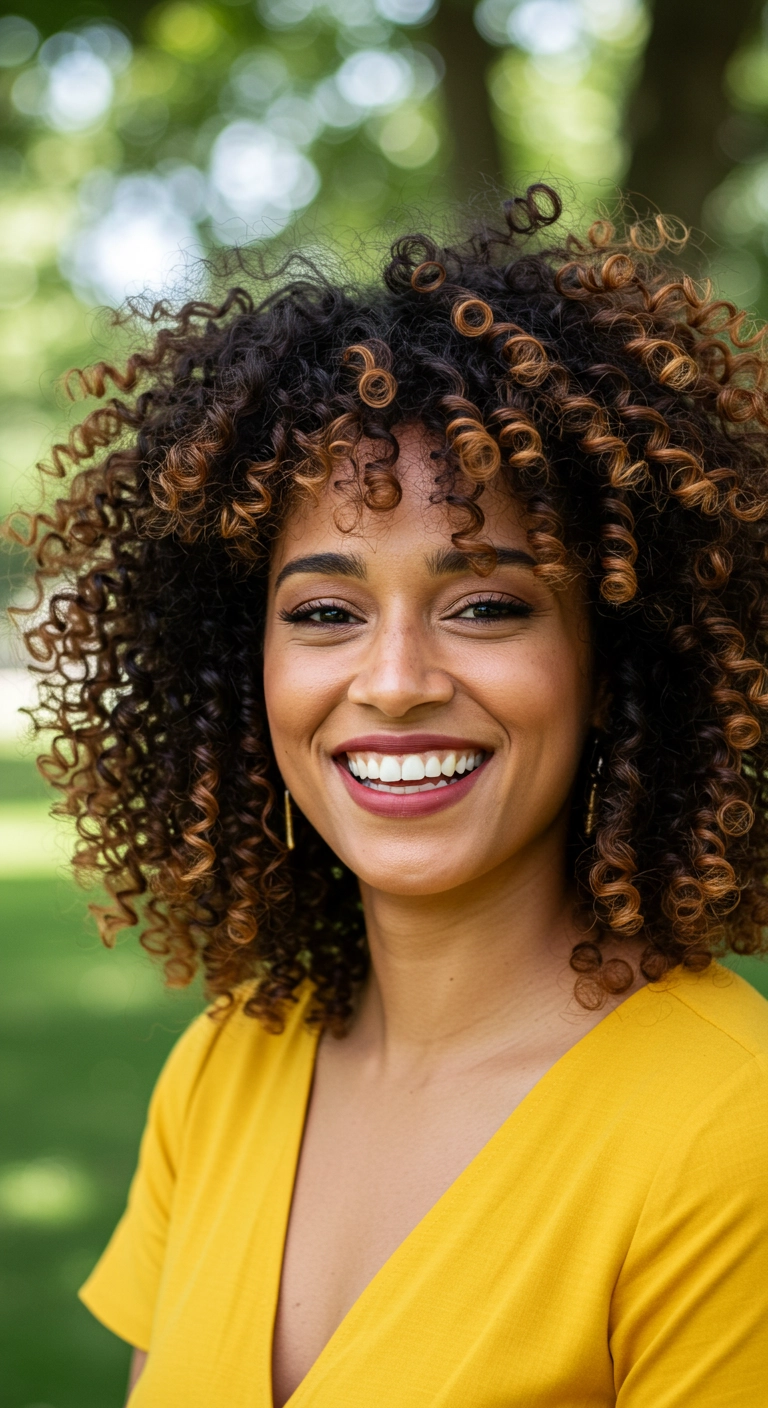
Embrace that natural bounce with tons of volume and gorgeous dimension! Adding warm caramel and honey painted highlights to defined curls gives so much depth, making every single ringlet pop without weighing it down. It feels effortlessly playful yet so put-together!
How to do this
1. Start on freshly washed, soaking wet hair after conditioning to prep your curls for optimal definition.
2. Rake a generous amount of curl defining leave-in cream using the curl defining leave-in conditioner listed below evenly through sections from roots to tips.
3. Apply a dollop of strong-hold curl gel using the strong hold curl defining gel listed below with praying hands, then gently scrunch upwards to encourage natural spiral formation.
4. For individual bouncy ringlets around the crown and face, twirl individual strands around your finger using the ringlet curl defining cream listed below.
5. Hover-diffuse on low heat and medium speed with the universal collapsible curl diffuser listed below until your hair is completely dry, without touching it to prevent frizz.
6. Once fully dry, break the gel cast by scrunching out the crunch with a few drops of lightweight oil using the lightweight argan hair bonding oil listed below for soft, radiant shine.
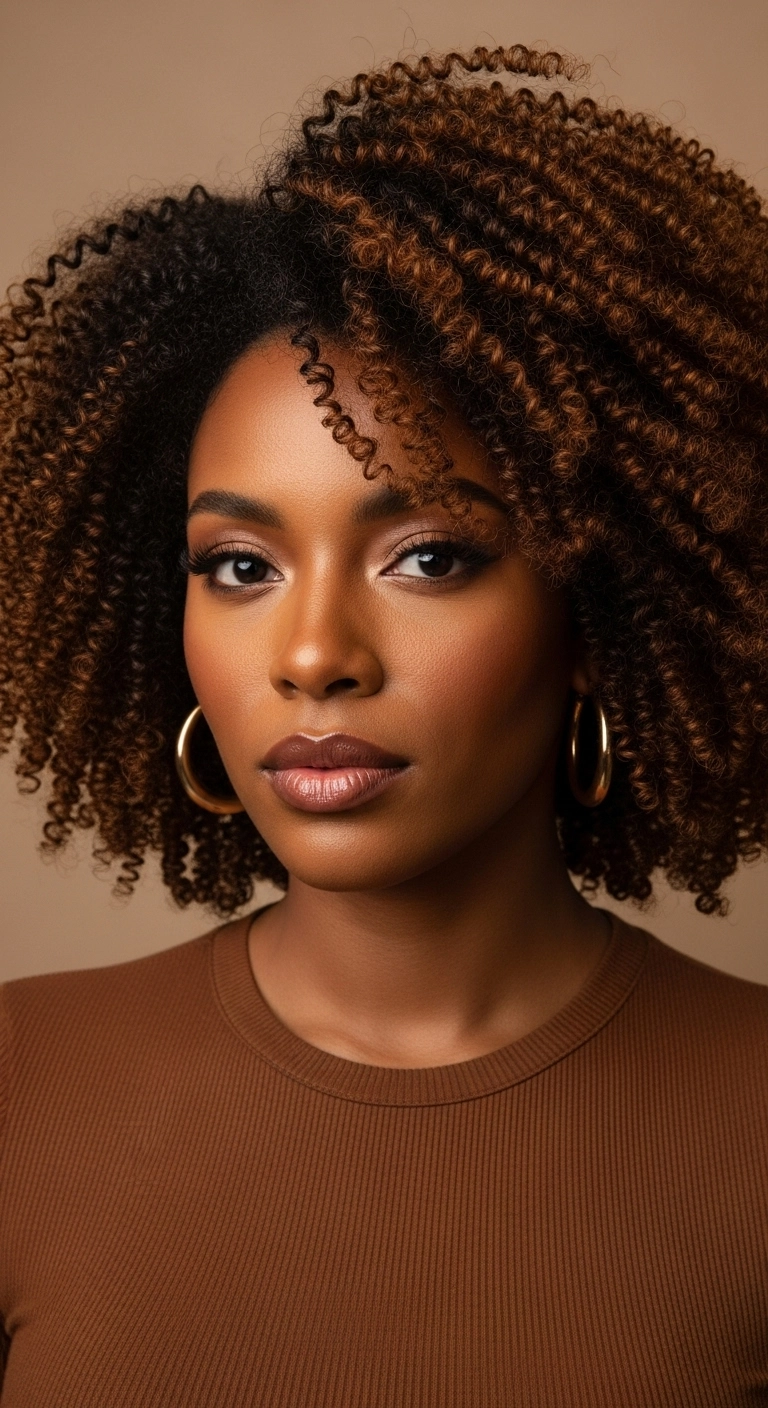
I'm totally obsessed with how much warmth and life these copper highlights bring to tight curls!! The face-framing ringlets in the front give it such a playful yet put-together touch. It's the absolute perfect shape if you want tons of volume without losing that soft, bouncy definition!
How to do this
1. Start by cleansing and conditioning your curls with a rich moisturizing system, thoroughly detangling with the wide-tooth comb listed below while your conditioner is still in.
2. On soaking wet hair, section your curls and generously rake through the leave-in curl defining cream listed below from roots to tips to lock in hydration.
3. Apply the strong hold curl defining gel listed below using the praying hands technique, smoothing over sections to encourage clumping and eliminate frizz.
4. Take small sections in the front near your forehead and finger-coil a few pieces to create those perfectly defined face-framing tendrils.
5. Attach the universal hair diffuser listed below to your blow dryer and cup sections of your hair on low speed and medium heat, drying until your curls are about 85-90% dry.
6. Once fully dry, take a few drops of the lightweight nourishing hair oil listed below on your palms and gently scrunch your curls to break the gel cast and add brilliant shine and volume.
Oh, curly bangs and shaggy layers, how I love thee! Embracing natural ringlets with this rounded collarbone cut is pure magic. This is sooo pretty!! Have you ever tried curly bangs before?
How to do this
1. Start on freshly cleansed, soaking wet hair in the shower to keep curls plump and clumped together.
2. Rake through a generous palmful of the hydrating curl defining cream listed below from roots to ends, making sure every strand is evenly coated.
3. Section out the bangs and use a wide-tooth comb or curl defining brush to encourage ringlet formation, then scrunch upward gently using a microfiber hair towel.
4. Glaze a lightweight styling gel over the canopy and scrunch again to lock in moisture and create a soft cast.
5. Attach a diffuser attachment to your blow dryer and dry curls on low speed, medium heat, tilting your head side to side and gently cupping sections toward your scalp.
6. Once 100% dry, break any light gel cast by scrunching a couple drops of nourishing hair oil listed below through the lengths to reveal bouncy, soft volume.
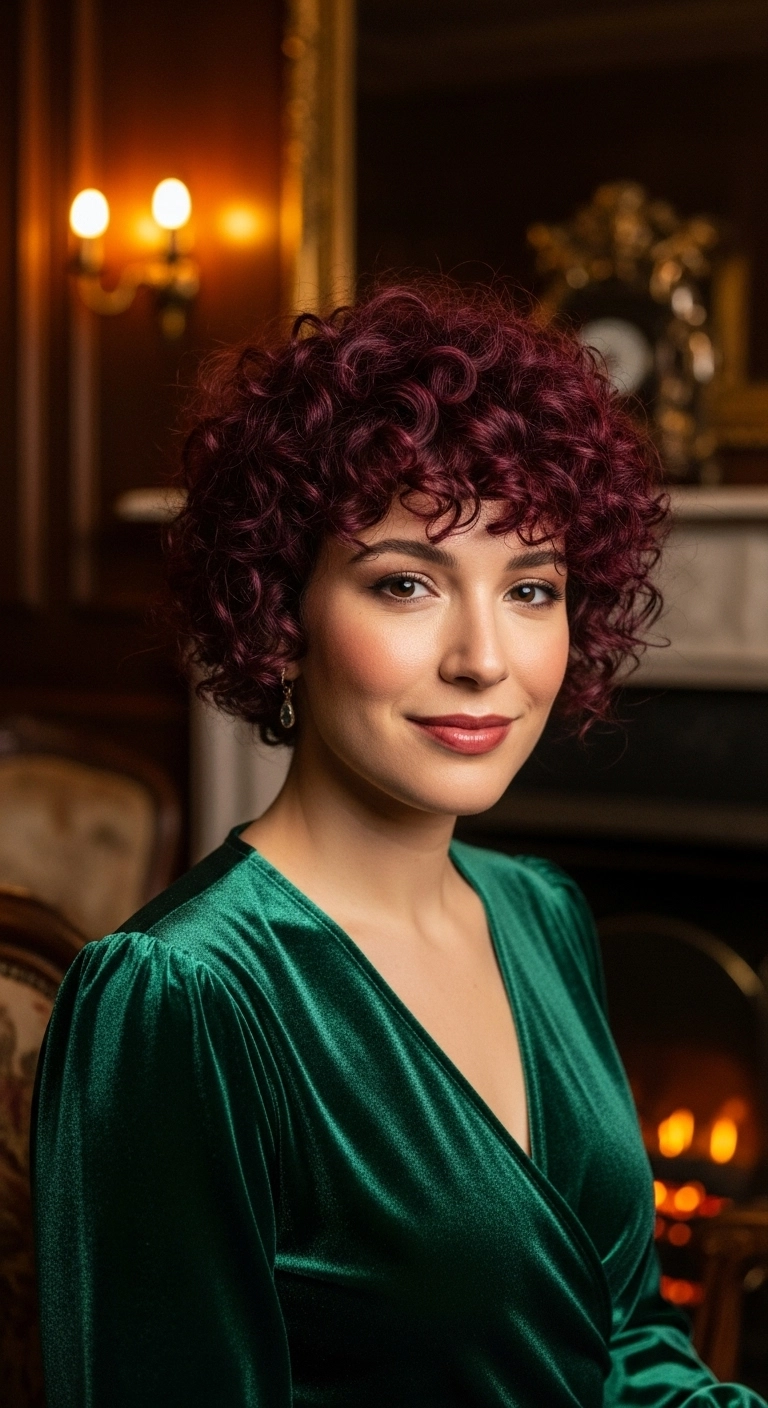
Isn’t this deep burgundy curly bob absolutely stunning?? The rich wine hue gives classic bouncy ringlets such a dramatic and romantic vibe. One thing I love about this cut is how the rounded curly bangs perfectly frame the eyes while keeping the curls defined and voluminous. It’s such an effortless yet glamorous look that works gorgeously for everyday wear or dressing up for a special evening!
How to do this
1. Start on freshly washed, soaking wet hair after applying a leave-in conditioner to lock in maximum hydration.
2. Section the hair and distribute a generous amount of curl defining cream listed below from roots to ends using praying hands.
3. Apply a lightweight styling gel over the curl cream to provide long-lasting hold and prevent frizz as the curls set.
4. Gently shape the curly bangs forward across the forehead with your fingers, twisting individual ringlets for clean definition.
5. Flip your head forward and hover diffuse your curls with the hair dryer diffuser listed below on low heat until about 80% dry, then let the rest air dry.
6. Once the hair is 100% dry, take a few drops of the nourishing hair oil listed below and gently scrunch out the gel cast to reveal bouncy, touchable volume.
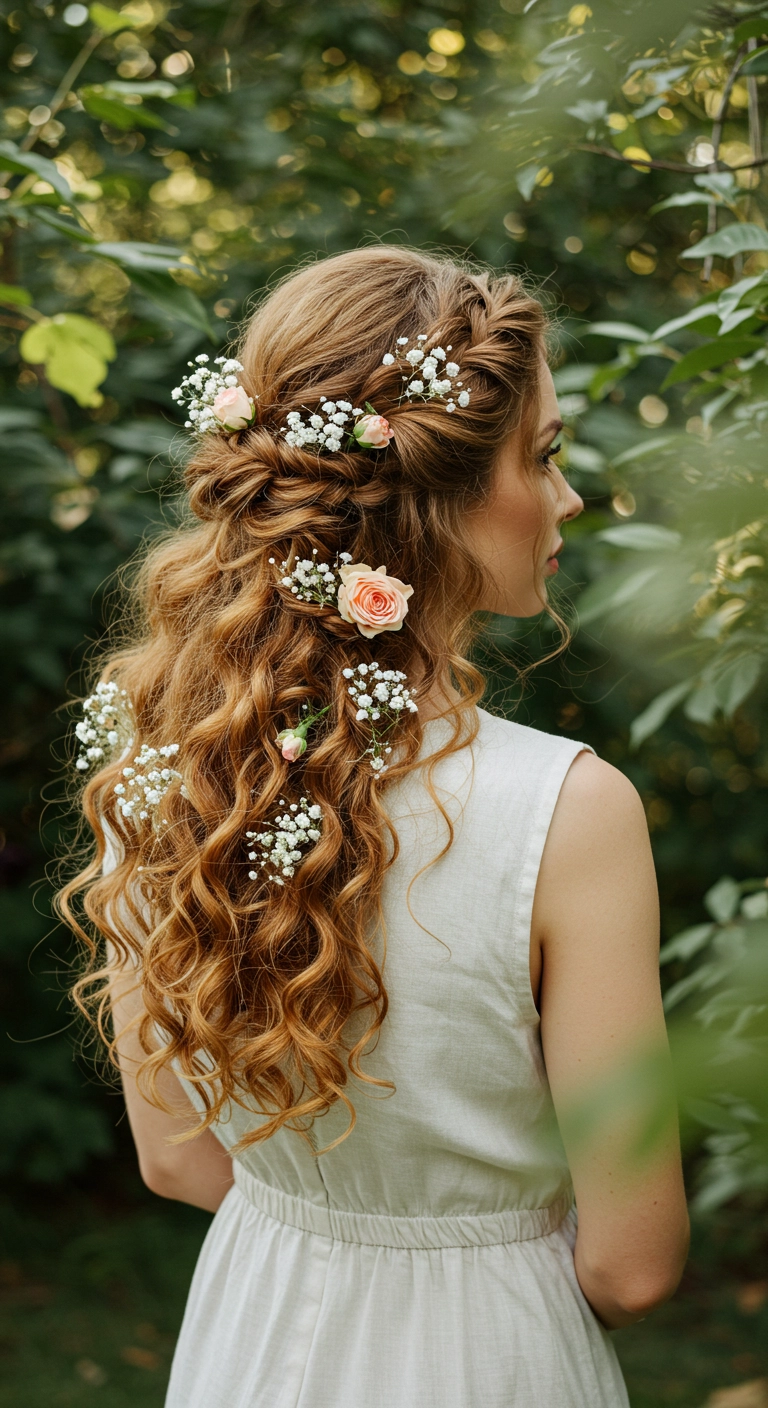
I think half-up styles are hands down the most versatile look for any wedding or romantic outdoor gathering. By pairing a loose, pancaked side Dutch braid with bouncy spiral curls, you get the structure of an updo while still showing off your hair's gorgeous length and volume. Tucking fresh blooms like baby's breath and mini garden roses into the twists creates that timeless, dreamy cottagecore feel that stays beautiful all day long.
How to do this
1. Start by prepping clean, dry hair with a generous mist of the heat protectant spray listed below to shield your curls from heat styling.
2. Using the 1-inch curling wand listed below, take 1 to 2-inch vertical sections all over your head, wrapping away from your face to create defined, romantic spiral curls.
3. Once your curls have cooled, lightly finger-comb through them and spritz with the flexible hold hairspray listed below to give soft hold without stiffness.
4. Section off the top side portion of hair near the temple and begin a loose Dutch lace braid, adding small pieces along the hairline as you braid toward the back of the head.
5. Gently pancake the braid by tugging lightly on the outer loops to give it that effortless, full, romantic texture.
6. Gather the braid and a matching twisted section from the opposite side, securing them together at the crown using clear mini elastics and bobby pins.
7. Finish the look by misting with the texturizing shine spray listed below and tucking delicate sprigs of baby's breath and fresh miniature roses into the braids and curls.
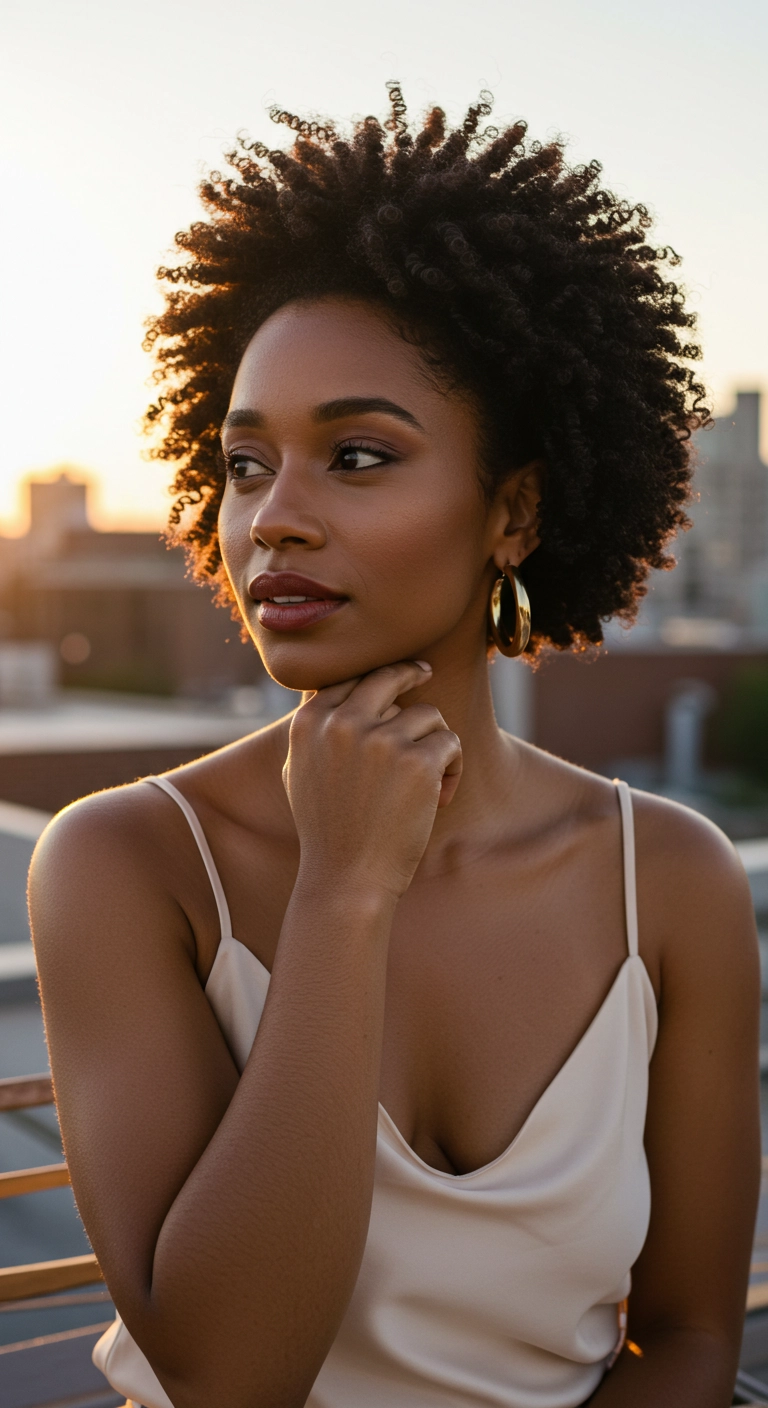
This look is all about celebrating your natural texture and volume, making it the ultimate chic style for warm summer evenings or date night – I wore this twist-out to a rooftop dinner and got non-stop compliments!
How to do this
1. Start on freshly washed, conditioned damp hair and gently detangle from ends to roots using the wide-tooth detangling comb listed below.
2. Section your curls into small, manageable quadrants and work in a generous amount of the hydrating leave-in curl cream listed below to lock in maximum moisture.
3. Apply the curl defining styling gel listed below evenly through each subsection, smoothing with your fingers or raking through to encourage natural coil definition.
4. Form small two-strand twists or finger coils across your entire head, allowing them to fully dry either overnight or by using a hood dryer.
5. Once 100% dry, coat your fingertips with a few drops of the nourishing hair and scalp oil listed below and carefully unravel each twist to prevent frizz.
6. Gently fluff the roots and shape your afro silhouette using the seamless afro pick listed below to lift the base and achieve this gorgeous, full rounded volume.
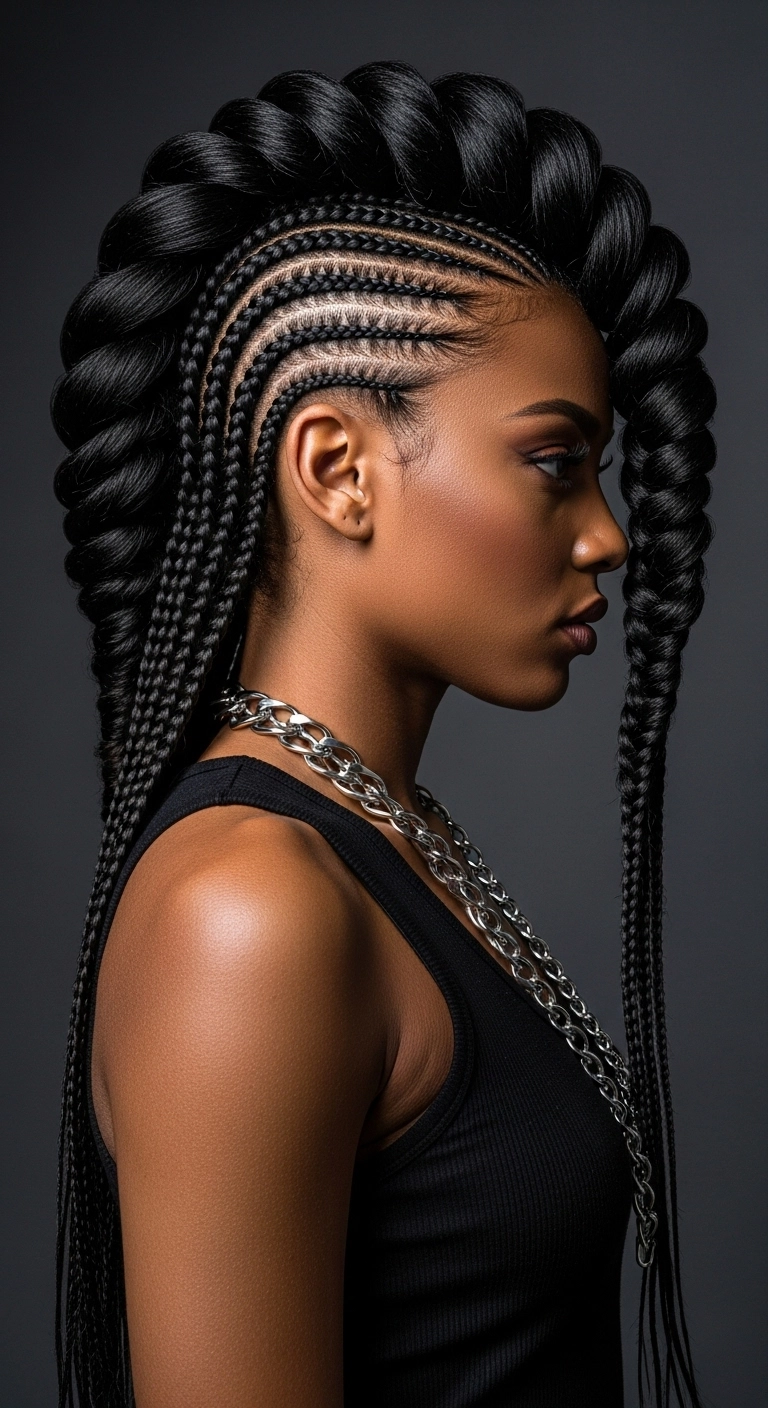
I fell completely in love with this fierce braided look the first time I saw it on the runway. It blends the classic edge of a high-fashion mohawk with the stunning artistry of precision feed-in cornrows. It's bold, sculptured, and protects your natural hair while turning every single head in the room. If you're ready to make a huge statement at your next festival or big night out, this braided faux hawk is definitely one to try!
How to do this
1. Start on freshly washed, conditioned, and thoroughly blown-out hair, detangling from ends to roots with the wide-tooth detangling comb listed below.
2. Section out the center crest of the head from the front hairline all the way to the nape of the neck, clipping it out of the way to create your mohawk track.
3. Apply a generous amount of the edge control and braiding gel listed below along clean horizontal and curved parting lines using the metal rat tail comb listed below.
4. Braid tight, clean cornrows along both sides of the head curving upward toward the center, feeding in pre-stretched synthetic braiding hair for neatness and uniform tension.
5. For the central ridge, craft a structured, oversized rope twist crest by securely anchoring bulk braiding hair at the center base and twisting tightly while feeding hair forward and backward into voluminous sculpted rolls.
6. Let the dramatic braid tails drape gracefully down past the chest in front and behind the shoulders.
7. Clean up any flyaways along the hairline and set the entire look by applying the foaming wrap lotion listed below, wrapping with a satin strip, and finishing with the high-shine conditioning oil sheen spray listed below.
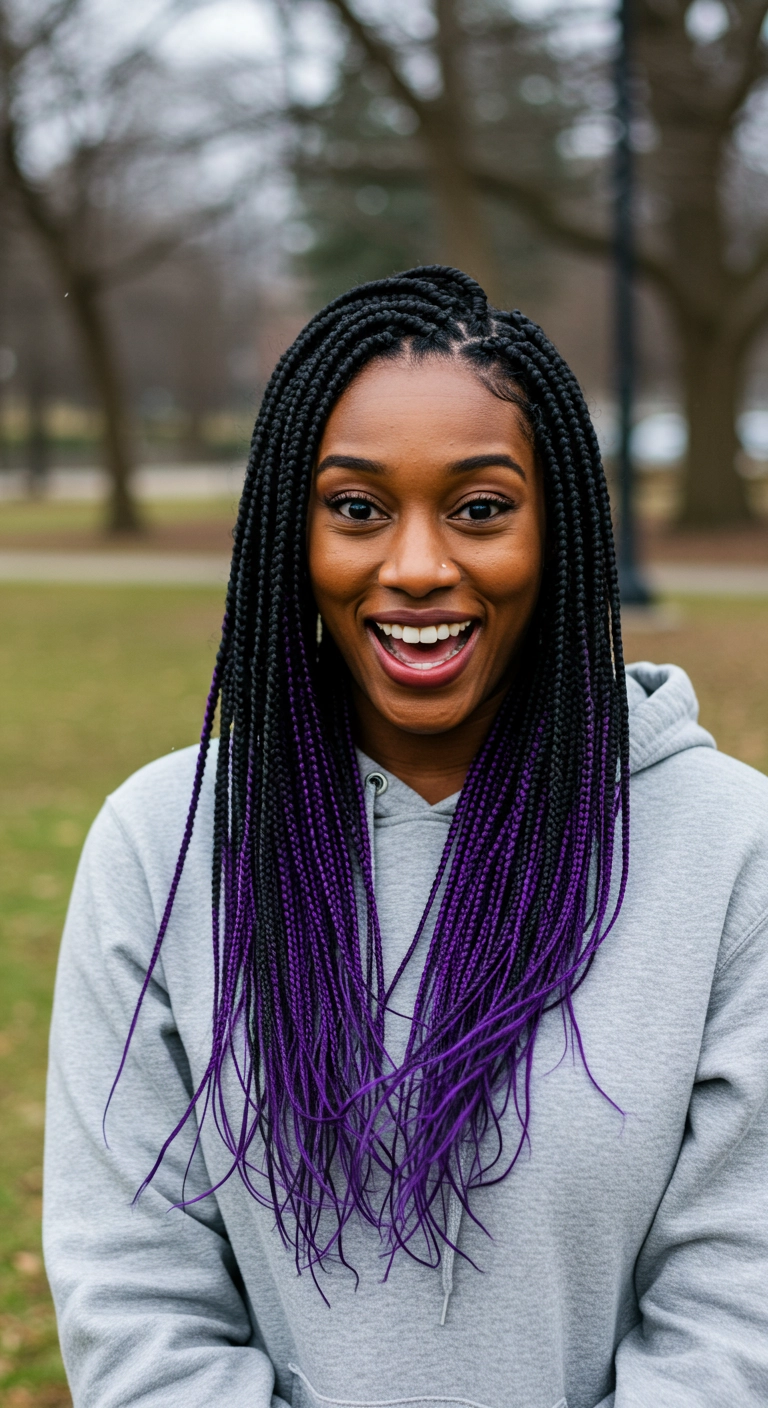
If you want a protective style with a fun pop of personality, these black to purple ombré braids are everything! The pop of violet at the ends makes everyday casual outfits look so cool and effortless without being overly dramatic.
How to do this
1. Thoroughly wash, deep condition, and blow dry your natural hair straight using the heat protectant spray listed below to make parting easy and protect against tension.
2. Section the hair into clean, neat grid boxes using a metal tail comb and secure each section temporarily with clips.
3. Apply a smoothing edge styling gel along the perimeter of the base section to keep roots sleek and frizz-free.
4. Begin braiding your natural hair in a knotless braid technique, gradually feeding in black synthetic braiding hair from the roots through the mid-shaft.
5. As you approach the mid-lengths, begin feeding in the vibrant purple braiding hair listed below to achieve that seamless gradient ombré transition.
6. Braid down all the way through the purple ends, leaving the very tips lightly feathered or tapered.
7. Dip the braided ends carefully into hot water to set and smooth the synthetic fibers, then set your hairline with an edge control brush and finish with a spritz of braid sheen spray.
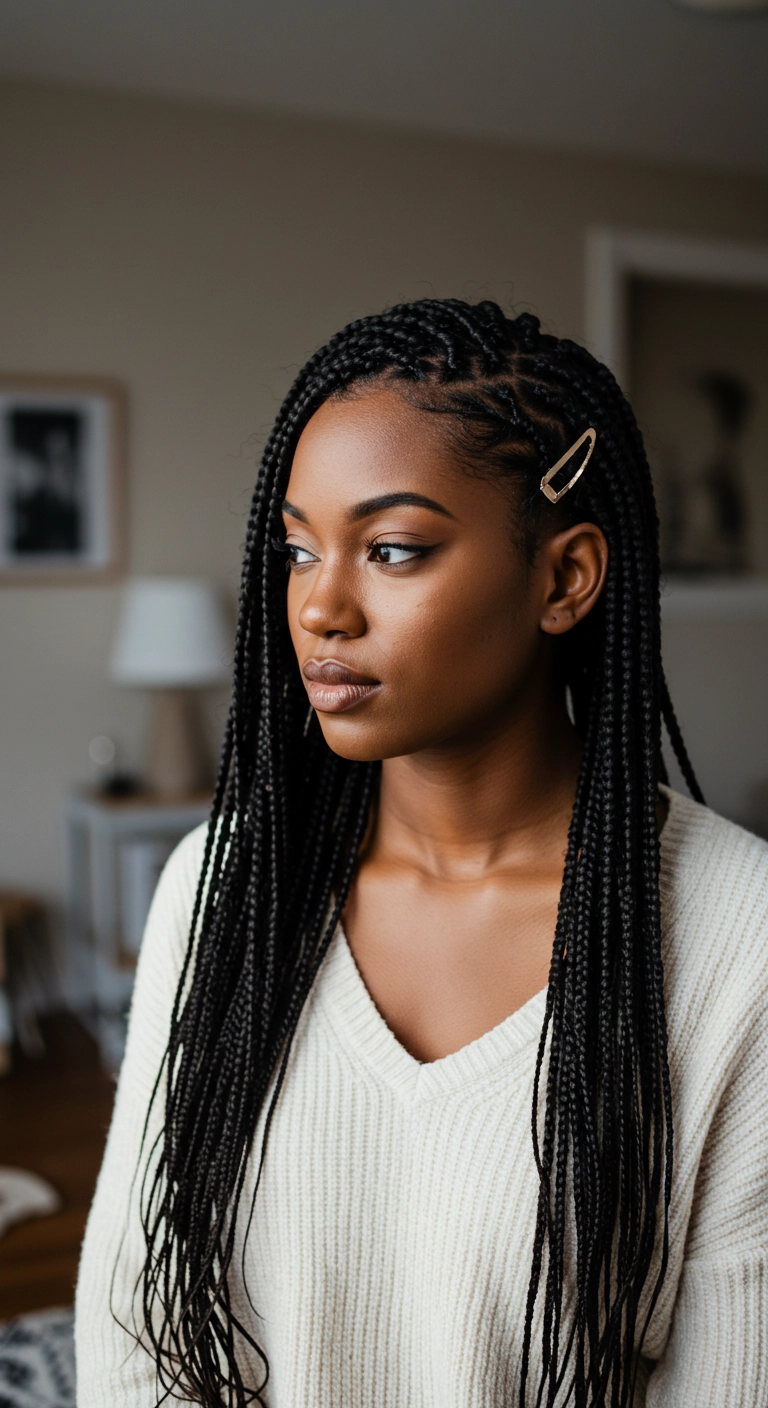
Whenever I want a protective style that looks super polished without feeling heavy on the scalp, long knotless braids are my go-to! Tucking one side behind the ear with a cute gold clip is such an easy way to elevate the whole look for work or dinner.
How to do this
1. Thoroughly cleanse, deep condition, and blow-dry your natural hair straight to prep for installation, using a leave-in moisturizer to keep strands hydrated.
2. Section the hair cleanly into precise, square or triangular parted grids using the rat tail comb listed below and secure each section with a small clip.
3. Apply a small amount of the braiding conditioning gel listed below along each part and at the roots to ensure a crisp, ultra-neat finish.
4. Begin braiding each individual section using the feed-in knotless technique with the pre-stretched braiding hair extensions listed below, gradually feeding in strands to keep the base lightweight and tension-free.
5. Continue braiding down through the ends until all sections are braided cleanly and evenly.
6. Dip the ends in a bowl of carefully heated hot water to seal them and soften the movement of the braids.
7. Smooth down the hairline flyaways and style soft baby hairs using the edge control styler brush listed below.
8. Create an effortless deep side part on one side and pin back the front section just above your ear with the gold metallic hair barrette listed below for a chic, clean look.
Oh, the bouncy, defined ringlets on this curly bob—I am completely in love! The soft curly bangs give it such an effortless, gorgeous frame. Have you ever tried rocking a short curly cut like this?
How to do this
1. Start on freshly cleansed, thoroughly wet hair using a moisturizing sulfate-free shampoo and deep conditioning mask.
2. Section your wet curls and rake through a generous amount of the hydrating leave-in curl cream listed below to lock in essential moisture.
3. Apply the strong-hold curl defining gel listed below from roots to ends, using the praying hands technique and then scrunching upward to encourage curl clumping.
4. For extra definition around the face and forehead, finger-coil individual curls and separate a few pieces to create wispy curly tendrils across the brow.
5. Attach a large bowl diffuser to your hair dryer and gently hover over sections on low heat and low airflow until hair is completely dry without disturbing the curl cast.
6. Once fully dry, dispense a few drops of the lightweight nourishing hair oil listed below into your palms and gently scrunch out the crunch to reveal soft, bouncy, defined curls with maximum volume.
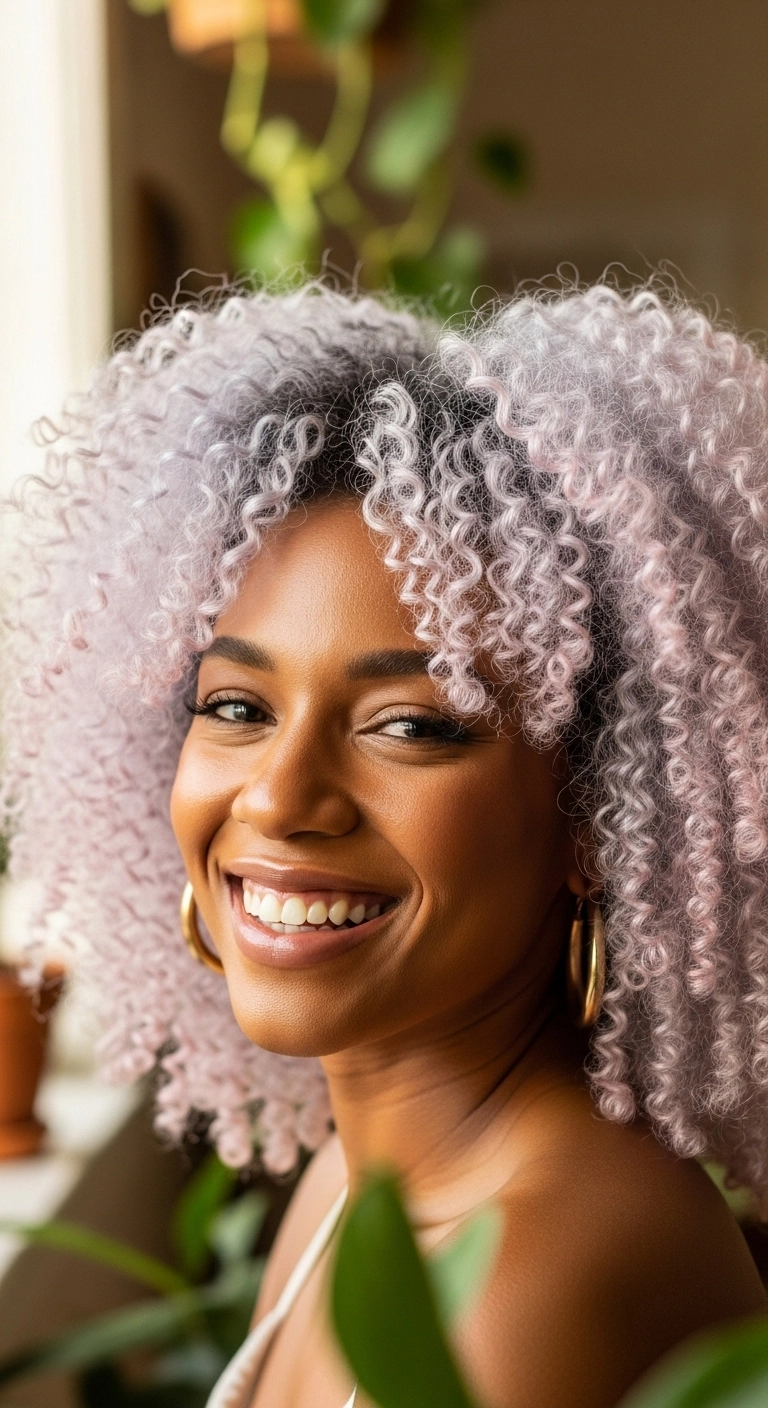
Are you completely obsessed with fun pastel shades on natural curls like I am? I added this stunning frosted lavender curly look to the collection because it brings so much playful dimension and pure joy, don’t you think?! The deep shadow root makes growing it out super effortless, while those bouncy ringlet bangs frame the face in the dreamiest way. You can rock it in this full, rounded halo shape or pin the sides back for a chic half-up moment. Give this pastel dream a try and show off your gorgeous curls!
How to do this
1. Start by gently clarifying and prepping naturally curly hair, ensuring deep hydration prior to any chemical processing.
2. If lifting naturally dark hair to a high pale blonde canvas, work with a professional colorist to bleach lengths while leaving a soft shadow root for seamless blending.
3. Deposit a soft pastel lavender toner using the pastel lilac semi-permanent hair color listed below to create that ethereal, cool-toned frosty purple tint.
4. After cleansing, apply a generous amount of the curl defining leave-in conditioner listed below to soaking wet hair to quench thirsty curls.
5. Section the hair into small quadrants and distribute the lightweight curl defining styling gel listed below using the rake-and-shake method to clump spiral ringlets.
6. Cut and shape the perimeter and bangs while slightly damp or dry using the professional hair cutting shears listed below to maintain the rounded, bouncy halo silhouette.
7. Dry with a low-heat blow dryer fitted with the universal collapsible curl diffuser listed below, flipping your head upside down to build massive root volume.
8. Gently scrunch out any gel cast with a few drops of the nourishing jojoba hair oil listed below to add soft shine and eliminate stiffness.
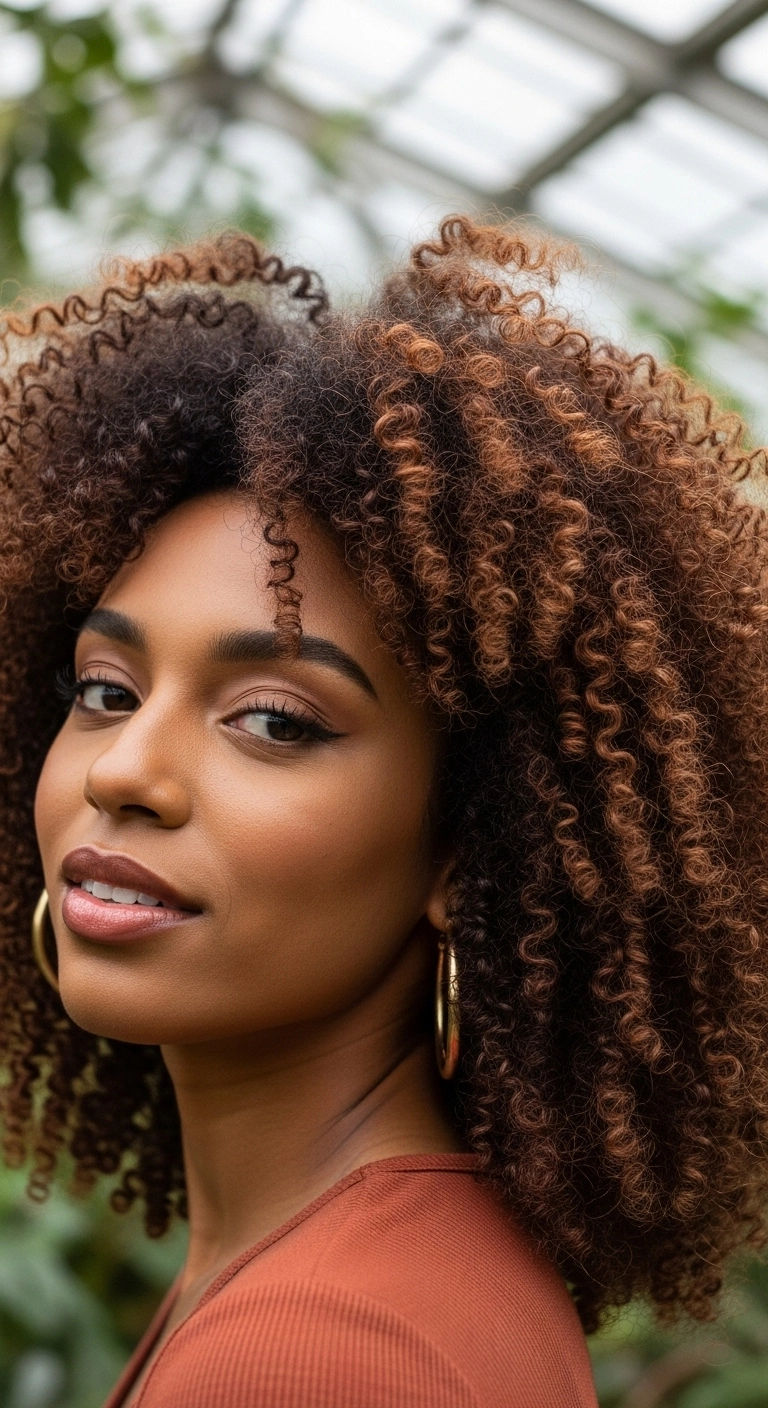
Can we take a second to appreciate the absolute magic of copper-toned curls? I had to feature this dimensional curly look because warm tones bring so much depth and life to natural textures, don’t you think?! You can rock this rounded cut fully picked out for dramatic, voluminous cloud-like energy, or keep the ringlets super defined and clustered for a chic, sculpted shape. It's totally effortless, glowing, and the perfect style to show off your natural pattern all year round!
How to do this
1. Start on freshly washed, thoroughly conditioned, and damp hair to maximize coil definition and moisture retention.
2. Section your curls into four quadrants and apply a generous amount of the hydrating curl leave-in cream listed below from roots to ends.
3. Work through each section using the defined curl defining gel listed below, smoothing the product over small ribbon sections and gently finger-coiling around your face for added bounce.
4. Attach the universal collapsible diffuser attachment listed below to your blow dryer, setting it to low speed and medium heat, and cup the curls upward toward your scalp without disturbing the curl formation.
5. Once your hair is about 95% dry, warm a few drops of the nourishing hair and scalp oil listed below between your palms and gently scrunch out any gel cast to create soft, touchable ringlets.
6. Flip your head upside down and use the wide metal afro pick comb listed below right at the roots to fluff and expand the shape for maximum gorgeous volume.
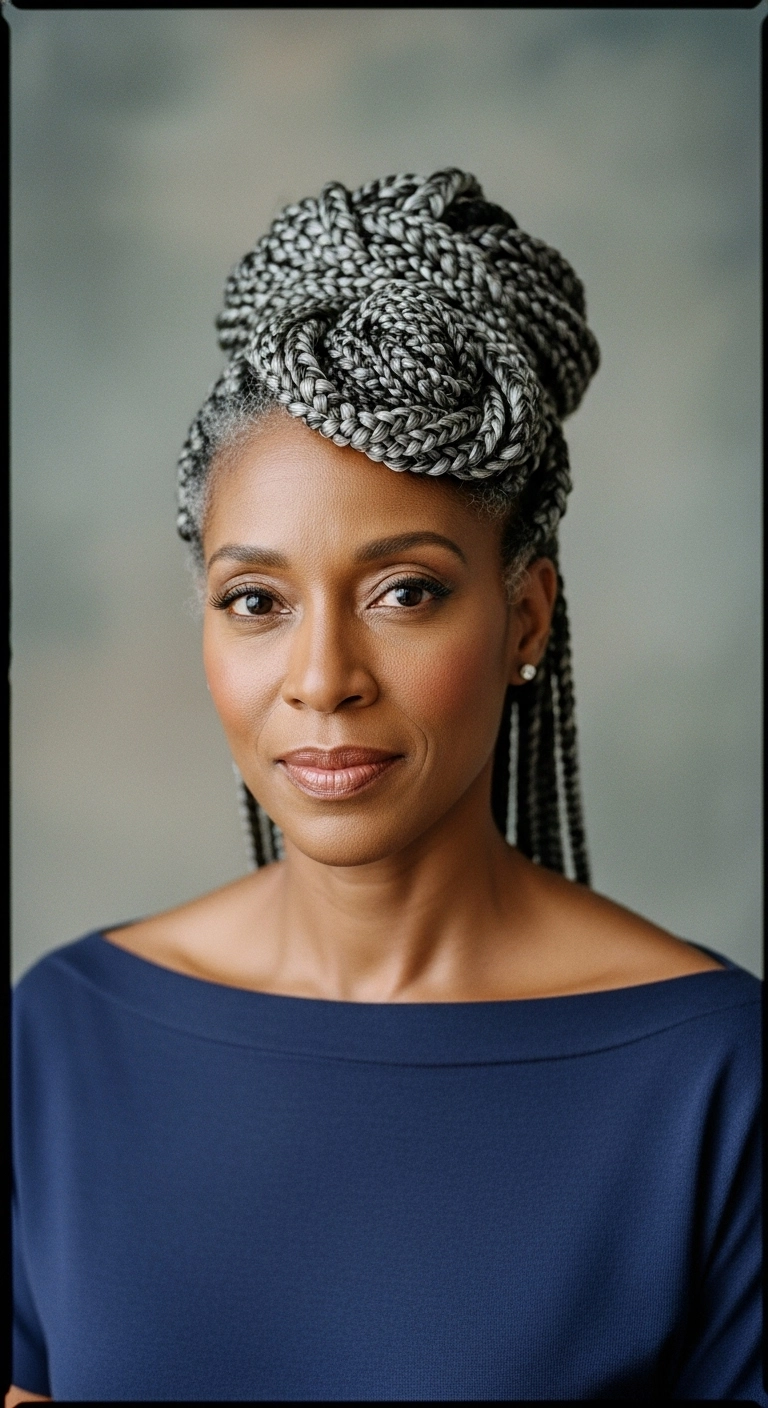
This braided look is effortlessly chic and keeps your hair completely out of your face, making it my absolute favorite for big events or busy work days—I wore a version of this to a formal dinner and received endless compliments!
How to do this
1. Start with clean, detangled, and conditioned natural hair, prepping the scalp using the scalp relief oil listed below.
2. Section hair cleanly into neat squares and install medium box braids using the pre-stretched silver and black braiding hair listed below, ensuring tension is even and comfortable.
3. Dip the finished braided ends carefully into hot water to set and smooth the braids completely.
4. Gather the top half to two-thirds of your braids into a high base at the crown, securing firmly with the strong elastic hair ties listed below.
5. Sculpt the gathered braids into an elevated, structured swirl or rosette bun over the front crown, securing sections in place with the large sturdy bobby pins listed below.
6. Allow the remaining braids to hang elegantly down your back.
7. Smooth down hairline edges and sideburns gently with a fingertip using the edge control styling gel listed below.
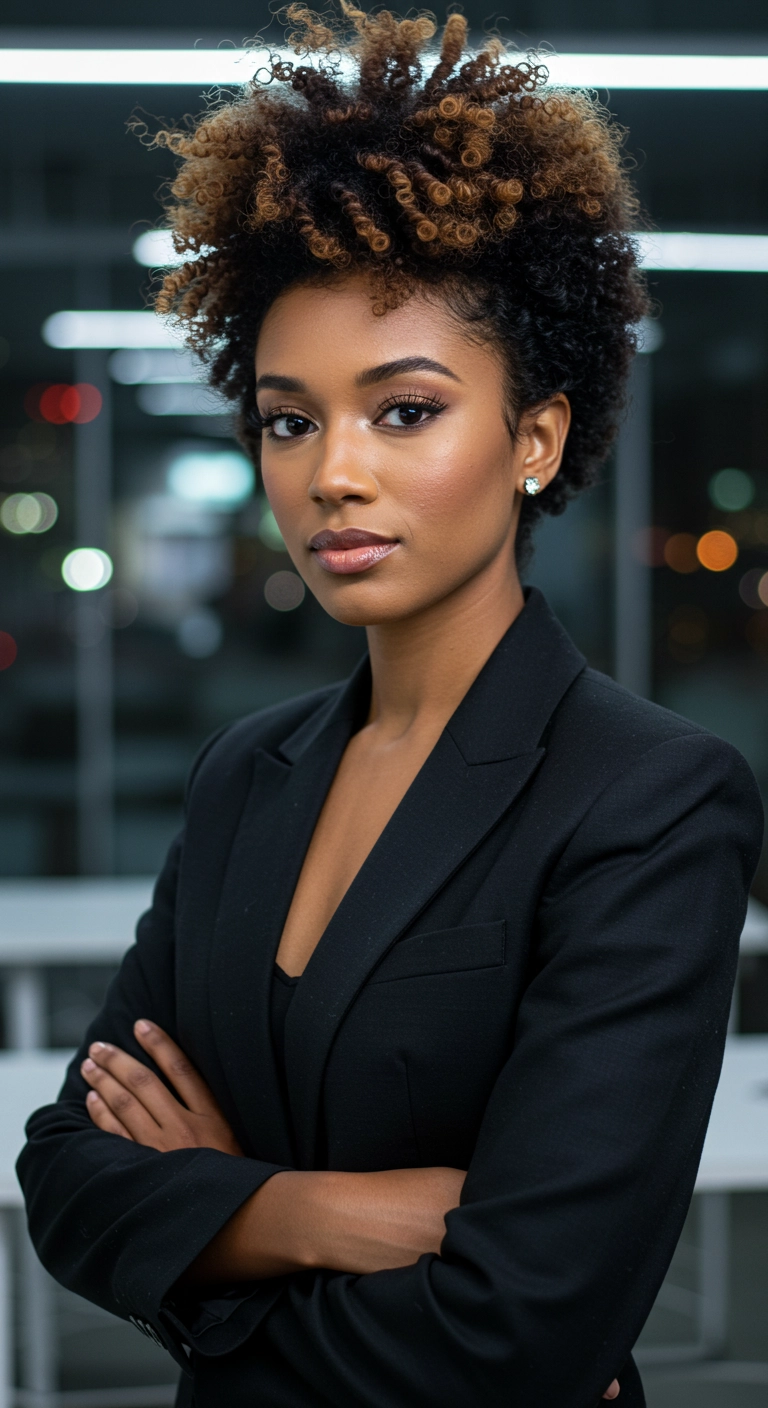
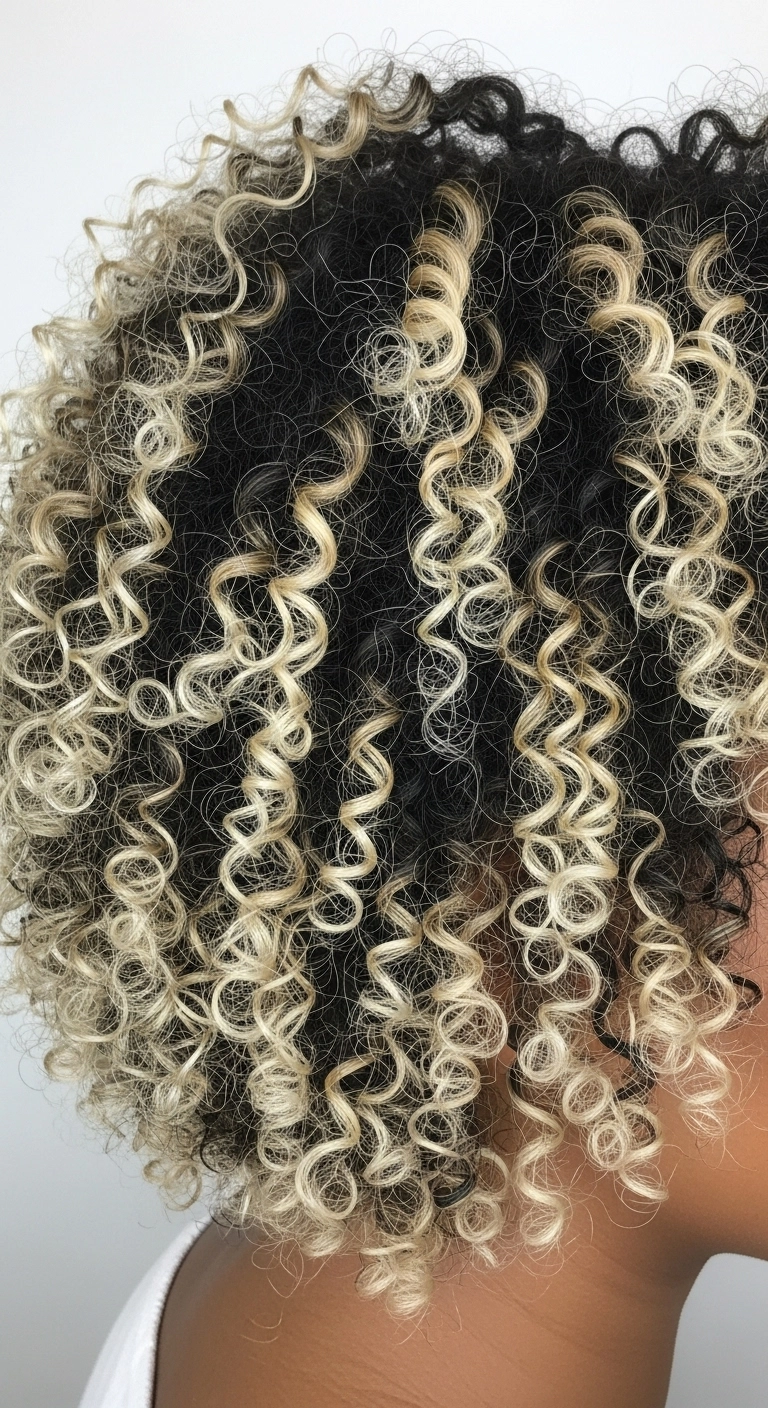
Isn't this high afro puff such a stunning and powerful look?? It combines boardroom sophistication with the gorgeous, natural beauty of defined coily texture. One thing I absolutely love about this style is how the warm honey-blonde tips pop against the dark base—it instantly gives your curls so much dimension and life! It's super versatile too, keeping you looking sharp for a big workday or sleek and chic for dinner.
How to do this
1. Start on freshly washed, damp hair and apply a generous amount of the leave-in curl defining cream listed below to lock in hydration.
2. Section the hair and do a finger-coil or two-strand twist out using the curl styling custard listed below to achieve maximum coil definition, especially through the top and front sections.
3. Allow your curls to dry thoroughly or use a hair diffuser on low heat to set the tight ringlets without creating frizz.
4. Gently unravel and separate the coils with a few drops of the lightweight nourishing hair oil listed below on your fingertips to add shine and volume.
5. Brush the perimeter and nape of your hair upwards with the boar bristle edge brush listed below and secure it into a high, compact puff using an adjustable satin stretch band.
6. Fluff the top coils forward so they spill effortlessly over the front of your forehead to create that beautiful face-framing curly crown, and mist with the medium hold shine spray listed below.
Products Used
Hydrating Leave-In Conditioner and Curl Defining Cream
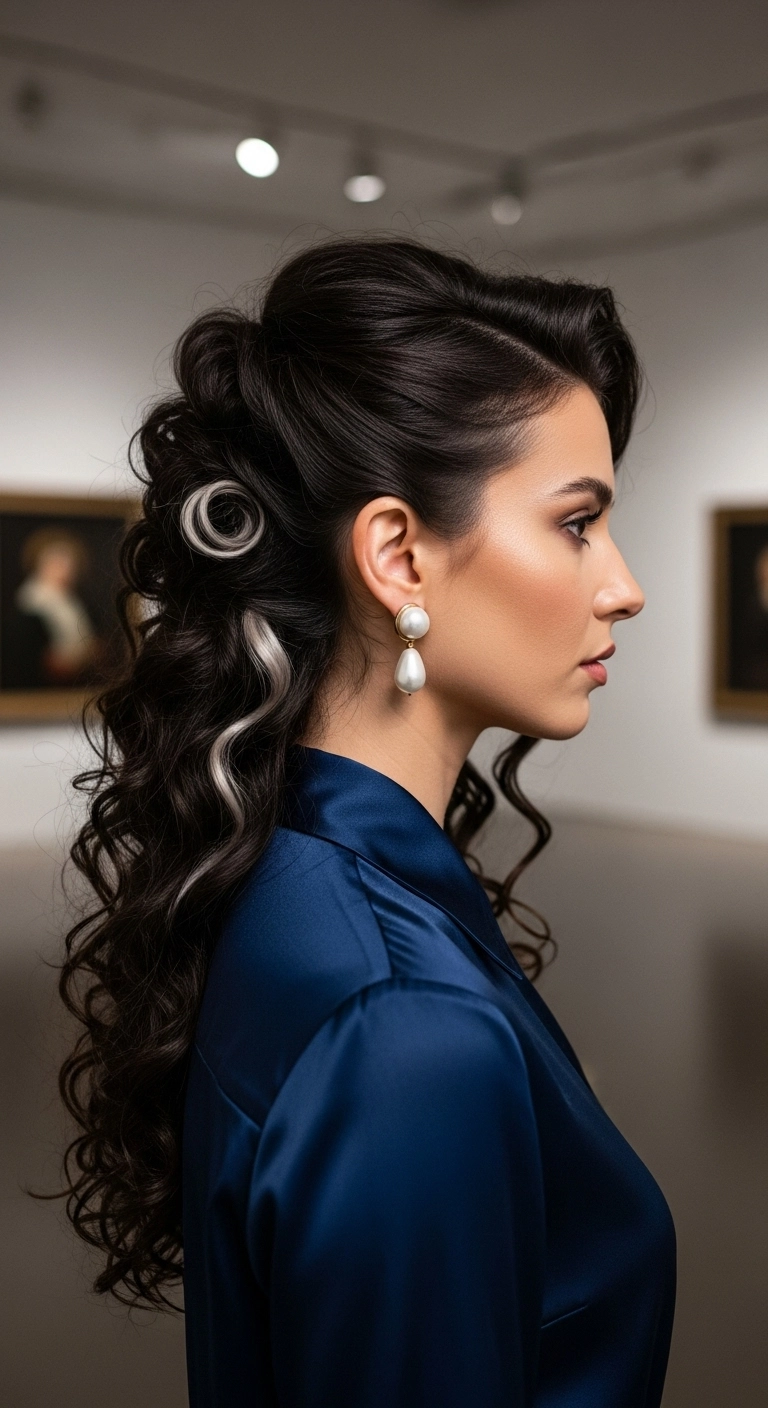
Oh, the drama of a cascading half-up style with hidden silver ribbons, how I love thee! That swirled accent curl resting against deep glossy brunette is everything. Would you dare rock this gorgeous high-contrast glam look for your next big night out?
How to do this
1. Start by prepping clean, dry hair with a generous mist of the heat protectant spray listed below to shield your strands and enhance shine.
2. Section out the contrast peekaboo panels behind the ear if coloring or clipping in silver-white hair extensions, ensuring clean separation from the dark base.
3. Use a 1-inch curling iron along with the ceramic curling iron listed below to curl the entire head in uniform vertical sections, curling away from the face for that classic Old Hollywood ribbon effect.
4. Allow all curls to cool completely, then gently sculpt the front crown back into a voluminous half-up pompadour using the teasing brush and lightweight hair oil listed below to smooth down any flyaways.
5. Carefully arrange the silver accent curls into circular pin-curled details along the side and pin securely beneath the darker canopy using bobby pins.
6. Leave out a single soft tendril along the jawline, curling it lightly to frame the cheek and collarbone.
7. Lock the entire sculpted cascade into place with a fine mist of the strong hold hairspray listed below for all-night shine and definition.
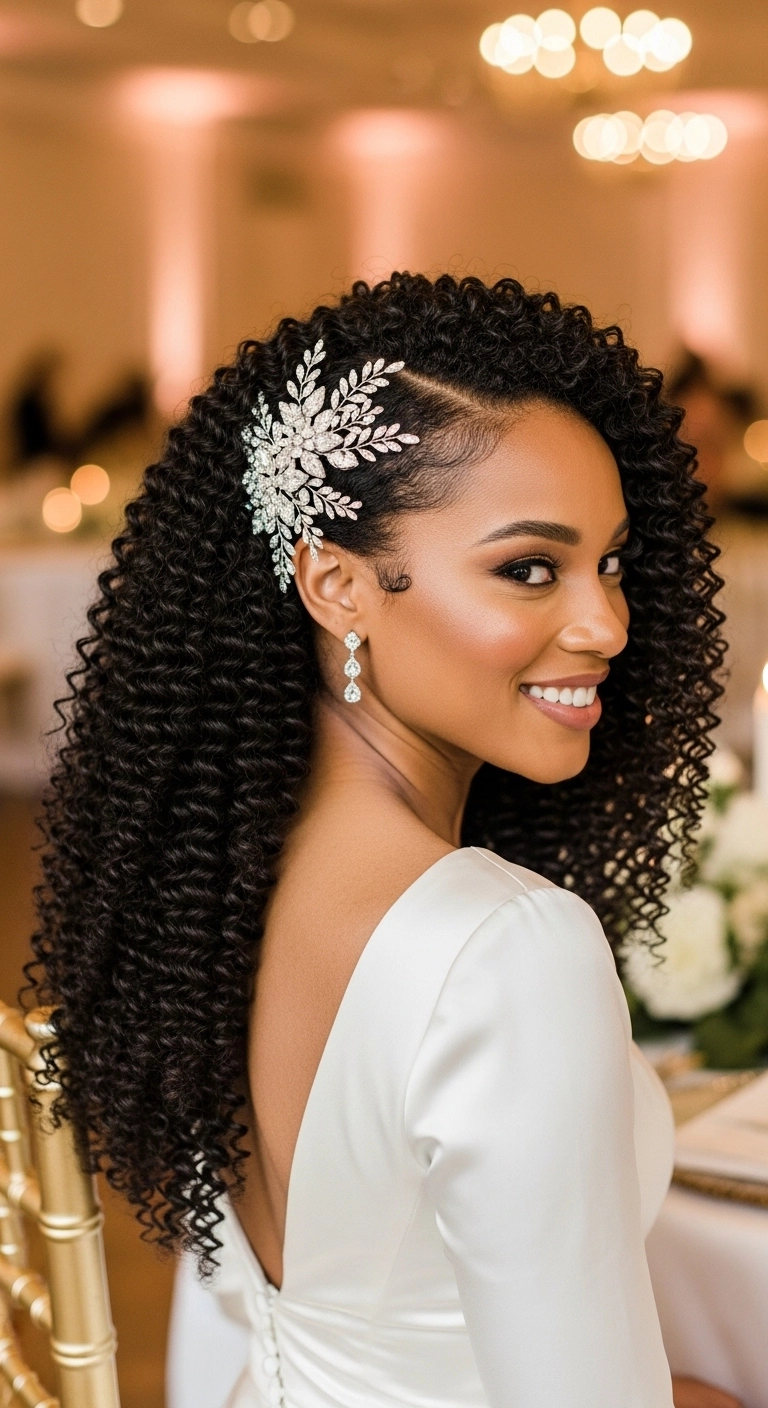
This bridal look is all about showing off gorgeous natural texture with timeless elegance. You create a crisp deep side part, smoothing down one temple with edge control to sculpt sweet little swirls. Then, pin that side securely behind your ear and pop in a dazzling crystal vine comb to let the rest of your lush, juicy spiral curls tumble down freely.
How to do this
1. Start on freshly washed, damp hair and apply a generous amount of the curl defining cream listed below from roots to ends to ensure moisture and maximum definition.
2. Section the hair and apply the strong hold curl styling gel listed below in small sub-sections, using a shingling or finger-coiling technique to create springy, uniform 3C/4A spiral curls.
3. Use a blow dryer with the large bowl diffuser listed below on low speed and medium heat to gently dry the curls completely without causing any frizz.
4. Create a clean, deep side part using the rat tail comb listed below, carving a crisp diagonal line from the arch of the eyebrow back.
5. Smooth down the hairline on the side with less hair using the edge control paste listed below and a soft bristle edge brush, carefully sculpting subtle baby hair swirls along the temple.
6. Pin back the smoothed section securely behind the ear with bobby pins, then nestle the sparkling bridal rhinestone hairpiece listed below directly above the ear to cover the pins.
7. Finish by misting the entire head with the high-shine lightweight finishing spray listed below to lock in radiant luster and keep every coil perfectly bouncy all night long.
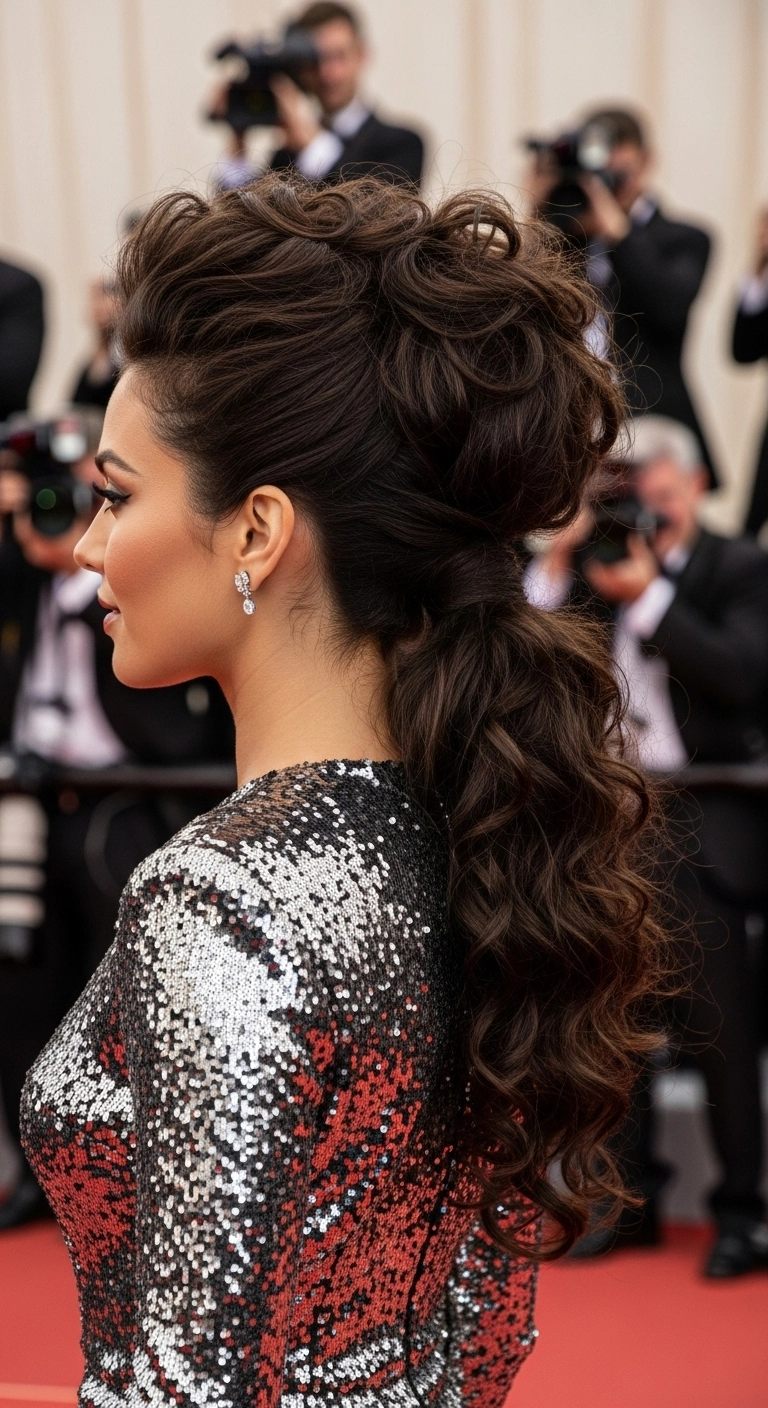
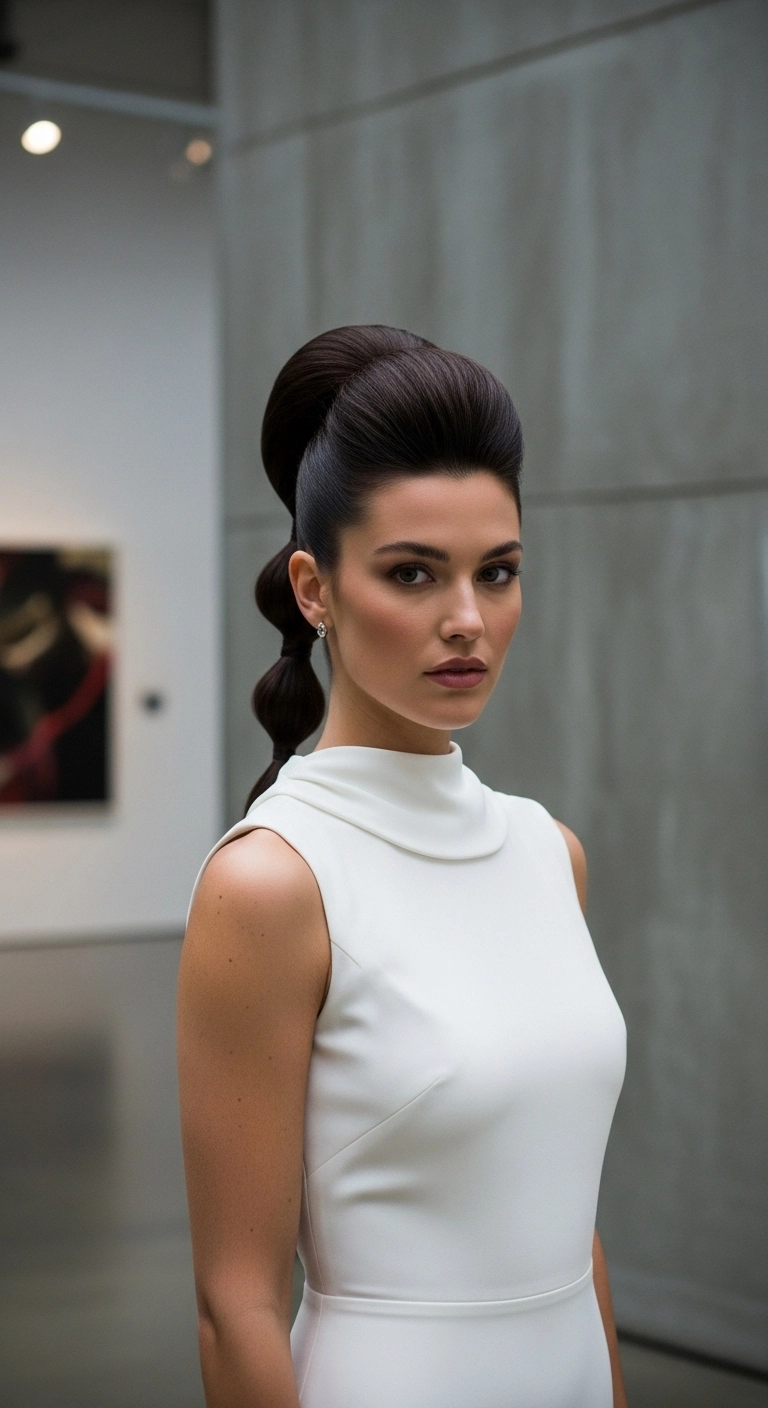
I am absolutely obsessed with this hairstyle! It takes a classic low ponytail and dials the volume and glamour all the way up with a lifted, textured crown and cascading romantic curls. It’s the ultimate statement look for a black-tie gala, red carpet event, prom, or winter wedding when you want to keep your hair back off your neck without sacrificing an ounce of drama.
How to do this
1. Start by prepping damp hair with a root-lifting mousse to build massive foundational volume before blow-drying with a large round brush.
2. Once completely dry, mist hair with the heat protectant spray listed below and curl all sections with a 1-inch or 1.25-inch curling iron, alternating directions to create structured, bouncy curls.
3. Section off the top crown and front hair. Backcomb the crown extensively from underneath using the teasing comb listed below to build strong, elevated height.
4. Smooth back the sides snugly towards the nape of the neck while keeping the sculpted, textured volume through the top ridge, and secure the lower hair into a low ponytail using the clear elastic hair ties listed below.
5. Take a strand of hair from underneath the ponytail and wrap it tightly around the elastic band to conceal it, pinning it underneath with the bobby pins listed below.
6. Gently arrange the curls on top to cascade seamlessly back into the tail, spray liberally with the strong hold texturizing hairspray listed below, and fluff the ponytail length for ultimate red carpet drama.
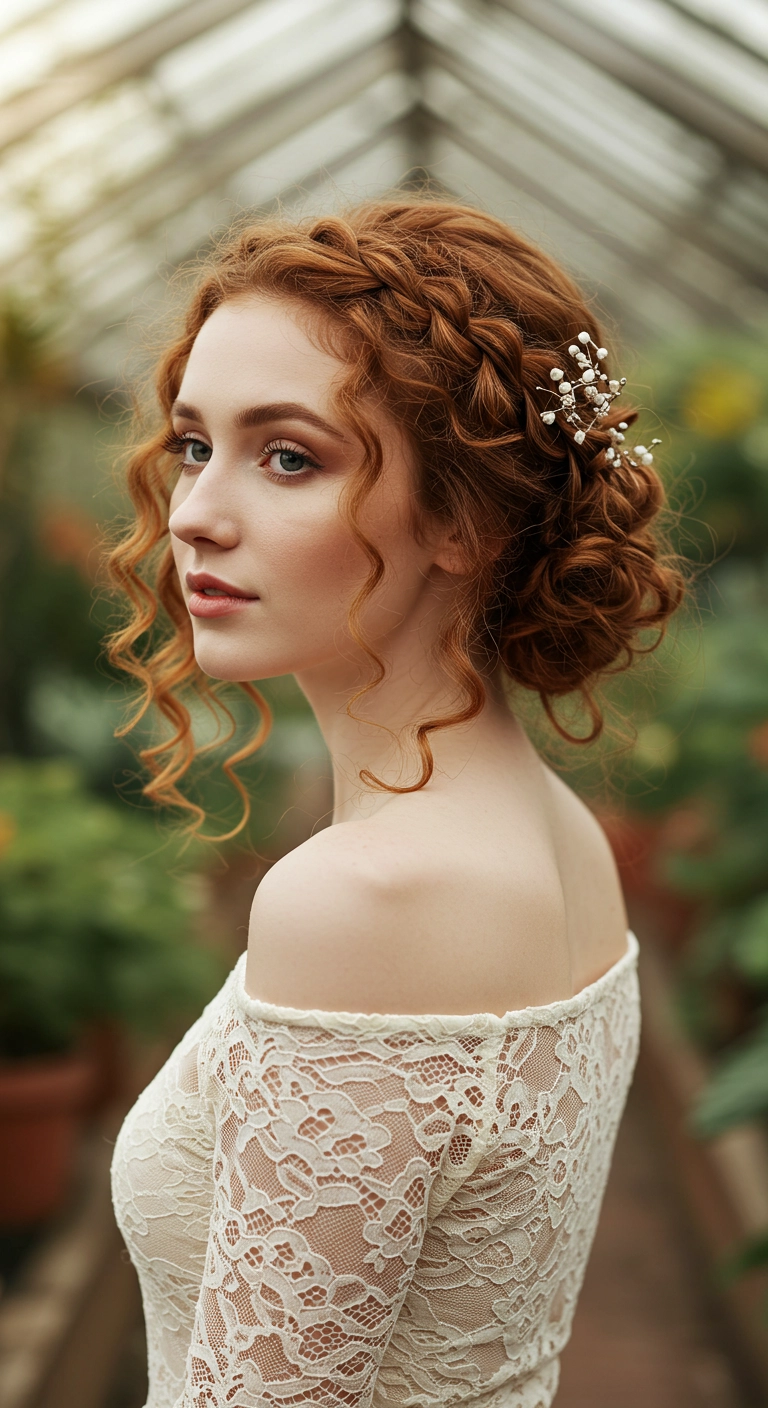
Are you completely in love with ethereal, storybook bridal hairstyles too? I had to include this braided copper chignon because it feels like something straight out of a fairytale, don’t you think?! The way the crown braid weaves softly into that textured low bun while delicate spiral tendrils frame the face is just so dreamy. You could easily swap the pearl pins for fresh baby's breath or wildflowers depending on your wedding theme. It's truly the ultimate romantic bridal updo for anyone wanting effortless elegance on their special day!
How to do this
1. Start by prepping clean, dry hair with a lightweight heat protectant spray to protect your strands before heat styling.
2. Using a 1-inch curling iron, curl small-to-medium vertical sections throughout the entire head, leaving out a few face-framing tendrils in the front.
3. Mist the curls with a texturizing volume spray to build grip and touchable texture before braiding.
4. Create a side part and begin a loose Dutch or French braid starting along the hairline across the crown towards the back, securing the end with a small clear elastic band.
5. Gather the remaining curled hair at the nape of the neck and loosely twist and pin it into a textured chignon using matte bobby pins, making sure to gently pancake the braid for extra fullness.
6. Tuck the tail of your braid into the bun, define the front curling tendrils with a drop of nourishing hair oil, and insert a delicate pearl or floral bridal hair accessory into the side.
7. Finish the entire look with a generous mist of flexible hold hairspray to ensure the romantic updo stays secure throughout the event.
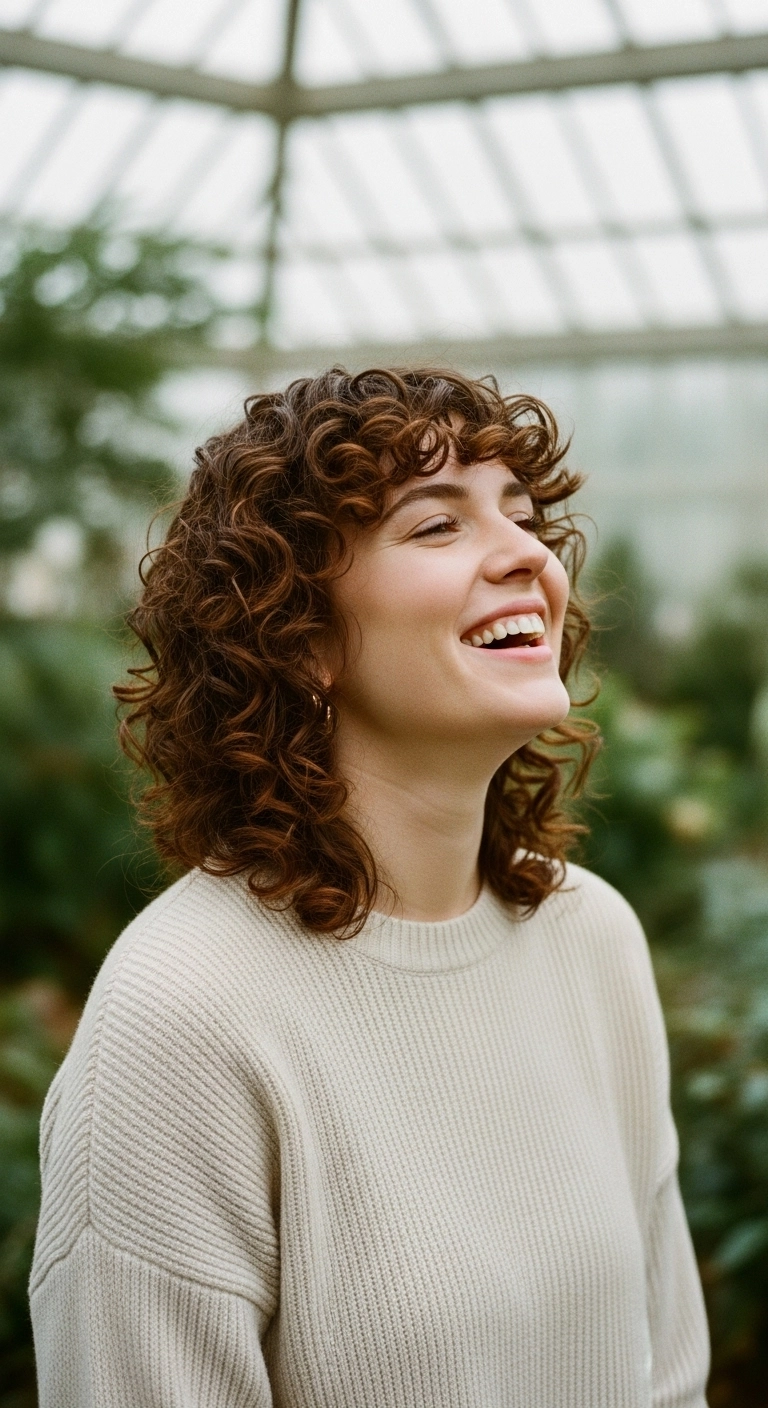
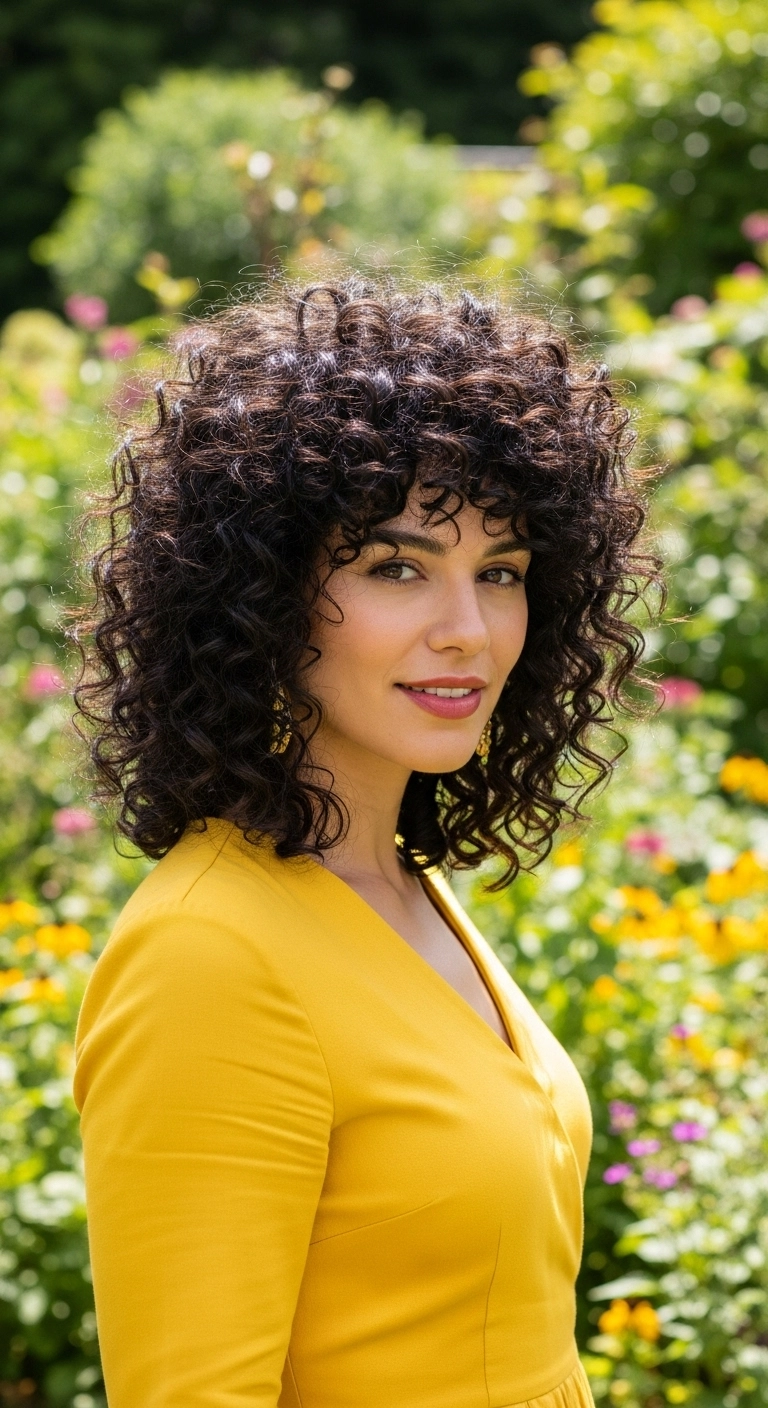
I’m absolutely in love with this curly shag because it embraces full, natural bounce without feeling high maintenance! The soft, layered shape gives your ringlets so much natural lift, and the curly bangs frame your face in the most flattering, effortless way. It's totally versatile whether you’re running errands in a casual top or dressing up for dinner in a bright outfit. Definitely give this curly cut a try if you want to let your natural texture shine!
How to do this
1. Start on freshly washed, soaking wet hair to maximize curl clumping and minimize frizz.
2. Apply a generous amount of curl defining leave-in conditioner using the leave-in conditioner listed below evenly through sections from roots to ends.
3. Rake through and scrunch in a medium-hold curl defining cream or gel using the curl defining styling cream listed below to lock in the ringlets and promote bounce.
4. Shape and finger-coil the curly bangs forward onto the forehead to ensure they dry with soft, rounded definition.
5. Gently cup and dry the hair using a blow dryer with a deep bowl diffuser using the collapsible diffuser attachment listed below on low heat and medium speed, scrunching upward toward the scalp to build massive volume.
6. Once the curls are 100% dry, scrunch out any crunch using a few drops of lightweight nourishing hair oil using the anti-frizz hair oil listed below to add glossy shine and soft touchability.
7. Fluff the roots with a wide-tooth comb or your fingers to expand the rounded shag silhouette and amplify fullness.
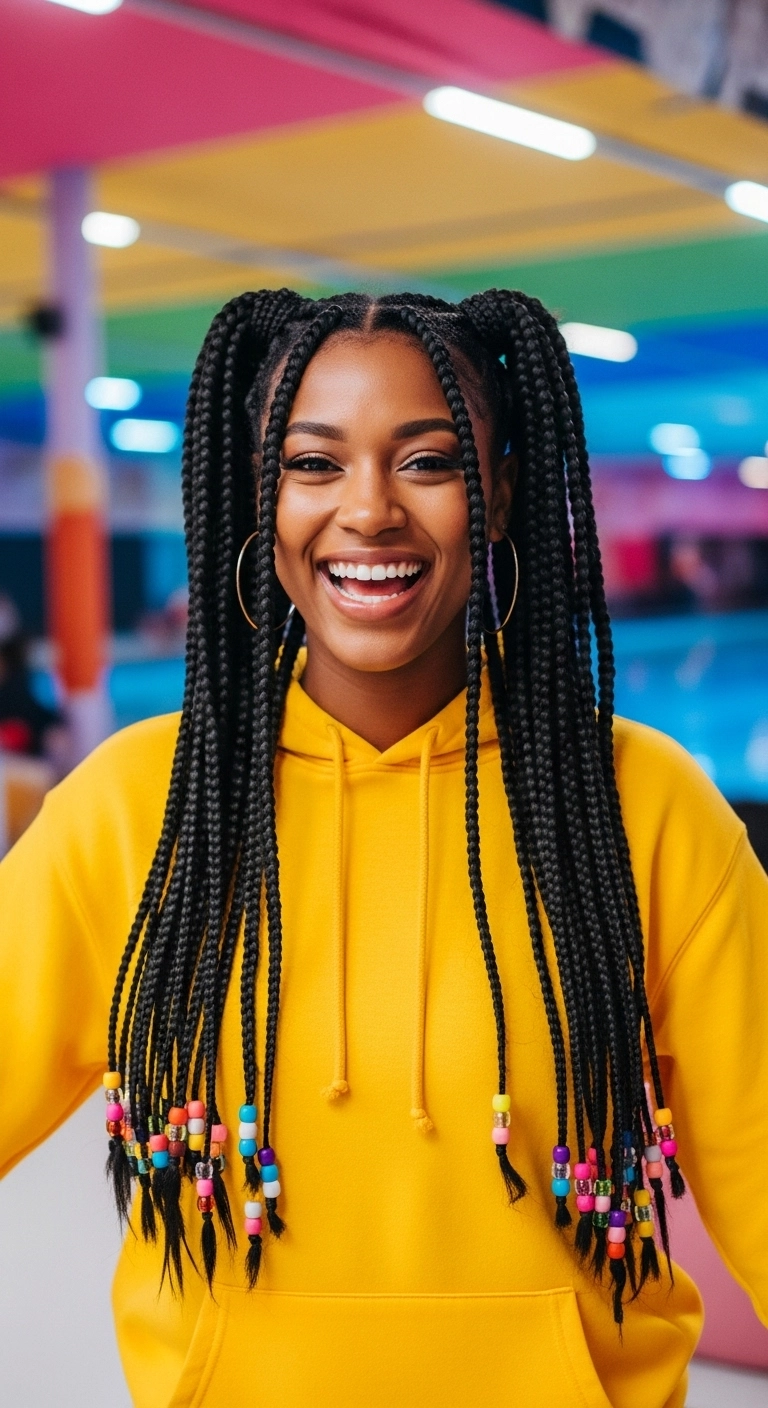
Honestly, whoever said hair beads belong in the 90s clearly hasn't seen how fun they look on high braided pigtails! I am totally obsessed with the playful, nostalgic energy here. Throwing your box braids up into two bouncy high ponytails instantly lifts your face and gives you that effortlessly cool throwback vibe.
How to do this
1. Start with clean, deeply moisturized, and blown-out hair using a leave-in conditioning spray and braid sealing cream.
2. Part the hair cleanly down the middle using a metal tail comb to create neat grid-like box sections, applying edge control gel along the parts for sharp lines.
3. Install neat, tension-free knotless box braids using the synthetic braiding hair listed below, braiding all the way down to the chest.
4. Leave out one braid on each side in the front to act as face-framing tendrils.
5. Gather the remaining braids on each side high up on the crown into two playful high pigtails, securing them tightly with snag-free elastic bands.
6. String colorful multi-colored pony beads onto the bottom of each braid using a bead threader loop tool listed below, and secure the ends with mini clear rubber bands.
7. Finish the scalp and braids with a lightweight braid sheen spray to lock in high gloss and moisture.
Caramel and warm copper highlights painted onto a bouncy, curly bob. I've always loved how a little sun-kissed Pintura placement makes every single ringlet pop without losing the depth of darker roots. It's effortless, full of life, and that warm golden halo just completely lights up your whole face.
How to do this
1. Start on freshly cleansed, thoroughly conditioned, and damp hair after prepping with a leave-in conditioner listed below.
2. Section your curls into workable quadrants and apply a curl defining cream listed below from roots to ends, using the praying hands method to distribute evenly.
3. Work through each section in small sub-sections, finger-coiling each ribbon of curls to create ultra-defined 3C/4A ringlets around the crown and face framing bangs.
4. Mist a lightweight curl styling gel listed below over the top to lock in moisture, enhance definition, and prevent frizz while the curls form.
5. Attach a large diffuser bowl to your blow dryer, tilt your head gently from side to side, and cup the curls upwards on low heat and low air speed until 85-90% dry.
6. Once fully dry, dispense a few drops of a nourishing hair oil listed below between your palms and gently scrunch the curls to break the gel cast, then gently pick out the roots using an afro pick listed below to amplify maximum volume and bounce.